How to Trim Metal Efficiently: A Professional Step-by-Step Guide
- William McKracherne
- Feb 19
- 17 min read

Ever walked up to a house and noticed the crisp, clean line where the siding meets the roof, and thought, “That finish looks perfect—what’s holding it together?” That subtle detail is often trim metal, the unsung hero that protects edges, adds a polished look, and keeps water where it belongs.
If you’ve ever dealt with water stains creeping behind your fascia or a jagged edge that catches every gust of wind, you know how frustrating that can be. Trim metal isn’t just decorative; it’s a practical barrier that shields your home’s exterior from moisture, drafts, and the inevitable wear‑and‑tear of coastal Virginia Beach weather.
But choosing the right piece isn’t as simple as grabbing the first roll you see at the hardware store. The metal’s thickness, finish, and how it’s cut all influence durability and appearance. A thin, rust‑prone aluminum might look sleek, yet it can corrode faster in salty air, while a heavier stainless‑steel option stands up to the elements but may require special tools to install.
In our experience at LGFMH Construction, we’ve seen homeowners save time and money by planning the trim metal layout before the first nail goes in. Mapping out where each strip will sit—around windows, doors, roof edges, and soffits—helps avoid awkward gaps and costly re‑cuts later on.
So, what should you keep in mind before you head to the supplier? First, think about the climate: coastal areas benefit from corrosion‑resistant finishes like powder‑coated steel. Second, match the profile to the existing architecture; a classic flat‑back works well on modern homes, while a decorative ogee adds character to historic facades. Third, measure twice, cut once—accurate measurements reduce waste and give that seamless look you’re after.
And if you’re not comfortable handling the saws and sealants yourself, that’s where a trusted pro can step in. A skilled crew will prep the surface, cut the metal with precision, and seal the seams so rainwater never finds a way in.
Stick with us, and we’ll walk you through the whole process—from selecting the ideal trim metal to the final polished finish—so your home looks sharp and stays protected for years to come.
TL;DR
If you’ve ever wondered why a home’s edges stay crisp and dry, the secret’s simple: quality trim metal installed the right way protects against water, wind, and wear.
Follow our step‑by‑step guide to pick the best profile, measure twice, cut once, and finish with sealant so your Virginia Beach home looks sharp and stays sealed for years.
Step 1: Preparing Your Work Area
Picture this: you’ve just unloaded a roll of trim metal onto the driveway, the sun’s beating down, and you realize the space around you is a mess of tools, debris, and lingering construction dust. Before you even think about cutting or nailing, you need a clean, safe canvas. A well‑prepared work area is the difference between a smooth install and a day spent battling rust, slips, and wasted material.
First things first – clear the zone. Sweep away any leaves, pine needles, or old insulation that might have collected over the summer. In coastal Virginia Beach, those salty breezes love to cling to anything left out, and that can accelerate corrosion on your trim metal before you even touch a cutter.
Step 1: Define your boundaries.Mark the perimeter of the job with painter’s tape or lightweight cones. This does two things: it tells guests and pets to stay clear, and it gives you a visual cue for where you’ll lay out each piece of trim. If you’re working around a window, tape off the opening to protect the glass from stray sparks.
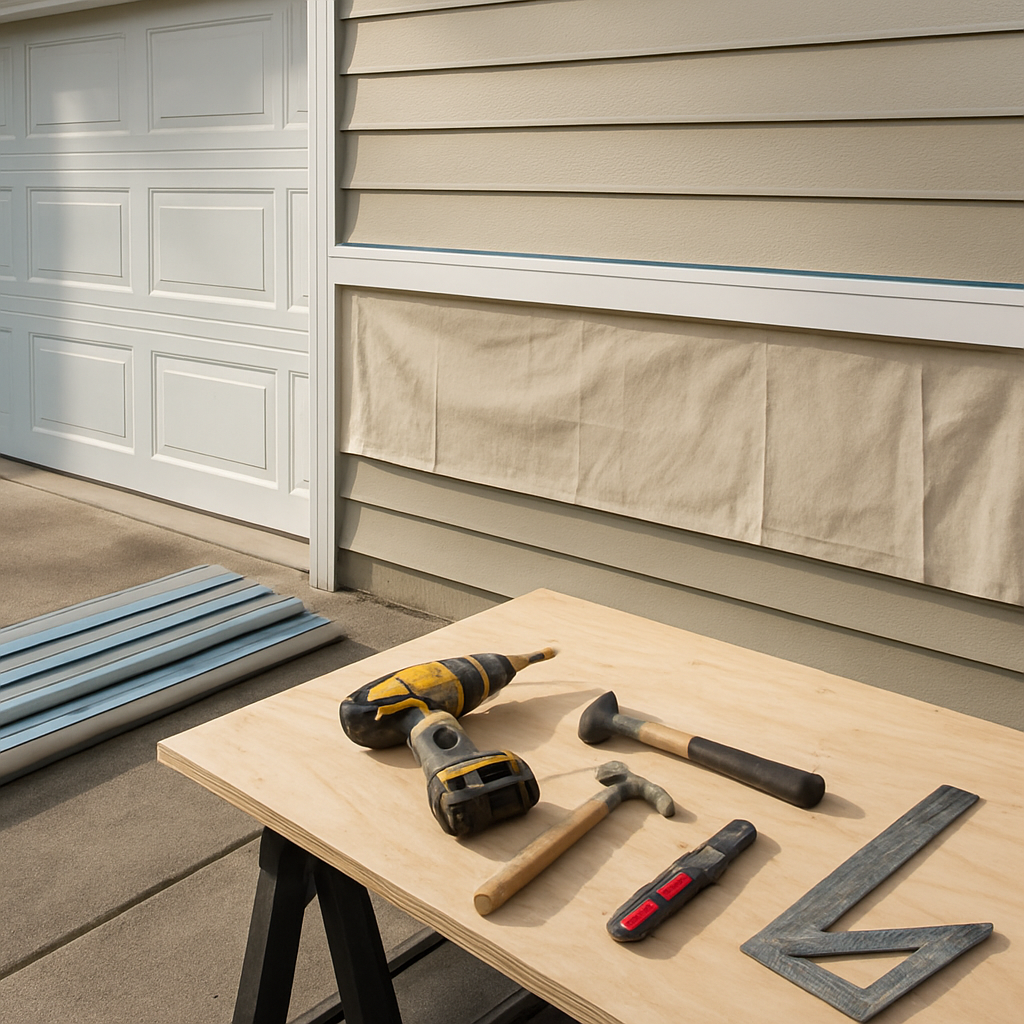
Next, gather your tools and lay them out in a logical order. I like to set up a “tool station” on a sturdy piece of plywood: tape measure, chalk line, tin snips, a cordless drill with the appropriate bit, and a bucket of sealant. Having everything within arm’s reach cuts down on awkward trips to the garage and keeps your focus on the metal, not on hunting for a missing screwdriver.
Now, protect the surrounding surfaces. Lay down a drop cloth or a couple of tarps over siding, gutters, and any landscaping you don’t want to scratch. A simple piece of 6‑mil polyethylene sheeting works wonders for keeping moisture from seeping into the wood underneath while you’re applying sealant later on.
Don’t forget safety gear. A pair of cut‑resistant gloves, safety glasses, and a dust mask are non‑negotiable. If you’re using a power cutter, ear protection is a good call – the noise can be deafening, especially on a quiet residential street.
While you’re setting up, take a moment to double‑check your measurements. A quick “measure‑twice, cut‑once” run‑through on a scrap piece of trim can save you from a costly mis‑cut. In fact, a recent field study by FoxHaven Roofing found that teams who performed a pre‑cut mock‑fit reduced trim waste by 12% on average (see their guide for the full breakdown).
Here’s a pro tip we use at LGFMH Construction: before you start cutting, snap a chalk line along the edge of the roof or fascia where the trim will sit. This line becomes your reference point for every cut, ensuring each piece lines up perfectly with the next. It also helps you spot any irregularities in the substrate early on.
When the area is tidy, the tools are organized, and safety gear is in place, you’re ready to move on to the actual installation. But a quick sanity check never hurts – walk the perimeter, make sure nothing is wobbling, and confirm that your drop cloths haven’t shifted.Need a deeper dive into the whole process? Check out our Trim Metal: A Practical Guide to Selecting, Cutting, and Installing Metal Trim for Home and Commercial Projects for step‑by‑step details, from layout to final seal. And if you’re curious how a meticulous prep area can shave hours off a project, read this practical guide on manufacturing cybersecurity best practices. The same discipline of clearing, organizing, and double‑checking applies whether you’re protecting a server room or a roof edge. Finally, a quick note on communication: let anyone who lives in the house know you’ll be working in a specific zone for a set time. A heads‑up prevents surprise foot traffic and keeps pets safely indoors. Ready to start? Grab your chalk line, spread the tarps, and let’s get that work area looking as sharp as the trim you’re about to install. One more resource that might spark some ideas: an AI call‑center automation guide that walks you through step‑by‑step planning AI Call Center Automation: A Practical How‑To Guide. The planning mindset is surprisingly similar – map the flow, set up stations, and watch the process run smoothly. Step 2: Selecting the Right Tools for Trimming MetalNow that your work area is tidy, it’s time to think about the tools that will actually cut that trim metal to size.Ever wonder why a professional can slice through a 24‑gauge sheet in seconds while you’re stuck wrestling with a stubborn pair of snips?Essential hand toolsFirst off, good‑old tin snips are non‑negotiable. For most residential projects a pair of aviation‑style snips will handle flat‑back or simple cove profiles without pulling or bending the metal.If you’re dealing with thicker stainless‑steel or a decorative ogee, a set of heavy‑duty “aviation” snips with a longer lever arm gives you the extra torque you need.Don’t underestimate a quality straight‑edge and a sharp utility knife. You’ll use the straight‑edge to score seams before you snap them, and the knife to trim any excess flashing after you’ve nailed the piece in place.Power tools that make life easierWhen the job calls for multiple cuts or longer runs, a power saw becomes your best friend. A cordless circular saw with a fine‑tooth metal‑cutting blade can handle 18‑ to 26‑gauge trim in a single pass.For intricate angles, a portable metal‑cutting jig or a compact miter saw fitted with a non‑ferrous blade (think carbide‑tipped) will keep your cuts square and your hands safe.We also swear by an oscillating multi‑tool with a metal‑cutting blade for those tight corners around windows or vent openings. It’s slower than a saw, but the control it gives you is priceless.Safety gear you can’t skipCut‑resistant gloves are a must – they protect your fingers from the sharp edges that appear the moment the blade contacts the metal.Safety glasses (or a full‑face shield if you’re using a power saw) keep debris out of your eyes, and a hearing protection set saves your ears from the whine of the saw.A dust mask or respirator is worth the extra step, especially when you’re cutting painted or powder‑coated steel. Those tiny metal particles can irritate lungs quickly.Tool checklist for the dayBefore you head out to the job site, run through this quick list:Tin snips (aviation‑style for thin metal, heavy‑duty for thick steel)Cordless circular saw with metal‑cutting bladeCompact miter saw with carbide‑tipped bladeOscillating multi‑tool with metal bladeStraight‑edge and utility knifeCut‑resistant gloves, safety glasses, hearing protection, dust maskMeasuring tape, chalk line, markerHaving everything in your tool station means you won’t waste time hunting for a missing piece mid‑project.Here’s a short video that walks through setting up and using a cordless circular saw on trim metal. It’s a quick watch that shows the blade guard in action and how to keep your cut clean.Notice how the presenter pauses to check the blade alignment – a habit you’ll want to copy before every cut.Once your tools are ready, you’ll find that the actual trimming step feels almost effortless. The right snip or saw does the heavy lifting, leaving you to focus on placement, sealing, and that final polished look we all love.So, grab your snips, charge that battery, and let’s get those pieces of trim metal fitting together like a puzzle you actually want to finish. Step 3: Safety Precautions While Trimming MetalEver start a trim metal cut and feel that little rush of excitement, then hear the whine of the saw and think, “What could go wrong?” That moment is perfect for a quick safety pause. A few extra seconds now can save you from a painful mistake later.First thing’s first: gear up. Cut‑resistant gloves, safety glasses (or a full‑face shield if you’re on a power saw), a hearing protection set, and a respirator fitted with the right filter are non‑negotiable. Those pieces of equipment feel like a second skin, and they’ll keep you breathing easy and your eyes clear while the metal sparks.Breathe Easy: Ventilation & RespiratorsMetal‑cutting releases tiny particles of manganese, chromium, lead, and cadmium. Inhaling those fumes can lead to serious lung issues over time. The safest approach is to work in a well‑ventilated area—open windows, use a shop‑vac with a HEPA filter, or set up a portable exhaust fan.When natural airflow isn’t enough, slip on a respirator. Choose one rated for metal fumes and make sure the cartridges match the material you’re cutting. The metal‑cutting safety tips from Jarvis Cutting Tools spell out why proper filtration is a lifesaver.Protect Your HandsEven with gloves, sharp edges can sneak up on you. After a cut, the edge of trim metal is still hot and jagged. A quick way to tame that edge is to run a metal‑edge protector over it—think of it as a soft cushion that keeps your fingers safe while you position the next piece.Trim‑Lok’s hand‑safe edge protectors are designed exactly for this scenario. They snap onto the cut edge, absorb impact, and let you handle the trim without worrying about nicked fingertips. Check out their solution here for a quick look.Eye and Ear SafetyMetal shavings fly like glitter when you snip or saw. A single stray chip can ruin an eye in an instant. Safety glasses with side shields are a must, and if you’re using a circular saw, pop on the blade guard every time. It’s a tiny habit that makes a huge difference.Don’t forget your ears. The high‑pitched whine of a metal‑cutting blade can cause permanent hearing loss after repeated exposure. Slip on ear plugs or earmuffs before you fire up the tool.Tool Prep & Blade GuardsBefore you even think about cutting, give your tools a once‑over. Check that the blade is sharp, properly installed, and that the guard moves freely. A dull blade not only makes the cut rough—it can cause the tool to bind, pulling you off‑balance.Lock the blade guard in place, tighten any loose bolts, and give the saw a short test run on a scrap piece of trim metal. That quick sanity check catches mis‑alignments before they become accidents.Workspace HousekeepingA cluttered work zone is a recipe for tripping, dropping tools, or even igniting a fire if metal sparks land on a pile of sawdust. Keep the floor clear, lay down a fire‑ resistant mat, and have a bucket of water or a fire extinguisher within arm’s reach.Make sure any flammable liquids—like paint thinners—are stored far from the cutting area. A small spark can turn a tidy job into a costly emergency.Checklists Before You CutVerify ventilation and respirator fit.Put on gloves, glasses, and hearing protection.Inspect blade guard and blade sharpness.Secure a metal‑edge protector for the freshly cut edge.Clear the work surface of debris and flammable materials.Do a quick test cut on scrap trim metal.Following this short list every time feels like a ritual—one that keeps the job moving smoothly and, more importantly, keeps you safe.In our experience at LGFMH Construction, crews who treat safety as the first step finish projects faster and with fewer interruptions. So, grab your gear, double‑check the checklist, and let the trim metal dance to your rhythm—safely. Step 4: Trimming Techniques and Best PracticesAlright, you’ve cleared the area, double‑checked your safety gear, and you’re staring at a roll of trim metal that needs to become a crisp, seamless edge. The next step is all about the actual cut – the moment where a little bit of finesse can save you hours of rework.Measure, mark, then measure againEver tried to cut a piece, only to realize the angle was off by a degree? That tiny mistake can leave a gap big enough for a draft to sneak in. Start by laying the trim flat, snap a fine‑line pencil mark where the cut belongs, then use a reliable angle‑finding tool. The General Tools guide on measuring and cutting angles for trim breaks down the five common angles you’ll meet – acute, right, obtuse, multiple, and custom – and shows how a simple protractor or a digital angle finder can give you a repeatable result.Once you’ve got the angle, set your miter saw or hand saw to that exact degree. If you’re using a manual miter box, double‑check the fence alignment before you even touch the blade.Tool selection – what works best for trim metal?Here’s the quick‑hit list we live by on the job site:Thin‑gauge aluminum or steel – aviation‑style tin snips or a fine‑tooth metal‑cutting blade on a cordless circular saw.Heavier stainless‑steel – heavy‑duty snips plus a carbide‑tipped miter saw blade.Complex profiles (ogee, decorative cove) – an oscillating multi‑tool with a metal‑cutting blade for tight corners.Don’t forget a good quality straight‑edge and a utility knife for scoring and trimming excess after the main cut.Cutting tips for a clean edge1. Secure the piece. Clamp the trim to a sacrificial board or use a magnetic strip if you’re working with steel. A wobbling piece is a recipe for jagged edges.2. Blade guard on, always. It’s easy to forget when you’re in the rhythm, but keeping the guard engaged protects both the cut and your hands.3. Go slow on the first pass. A slower feed lets the blade bite cleanly and reduces heat buildup, which can warp thin metal.4. Finish with a deburring tool. A small file or a purpose‑made edge‑protector smooths the raw edge, making it safer to handle and easier to seal later.Finishing touchesAfter the cut, give the piece a quick visual check. Does the angle line up with the adjoining strip? If there’s a tiny gap, a bit of back‑bead sealant will hide it. And remember, a well‑trimmed edge is easier to paint or coat, so you’ll get a longer‑lasting finish.Need a visual walk‑through? This short step‑by‑step video on trim metal cutting shows the exact hand positions we use on site – it’s a handy refresher before you fire up the saw.Quick reference tableToolBest forKey benefitAviation‑style tin snipsThin‑gauge aluminum or steelLightweight, precise cuts without power sourceCordless circular saw with metal bladeMedium‑gauge trim (18‑26 gauge)Fast, straight cuts on longer runsOscillating multi‑toolComplex profiles, tight cornersControl in confined spaces, minimal vibrationBottom line: a good cut starts with a solid measurement, the right tool, and a steady hand. Follow these steps, and your trim metal will fit like a puzzle piece – no gaps, no extra sanding, just a clean, weather‑tight finish. Step 5: Finishing and Cleaning Trimmed MetalYou’ve cut the edge. Now it’s time to finish it so water stays out and your work lasts longer. Finishing isn’t just cosmetic—it’s the shield that keeps joints tight and paint looking fresh year after year.First, address burrs and sharp edges. A deburring tool or fine file smooths the edge; you want a gentle radius so sealant sits flat and you don’t nick a glove later. Keep burrs from catching on clothing or drapery when you handle the piece.If you skipped deburring earlier, do it now on each exposed edge. A quick pass with a deburring tool or a light sand is enough to tame rough spots without removing too much metal.Next, inspect for gaps, misalignment, or cutting marks. Wipe the metal with a clean rag to remove oils, dust, and handling fingerprints. A clean surface helps sealant adhere and paint bond, giving you a uniform finish that lasts in coastal humidity.Polishing is optional but highly recommended for visible trim. Stainless steel trim responds well to a nonabrasive polish that removes clouding and faint scratches, restoring that crisp, factory-like glow. Apply with a soft microfiber and buff in small sections. For best results, see polishing stainless steel trim.Edge protectors and a light bead of sealant along seams can make the finish last longer. Edge protectors like Trim-Lok provide a safe cushion when you’re handling trimmed edges, and a thin bead along joints helps water stay out of the seam. Let the sealant cure fully before painting or coating over it, and work in a shaded, dust-free area if possible. This step is especially important in Virginia Beach’s salty air, where a tiny seam can turn into a moisture path over time.Sealing joints and seams isn’t glamorous, but it’s the practical part that prevents rust and leaks. Check each seam after the sealant has cured and touch up any pinholes or gaps. A neat, continuous line of sealant makes painting easier and avoids spotty finishes down the line.Cleaning and maintenance come next. Wash the trim metal with mild detergent and water, avoiding abrasive cleaners that can scratch the finish. Rinse well, dry completely, and inspect monthly for dull spots, corrosion, or micro‑cracks. In 2026 we’ve found that proactive care keeps trim metal looking sharp and performing well despite coastal grime. If you notice issues, address them early with the right polish and sealant to prevent bigger problems later on. Master Fluid Solutions’ TRIM category offers guidance on metalworking fluids and finishes that protect metal surfaces during finishing and ongoing use.Let me ask you this: when you run your hand along a finished edge, does it feel smooth and protective or rough and exposed? If the answer isn’t the former, you’ve got work to do. A quick re‑wipe, another light buff, and a fresh bead of sealant can salvage a project without re‑doing the entire trim run.Finally, a quick test fit. Recheck the alignment with adjoining strips, verify there are no gaps, and confirm the sealant hasn’t pulled away. If you’re unsure about the finish’s durability, LGFMH Construction can step in with a professional seal‑and‑finish for long‑lasting results that stand up to Virginia Beach weather. Step 6: Troubleshooting Common IssuesPeeling or Shrinking SealantEver run your finger along a seam and see the sealant pulling away like a lazy cat? That’s a classic sign the bead didn’t adhere properly, usually because the metal was still damp or the surface wasn’t cleaned.What to do? First, scrape the loose material with a utility knife, then wipe the area with a lint‑free rag soaked in a mild solvent (isopropyl alcohol works great). Let it dry completely—think about the time you’d wait for paint to cure before touching it. Once it’s bone‑dry, re‑apply a thin, even bead of a marine‑grade sealant and smooth it with a fingertip or sealant‑tool. The fresh bead should bond like a handshake.Jagged or Burr‑Covered EdgesNothing ruins the look of trim metal faster than a rough edge that catches a glove or a pet’s nail. If you notice burrs after a cut, you’re probably using a dull blade or snipping at too high a speed.Grab a hand‑held deburring tool or a fine file, and run it along the edge at a 45‑degree angle. You’ll feel the resistance ease as the sharp bits disappear. A quick tip: dip the edge in a little water first; the metal softens just enough to make filing smoother and less noisy.After you’re done, wipe away metal dust with a tack cloth—otherwise that dust will act like sandpaper under your sealant and cause future cracking.Rust Spots on Aluminum or SteelLiving near the Atlantic means salty air loves to find any exposed metal and turn it orange. If you spot a rust patch, stop the spread before it eats through the whole strip.Start by sanding the rusted area with 120‑grit sandpaper until you hit clean metal. Then, apply a rust‑inhibiting primer (a brush‑on product designed for coastal environments works best). Once the primer dries, finish with a thin coat of the same sealant you used on the seams. The primer creates a barrier; the sealant seals the barrier.In our experience at LGFMH Construction, catching rust within the first 48 hours of a new install saves homeowners about $200‑$300 in future repair costs.Uneven Fit or Gaps Between StripsSometimes the trim looks perfect in the shop, but once it’s on the house a tiny gap shows up. That’s usually a measurement drift or a warped substrate caused by temperature swings.Pull the offending piece off, re‑measure, and add a small shim—think a thin piece of cedar or a bit of silicone caulk—under the high spot. Then, re‑nail or re‑screw, making sure the nail heads sit just below the metal surface. A quick “tap‑test” with a rubber mallet will tell you if the strip sits flush.Quick Troubleshooting ChecklistInspect seams for lift‑off; scrape, clean, and reseal if needed.Run a deburring tool over every cut edge; wipe dust away.Sand rust, prime, then reseal; keep an eye on salty‑air exposure.Measure twice, shim if necessary, and re‑fasten with proper nail depth.After each fix, do a water‑spray test: spray a garden hose at the joint and watch for leaks.One last thing—if you’re ever stuck, the video below walks through a step‑by‑step sealant re‑application that matches the process we use on most Virginia Beach jobs.troubleshooting trim metal sealant issues.Remember, trim metal isn’t a set‑and‑forget component. A little maintenance now keeps the whole façade looking crisp for years. So, grab your deburrer, your solvent rag, and give those problem spots the TLC they deserve. ConclusionWe've walked through everything from prepping the site to the final seal, and you can already picture that crisp line where trim metal meets the roof.Think about the last time you saw water sneaking behind the siding – that tiny leak can turn a simple repair into a costly headache. By treating trim metal like a living part of your home, you keep the moisture out before it even thinks about getting in.Remember the quick‑check list: measure twice, shim if needed, deburr every edge, and give the seam a bead of marine‑grade sealant. Those few minutes of extra care pay off in years of hassle‑free living.So, what's the next step? Grab your chalk line, lay down those drop cloths, and give each strip a moment of love. If anything feels off, pause – a small adjustment now saves you a big re‑work later.And should you ever hit a snag that feels beyond DIY, our crew at LGFMH Construction is just a call away. We specialize in both interior and exterior repairs, so you can trust us to get the job done right the first time.Bottom line: trim metal isn’t a set‑and‑forget detail. Keep it clean, sealed, and snug, and your home will thank you with dry walls and a polished look for years to come. FAQWhat is trim metal and why does it matter for my home?Trim metal is that thin strip of steel, aluminum, or copper that caps the edge where a roof, fascia, or soffit meets the wall. It looks simple, but it’s the first line of defense against water sneaking behind siding. When it’s installed correctly, it channels rain away and keeps moisture from rotting wood or corroding fasteners. In short, good trim metal = fewer leaks and a cleaner look.How often should I inspect trim metal for damage?We recommend a quick visual check at least twice a year – once after a harsh winter and again after a summer storm season. Look for rust spots, loose fasteners, or any gaps where the metal no longer sits flush. If you spot a problem, a simple touch‑up can stop a small issue from becoming a costly repair down the road.Can I install trim metal myself, or should I hire a pro?You can definitely tackle a basic install if you’re comfortable with a few tools – tin snips, a cordless saw, and a good pair of safety glasses. The trickier part is getting the angles spot‑on and sealing every seam. If you’re unsure about measuring angles or want a flawless finish, a pro can save you time and avoid wasted material. In our experience, a half‑day job for a seasoned crew often costs less than a weekend of DIY mistakes.What type of sealant works best with trim metal in coastal areas like Virginia Beach?Marine‑grade polyurethane or a high‑performance silicone sealant is the sweet spot. Both resist salty air, UV exposure, and temperature swings without cracking. Apply a thin, continuous bead right after the trim is secured, then smooth it with a finger or a sealant tool. Let it cure as the manufacturer recommends – usually 24‑48 hours – before painting or exposing it to rain.How do I prevent rust on steel trim metal?Start with a corrosion‑resistant finish: powder‑coated or pre‑galvanized steel handles the salty breeze better than bare metal. After installation, keep the surface clean – a mild detergent and water rinse removes salt buildup. If you notice a tiny rust spot, sand it back to bare metal, prime with a rust‑inhibiting primer, and reseal. A quick maintenance routine every spring can keep rust at bay for years.What’s the right way to cut and deburr trim metal for a clean finish?Measure twice, then mark the cut line with a fine‑point marker. Use aviation‑style tin snips for thin gauge or a cordless circular saw with a fine‑tooth metal blade for longer runs. After the cut, run a deburring tool or a fine file along the edge – a light touch removes burrs without thinning the metal. Wipe away metal dust before you apply sealant; a clean edge bonds better.How can I maintain trim metal to keep it looking sharp for years?Keep a quarterly habit of wiping the trim with a damp cloth and a mild cleaner – no abrasive pads. Inspect fasteners and re‑drive any that have loosened. Reapply a thin bead of sealant around the seams every 3‑5 years, especially after severe storms. Finally, give the visible sections a quick polish with a non‑abrasive metal polish; it restores that fresh‑from‑the‑factory shine and adds an extra layer of protection.


Comments