How to Repair Rust on Metal Roof Panels
- William McKracherne
- May 17
- 7 min read

Rust on a metal roof looks ugly and can lead to leaks. If you spot orange spots, you don’t have to call a pro right away. This guide walks you through every step you need to fix the problem yourself, from checking the damage to sealing a finish that lasts for years.
By the end you’ll know how to inspect safely, pick the right tools, strip away corrosion, prime the metal, and apply a durable topcoat. Let’s get to work.
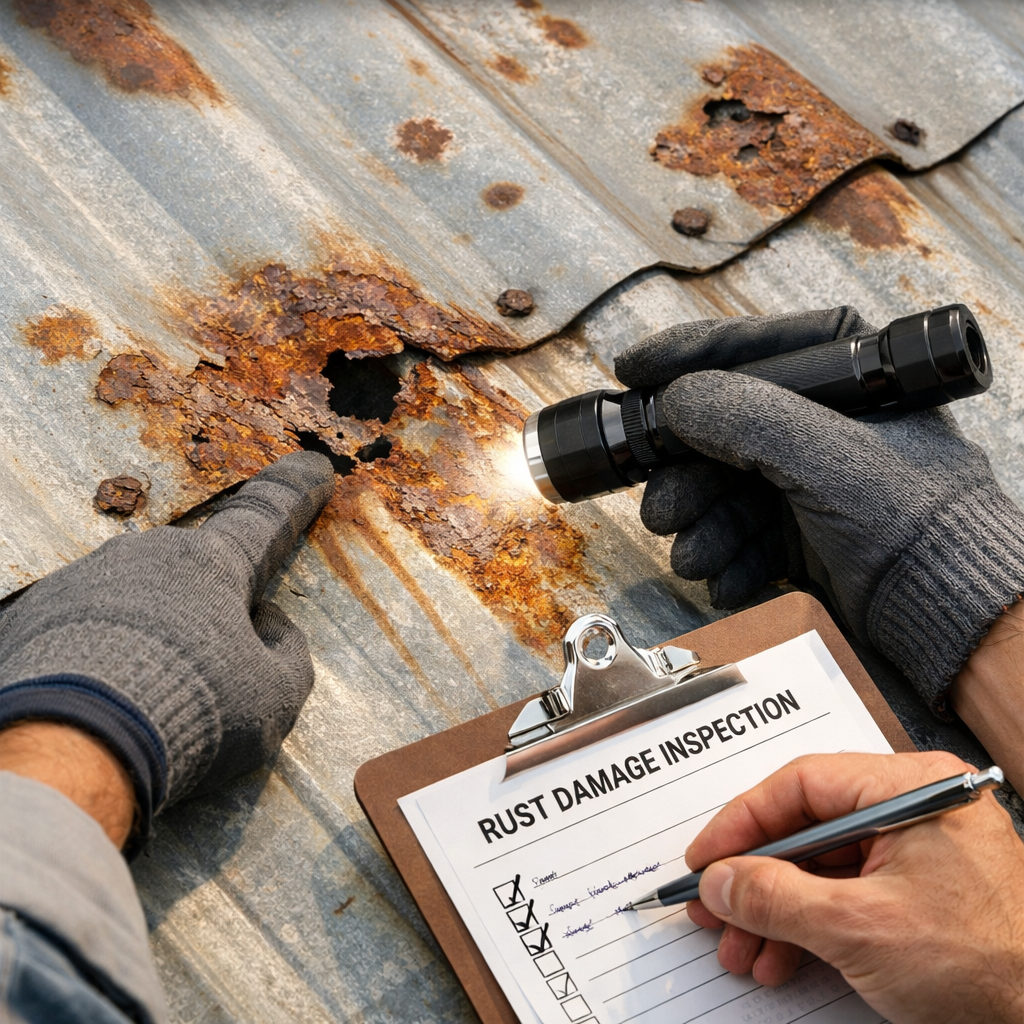
Step 1: Inspect and Identify Rust Damage
Start on the ground. Walk around the house with a pair of binoculars and look for discolored patches, bubbling paint, or water stains near seams. Those clues tell you where rust may be hidden.
When you feel comfortable, climb a ladder with a soft‑soled shoe and a use if the roof pitch is steep. Keep your hands away from the edge and test each panel gently with your palm. A dull thud means the panel is solid; a hollow sound can hint at corrosion underneath.
Take photos of every suspect spot. A photo log helps you track progress and shows a contractor exactly what needs fixing if you later decide to hire help.
Look especially at fasteners, seams, and flashing. In humid climates, fastener loosening often leads to water seepage, which accelerates rust.
Use a handheld magnet to see if the coating is still magnetic; loss of magnetism can indicate a thick layer of rust under the paint.
Key Takeaway:A thorough visual and tactile inspection lets you map rust areas before any removal work begins.
When you spot rust, note its depth. Light orange staining usually means surface corrosion that can be sanded away. Dark, flaky patches indicate deeper damage that may need a metal neutralizer.
For safety, wear a hard hat and non‑slip shoes. OSHA recommends a fall‑protection plan for any work over six feet high. OSHA’s fall‑protection guidelines give the exact requirements.
And remember, if you feel unsure about height or the extent of damage, it’s wise to call a local roofing professional for a quick assessment.
Now that you know where the rust lives, you can gather the right tools.
Step 2: Gather Materials and Safety Gear
Before you climb again, collect everything you’ll need on the ground. Having a well‑stocked kit saves trips up and down the ladder.
Tools:
Wire brush or stiff‑bristle hand brush
120‑grit sandpaper or a power sander with a metal‑cutting disc
Putty knife for scraping stubborn rust
Paint rollers and a small brush for primer
Safety use, rope, and anchor point
Protective gloves (chemical‑resistant), safety glasses, and a respirator mask
Materials:
Phosphoric‑acid rust remover (or a household white‑vinegar solution)
Alkyd or epoxy metal primer , see the comparison below for choosing the right type
Metal‑safe waterproof sealant such as Liquid Rubber MetalSafe
Top‑coat paint designed for metal roofs (polyaspartic or acrylic)
Keep a clean bucket for mixing primer and a rag for wiping panels clean.
Pro Tip:Store all chemicals in a locked, well‑ventilated cabinet away from children and pets.
When you’re ready, read the safety data sheets for any acid‑based remover. Those sheets tell you the proper ventilation, protective gear, and first‑aid steps if you get a splash.
For more detailed steps on handling metal trim safely, see How to Trim Metal Efficiently: A Professional Step‑by‑Step Guide . This article walks through setting up a safe work zone and using a use on steep roofs.
Now you have the right gear. The next step is to strip the rust away.
Step 3: Remove Rust and Prepare Surface
Start with the smallest rust spots. Apply a phosphoric‑acid remover according to the label , usually a thin coat that you let sit for 5‑10 minutes. The acid converts iron oxide into a black, water‑soluble layer.
If you prefer a DIY mix, soak a rag in white vinegar and press it onto the rust for about 15 minutes. The mild acid works well on light stains.
After the chemical has done its work, scrub the area with a wire brush. Use firm, even strokes to avoid gouging the metal.
For tougher patches, grab the sandpaper or a power sander. Work in a circular motion and keep the surface wet to reduce dust.
Once the rust is gone, wipe the panel with a clean rag soaked in mineral spirits to remove any oil or residue. Let the metal dry completely , a hair dryer on low heat can speed up drying on cool days.
Check the surface for smoothness. Any remaining pits should be filled with a metal‑compatible filler before priming.
1dayaverage time to finish a full‑house rust repair, s.
Here’s a quick checklist before you move on:
All rust removed? Look for a uniform gray‑blue metal color.
Surface dry? No moisture or oily film.
Safety gear still on? Keep respirator and gloves until the job is done.
Now the panel is ready for primer.
Watch the short video above for a visual walk‑through of the rust‑removal process.
Step 4: Apply Rust‑Inhibiting Primer and Sealant
Choosing the right primer is key. Alkyd primers are budget‑friendly and work well on lightly corroded panels. Epoxy primers give stronger adhesion on heavily rusted or industrial‑grade steel.
Below is a quick comparison to help you decide which one fits your project.
Feature | Alkyd Primer | Epoxy Primer |
Cost | Low | Higher |
Best For | Residential roofs, mild rust | Heavy rust, coastal exposure |
Application | Brush, roller, spray | Mix‑two‑part, brush or roller |
Dry Time | 2‑4 hrs | 6‑8 hrs |
Durability | Good | Excellent |
For most home owners, the alkyd option saves time and money while still stopping future rust. If your roof sits near the sea or you see deep pitting, splurge on epoxy.
Mix the primer in a clean bucket. Stir gently to avoid bubbles. Then, using a roller, apply a thin, even coat along the grain of the metal. Brush along seams to get into crevices.
Pro Tip:Paint in the direction of the panel’s slope. This reduces drips and helps the coating flow downhill.
Let the primer cure fully , follow the manufacturer’s time, usually 4‑6 hours for alkyd. While it cures, you can prep the sealant.
Sealant comes next. A silicone‑based metal‑safe sealant creates a waterproof barrier that also blocks moisture from reaching the metal. Apply a bead along every seam, edge, and fastener.
After the sealant cures (usually 24 hours), you’re ready for the final topcoat.
According to Flex Rock Coatings’ primer guide, using the right primer can extend a roof’s life by up to 15 years.
Now the roof is primed and sealed, and the surface is ready for a protective finish.
Step 5: Finish with Protective Coating
The final coat does more than add color , it shields the metal from UV, rain, and temperature swings. Choose a coating that matches your climate. In hot, sunny areas, a reflective “cool‑roof” acrylic works well. In industrial zones, a polyaspartic system offers extra chemical resistance.
Clean the primed surface with a lint‑free cloth to remove dust. Then, using a roller or sprayer, apply the first thin coat. Overlap each pass by about 10% to avoid streaks.
Let the first coat dry as per the product label , often 30‑45 minutes. Apply a second coat for full coverage. If you need a top‑coat with a specific color, this is the stage to add pigment.After the final coat cures, do a water‑spray test. Run a garden hose over the roof and watch for any runs or pooling. A well‑applied coating will shed water quickly.
"A proper coating system can reduce a building’s cooling load by up to 10% and add decades of protection," notes the Sherwin‑Williams roofing study.
For more on how coatings protect metal roofs, see Sherwin‑Williams’ benefits of metal roof coatings . The article explains the science behind barrier vs. sacrificial protection.
Once the coating is dry, remove any protective sheeting and do a final visual check. Look for missed spots, drips, or uneven gloss.
Key Takeaway:A high‑quality topcoat locks in the primer and sealant, giving your roof a long‑lasting rust‑free finish.
Now you have a fully repaired metal roof that should stay strong for decades.
FAQ
What safety gear do I need when working on a metal roof?
You’ll want a hard hat, non‑slip shoes, chemical‑resistant gloves, safety glasses, and a respirator mask if you use acid‑based rust removers. A full‑body use attached to a secure anchor point is essential for any roof steeper than 4:12. OSHA’s fall‑protection standards outline the exact requirements for height and tether length.
Can I use regular paint instead of a metal‑specific primer?
Regular paint will not bond well to metal and will peel quickly. A rust‑inhibiting metal primer creates a chemical bond that resists moisture and corrosion. Even a budget alkyd primer outperforms standard interior paint for outdoor metal.
How long does the whole repair process take?
For an average single‑family home, you can finish inspection, rust removal, priming, sealing, and coating in about one day if the weather stays dry. Larger roofs or heavy rust may need two days to allow each coat to cure properly.
Do I need to replace panels that are heavily rusted?
If rust has pitted through the metal and you see flaking or holes, replacement is safer. Small patches can be sanded, primed, and coated, but severely corroded panels lose structural strength and should be swapped out.
What’s the best time of year to repair a metal roof?
Mild, dry weather is ideal. Temperatures between 50°F (10°C) and 85°F (29°C) let primers and coatings cure without excessive shrinkage. Avoid rainy or very humid days because moisture can trap under the coating and cause adhesion problems.
How often should I re‑inspect my roof after the repair?
Do a quick visual check twice a year , once in spring after storms and again in fall before winter. Look for new rust spots, loose fasteners, or sealant cracks. Early detection keeps repair costs low.
Conclusion
Repairing rust on metal roof panels is a doable DIY project when you follow a solid plan: inspect thoroughly, gear up safely, strip the corrosion, prime with the right product, seal seams, and finish with a durable topcoat. Each step builds on the last, creating a barrier that stops water and oxygen from attacking the metal.
If you run into tough spots, remember that professional services like LGFMH Construction can handle the whole process from start to finish, saving you time and giving you peace of mind. Whether you choose to do it yourself or call in the experts, a well‑maintained metal roof protects your home for decades.


Comments