Painting Techniques and Tips: A Practical Guide for 2026
- William McKracherne
- Feb 21
- 15 min read

Picture this: you’ve just moved into a new house, and the walls look like they’ve survived a decade of popcorn ceiling and faded paint. You feel that mix of excitement and dread—excited because you can finally make the space yours, but dreaded because painting seems like a massive, messy project.
We’ve all been there. The good news? Painting doesn’t have to be an overwhelming nightmare. It’s really just a series of small, manageable steps, and with the right approach, you’ll see a transformation that feels almost magical.
First, start with a quick assessment. Walk through each room and note any cracks, peeling spots, or water stains. Those tiny imperfections are the hidden villains that can ruin an otherwise flawless finish. A simple patch and sand can save you hours of rework later.
Next, choose your colors wisely. Think about the mood you want—calm blues for a bedroom sanctuary, sunny yellows to energize a kitchen. A handy tip: paint a large poster board and hang it on the wall for a full‑day test. If the hue looks right in morning, afternoon, and evening light, you’ve nailed it.
When it comes to materials, don’t skimp on quality. Premium brushes and rollers may cost a bit more, but they lay down paint evenly and reduce splatter. In our experience, using a low‑sheen finish in high‑traffic areas like hallways extends the life of the paint by up to 30%.
Now, let’s talk budget. A common question is how much painting will set you back. While costs vary, our detailed breakdown can help you plan. Check out How Much Does Interior Painting Cost: A Complete Guide for a step‑by‑step budgeting worksheet that accounts for square footage, prep work, and labor.
Ready to roll up your sleeves? Here’s a quick checklist to get you moving: 1) Gather supplies (paint, primer, rollers, drop cloths). 2) Protect floors and furniture. 3) Prime any patched areas. 4) Apply the first coat, let it dry, then add a second coat. 5) Clean up promptly to avoid dried paint on tools.
Does that sound doable? Absolutely. By breaking the job into these bite‑size tasks, you’ll finish faster, spend less, and end up with walls that feel fresh, bright, and truly yours.
TL;DR
If you’ve ever felt overwhelmed by freshening up your walls, this guide cuts the chaos down to simple, budget‑friendly steps—choose the right hue, prep like a pro, and apply paint with confidence. By following our checklist you’ll finish faster, spend less, and enjoy rooms that look brand‑new without hiring a contractor for painting.
Step 1: Preparing Your Canvas
Ever stand in a room that looks like it’s been stuck in the 90s and feel that mix of excitement and "where do I even start?" That moment is the perfect cue to treat your walls like a fresh canvas – you just need the right prep before the first brushstroke.
Clear the space and protect what matters
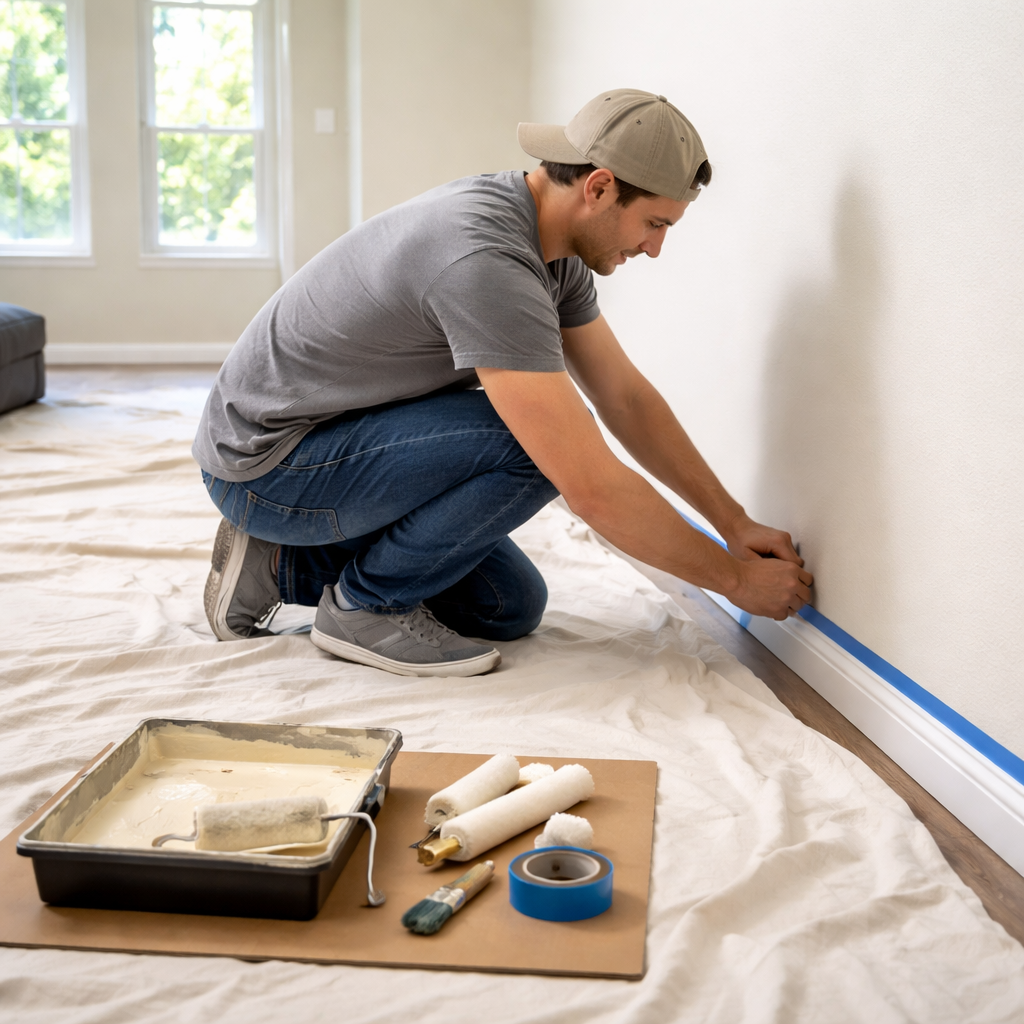
First thing’s first: move furniture out of the way or, if that’s a nightmare, slide it to the center and wrap it in drop cloths. And don’t forget the floor – a cheap plastic sheet can turn a splatter disaster into a clean‑up breeze. While you’re at it, check for any loose trim or outlet covers that might need unscrewing. A quick glance now saves a frantic scramble later.
Gather the right tools (and skip the cheap stuff)
We’ve seen DIYers try to cut corners with budget rollers, only to end up with a patchy finish that looks worse than the old paint. Invest in a good‑quality roller nap that matches your surface – smooth walls get a ¼‑inch nap, textured ones a ¾‑inch. A angled sash brush for corners, a sturdy tray, and painter’s tape are your best friends.
Pro tip: a small LED work light can make hidden spots pop. If you’re curious about sleek lighting that doubles as décor, check out LED Artistry’s lighting ideas for inspiration.
Patch, sand, and prime – the three‑step miracle
Got a nail hole or a crack? Fill it with a lightweight spackle, smooth it with a putty knife, and let it dry. Once dry, sand it with 120‑grit paper until it blends into the surrounding wall. Then, wipe away the dust with a damp cloth – you’ll see the difference instantly.
Now, prime any patched area. Primer seals the surface, blocks stains, and helps the new paint stick. It’s the unsung hero that keeps your color looking fresh for years.
Still wondering if you need a primer for the whole room? If the existing paint is glossy or you’re switching from a dark to a light hue, a full‑room primer is worth the extra time.
Watch that short video for a visual walk‑through of sanding and priming – it’s like having a seasoned pro right next to you.
Set up a clean, organized work zone
Lay out all your tools on a sturdy piece of cardboard or a portable tray. Label each roller and brush so you don’t waste time hunting for the right one mid‑job. And here’s a little secret: keep a small bucket of water nearby to rinse brushes quickly; it extends the life of your tools.
When you’re ready to start, step back, take a breath, and picture the finished room. That mental image keeps you motivated through the prep grind.
If you love adding personality to a space, consider finishing touches like decorative ornaments. Some of the most eye‑catching pieces for 2026 are highlighted in Harvey‑Bruce’s ornament roundup, which can turn a freshly painted wall into a gallery‑ready backdrop.
Finally, do a quick checklist before you move on to the actual painting:
All furniture protected and floors covered
Tools gathered and organized
Patches filled, sanded, and primed
Room well‑ventilated – open a window or use a fan
Cross those off, and you’ve officially prepped your canvas. The next step – laying down color – will feel a lot less intimidating when the groundwork is solid.
Step 2: Selecting the Right Paints and Brushes
Now that the walls are clean, patched, and primed, it’s time to think about the actual colour‑bringing tools. Picking the right paint and brush can feel like shopping for a new pair of shoes—there’s a lot of options and you don’t want to end up with something that looks great on the shelf but falls apart after a few weeks.
Know the finish before you buy
First, ask yourself how the room will be used. A high‑traffic hallway, a kid’s bedroom, or a family room that sees constant foot traffic all benefit from a low‑sheen satin or eggshell finish. Those finishes bounce just enough light to hide minor scuffs while still being easy to clean. For a cozy bedroom or a formal dining room where you want a softer, more velvety feel, a flat or matte finish can do the trick, but remember it’ll be harder to wipe clean.
In our experience at LGFMH Construction, we see homeowners regret cheap “budget” paints that start to look blotchy after the first wash. A slightly higher‑priced, reputable brand tends to hold colour better and resist yellowing over time.
Brushes, rollers, and the “right‑tool” mindset
When you grab a brush, look for a natural‑bristle sash brush for oil‑based paints and a synthetic‑nylon or polyester brush for latex. The synthetic ones give you a smoother pull and don’t shed fibers into the wet paint. For large, flat surfaces, a high‑quality ⅜‑inch nap roller works like a charm. The nap length matters: smooth drywall gets a ¼‑nap, lightly textured walls need a ⅜‑nap, and rougher surfaces call for a ½‑nap.
Don’t forget the little things: a paint tray liner keeps the roller clean, and a sturdy extension pole saves your back when you’re reaching for the ceiling. Those tiny upgrades add up to a professional‑looking finish without the extra labour cost.
Colour accuracy and test swatches
Even the best paint can look off if the lighting in your room is tricky. Paint a 6‑inch square on the wall, let it dry, and view it at morning, midday, and evening light. If the hue stays true, you’ve got a winner. If it shifts toward a cooler or warmer tone, try a nearby shade. This simple step prevents the dreaded “what‑did‑I‑just‑paint‑the‑room‑that‑color?” moment.
Budget‑friendly buying tips
Paint can be pricey, but you don’t have to break the bank. Buying a gallon plus a quart of the same colour lets you touch up later without colour mismatch. Look for sales on premium brands—many home‑improvement stores run “buy‑one‑get‑one‑half‑off” deals on weekends. And, if you’re still unsure about how much you’ll need, the budgeting worksheet in our comprehensive interior painting cost guide helps you calculate paint volume based on square footage.
Putting it all together
So, what’s the quick checklist?
Decide on finish (satin, eggshell, flat) based on traffic and cleaning needs.
Choose a reputable paint brand—look for durability guarantees.
Pick natural‑bristle brushes for oil‑based, synthetic for latex; use a ⅜‑nap roller for most walls.
Test a sample patch in different lighting.
Buy a gallon + quart for future touch‑ups and use sales to stretch your budget.
When you pair the right paint with the right brush, the whole process feels less like a chore and more like a creative project you actually enjoy. And remember, taking a few minutes to select quality tools now saves you hours of re‑work later.
Step 3: Mastering Brush Techniques
Choosing the right brush
Before you even dip the bristles, think about the job you’re tackling. Natural‑bristle brushes work wonders with oil‑based paints because they hold more paint and give you that buttery glide. Synthetic nylon or polyester brushes are the go‑to for latex or water‑based paints – they stay flexible, shed less, and dry faster. If you’re painting a smooth drywall, a flat‑sided brush helps you spread paint evenly without leaving streaks. For trim or corners, an angled sash brush lets you hug the edge without a lot of back‑and‑forth.
Need a deeper dive? Check out our comprehensive painting guide for a side‑by‑side comparison of brush types and the finishes they shine with.
Loading the brush without dripping
Here’s a trick we swear by: dip the tip of the brush into the paint, then tap it gently against the side of the can. Never swipe the whole bristle against the rim – that just throws excess paint back into the tray and creates splatter. Pull the brush out and swipe it across the tray’s ridged edge. You’ll see a thin, even film of paint on the bristles, which is perfect for a smooth coat.
Do you ever wonder why a brush sometimes leaves clumps? It’s usually because it’s overloaded. A quick press‑and‑pull motion on the roller tray removes the surplus, and you’ll get a feather‑light finish instead of a bumpy mess.
Stroke patterns that give a smooth finish
Start with a “wet‑edge” technique: work in sections that are still wet, overlapping each stroke by a half‑brush width. This prevents hard lines and keeps the colour consistent. For flat walls, use long, horizontal strokes – think of painting a horizon. When you reach a corner, switch to a light, back‑and‑forth motion, letting the brush’s natural spring fill the gap.
And what about that dreaded “brush marks” look? The secret is to finish each section with a light, feathering pass. Lightly glide the brush over the wet paint without adding more pigment, smoothing out any ridges before the paint sets.
Caring for your brushes
After the job, clean brushes while the paint’s still tacky. For water‑based paints, rinse with warm, soapy water until the water runs clear. For oil‑based paints, a mineral‑spirit soak does the trick – just remember to dispose of the solvent responsibly.
When they’re dry, reshape the bristles with your fingers and hang them bristle‑down. This prevents the hairs from splaying and keeps the brush ready for the next project. A well‑maintained brush can last years, saving you the cost of replacements.
Quick checklist for brush mastery
Pick natural‑bristle for oil, synthetic for latex.
Tap off excess paint, then swipe on a tray edge.
Work wet‑edge, overlapping each pass.
Finish with a light feathering stroke.
Clean promptly: soap‑water for latex, mineral spirits for oil.
Reshape and store bristle‑down.
Mastering these brush techniques turns a routine paint job into a satisfying craft. You’ll notice fewer drips, smoother walls, and a finish that looks like it was done by a pro. And if you ever feel stuck, remember that a few minutes of proper brush care now saves you hours of re‑work later.
Step 4: Color Theory and Mixing
Now that you’ve got your brushes and rollers under control, it’s time to think about the actual colour you’re putting on the wall. Color can feel like a mystery, but the basics are surprisingly simple once you break them down.
Understanding the color wheel
Imagine a pizza sliced into 12 pieces – that’s the classic color wheel. Primary colours (red, blue, yellow) sit at the corners, and mixing any two gives you the secondary colours (orange, green, purple). The wheel helps you spot harmonious pairings without guessing.
Do you ever stare at a swatch and wonder why it feels “off”? Usually it’s because the hues are too close or too far apart. Complementary colours – those opposite each other on the wheel – create a lively contrast, while analogous colours (next to each other) feel calm and cohesive.
Mixing basics you can trust
Start with a small amount of paint in a separate cup. Add just a dab of your secondary colour, stir, and test on a piece of cardboard. If you need a deeper shade, add a touch of the primary colour again; if it’s too strong, thin it with a bit of white (for lighter tones) or black (for darker tones). Remember: a little goes a long way.
One trick we swear by is the “three‑step test”: paint a stripe, let it dry, view it in natural light, then under a lamp. The colour can shift dramatically, and catching that early saves you from a whole wall redo.
Keeping your mix consistent
When you’re covering an entire room, you’ll likely need more paint than the first cup you mixed. The key is to keep a master batch. Mix a larger quantity in a clean bucket, note the exact proportions (e.g., 2 parts red, 1 part yellow), and label the bucket. If you run out, you can replicate the mix by following the same ratios.
And if you’re using a pre‑mixed paint, you can still tweak it. Add a teaspoon of a complementary hue to mute a bright shade, or a splash of white to mute saturation. Just stir gently – vigorous shaking can introduce bubbles that show up as speckles.
Practical colour‑selection tips
• Use the 60‑30‑10 rule: 60% dominant colour, 30% secondary, 10% accent. It works for walls (dominant), trim (secondary), and accessories (accent).
• Test a sample on opposite walls; morning light can make a colour feel cooler, while evening light warms it up.
• If you’re unsure, start with a neutral base (greige, soft taupe) and add splashes of colour through décor. Neutrals are forgiving and make future colour swaps painless.
Feeling overwhelmed? Remember that painting is as much about experimentation as it is about technique. Play with a few swatches, note what you like, and let your gut guide the final decision.
Quick reference table
Feature | Tool/Method | Key Note |
Colour harmony | Color wheel | Use complementary for pop, analogous for calm. |
Mix consistency | Master batch & ratio notes | Label bucket; replicate ratios exactly. |
Shade adjustment | White/black tint | White lifts, black deepens – add sparingly. |
If you want a deeper dive into how colour theory translates to real‑world rooms, check out our full painting guide. With a little science and a lot of trial, you’ll end up with walls that feel intentional, not accidental.
Step 5: Finishing Touches and Preservation
Now that the colour has settled on the wall, you’re at the part that makes the whole job feel polished. It’s the moment you step back, see the room come alive, and realize you’ve actually done it yourself.
First thing’s first – give those edges some love. Grab a small angled brush and run a neat line along baseboards, window trims, and any crown moulding. A quick dip, a light tap on the tray’s edge, and you’ll avoid the dreaded “brush‑streak” look. It’s a tiny extra step, but it turns a good finish into a great one.
Spot‑check for imperfections
After the second coat dries, walk the room with a soft, white‑paper towel in hand. Lightly rub the surface; if you feel a bump or see a faint sheen, that’s a sign of a missed spot. A gentle sand‑paper (220‑grit) pass will smooth it out before you seal anything.
Do you ever wonder why some walls look “off” even though the paint is the same? Often it’s a stray hair, a dust particle, or a tiny drip that hardened. The quick touch‑up trick is to keep a spare cup of the mixed paint handy – just dab the area, feather it out, and let it dry.
Protecting your work
Once everything looks even, it’s time to think long‑term. A clear, water‑based polyurethane or a low‑sheen acrylic sealer adds a thin protective film that repels fingerprints and makes cleaning a breeze. Apply it with a clean foam roller in thin, even passes; two coats, light sanding between layers, and you’ve built a barrier that’ll keep the colour fresh for years.
If you have high‑traffic zones – hallways, kids’ playrooms, or a kitchen backsplash – consider a higher‑sheen finish (satin or eggshell). It’s still subtle but stands up to scrubbing without showing wear.
Maintenance habits that matter
Even the best‑preserved paint will fade if you neglect it. Here’s a quick habit checklist: dust walls with a microfiber cloth monthly, spot‑clean stains with a damp sponge (no abrasive cleaners), and touch up nicks with that spare paint cup you kept.
And remember, humidity can affect durability. In damp climates, run a dehumidifier in the winter months or use a moisture‑absorbing rug in bathrooms. It’s a small effort that pays off in fewer paint‑peel incidents.
Storing leftovers the right way
Don’t toss that half‑used can in the trash. Seal the lid tightly with plastic wrap, label the can with colour, finish, and date, then store it upside‑down in a cool, dry spot. Upside‑down storage creates a vacuum seal that keeps the paint from skinning over.
When the next project rolls around, you’ll have the exact match ready – no hunting for the perfect shade again.
When to call in the pros
Sometimes a wall has more than just paint issues – water damage, extensive cracking, or old lead‑based layers need a specialist’s touch. That’s where LGFMH Construction can step in, handling repairs and repainting so your preservation work isn’t undone by hidden problems.
Need help budgeting the sealer and touch‑up supplies? Our budgeting guide walks you through the exact costs so you stay on track.
Finally, give yourself a pat on the back. Finishing touches are the quiet heroes of any painting project – they turn a fresh coat into a lasting finish.
Conclusion
We've walked through everything from prepping the walls to picking the perfect finish, so you can see why a little extra care makes painting feel like a confidence boost rather than a chore.
Think about the last time you admired a fresh coat of paint—what stood out? Most likely it was the even colour, the clean edges, and the way the room seemed to breathe. Those details are the result of the steps we just covered.
So, what's next? Grab your tools, run through the quick checklist, and give that sealant a gentle swipe. If a spot looks dull later, a light mist of water and a wipe can bring it right back.
And remember, if you ever run into hidden moisture, bubbling or stubborn peeling, that's a signal to call in the pros. LGFMH Construction can diagnose the issue and get your walls back to looking brand‑new.
Bottom line: a solid prep, the right paint and brush, and a protective finish turn a simple DIY project into a lasting improvement you’ll enjoy for years. You’ve got the know‑how—now go make those walls shine.
Keep a microfiber cloth handy and dust the walls every few months; a quick wipe prevents grime from dulling the colour and extends the life of that finish.
FAQ
How often should I repaint the interior walls of my home?
Most people find a refresh every 5‑7 years works well, but it really depends on traffic, lighting and the finish you chose. A matte wall in a low‑traffic bedroom can hold up a decade, while a glossy kitchen backsplash may need a touch‑up after just a couple of years. Keep an eye on fading, stubborn stains, or peeling edges – those are the tell‑tale signs it’s time for a new coat.
What’s the best way to avoid brush marks when I’m painting?
Start with a good quality synthetic‑bristle brush and load it lightly; you want a thin, even ribbon of paint, not a soggy mop. Hold the brush at a slight angle and use short, overlapping strokes, feathering the edges as you go. If a mark shows up, lightly dampen the area with a clean rag and smooth it out while the paint’s still wet. Working in a “wet‑edge” mode—never letting the paint dry between strokes—usually eliminates most streaks.
Do I really need a primer before painting new drywall?
Yes, especially if the drywall is fresh or you’re covering a dark colour with a light one. Primer creates a uniform surface, improves adhesion and cuts down on the number of top‑coat layers you’ll need. A thin‑coat bonding primer works wonders on slick or patched spots, and it helps prevent the paint from soaking into the paper face, which can leave a patchy finish.
How can I tell if my paint finish is sealed properly?
Give the surface a gentle fingertip test after the sealant has cured (usually 48 hours). It should feel smooth and a little slick, but not sticky. Run a soft cloth over a hidden corner; if the cloth picks up dust or leaves a faint mark, the seal isn’t fully set. A quick visual check for glossy uniformity—no cloudy patches or streaks—also tells you the job is done right.
What’s the difference between matte, satin, and gloss finishes for high‑traffic rooms?
Matte absorbs light and hides imperfections, making it great for ceilings or low‑traffic hallways, but it can show scuffs. Satin offers a soft sheen, balances durability and hide‑ability, and is my go‑to for living rooms and bedrooms that see moderate use. Gloss reflects the most light and is super easy to clean, so it’s perfect for trim, doors or a kitchen island—but it also reveals every fingerprint.
When should I call a professional instead of DIY‑ing my painting project?
If you spot bubbling, peeling or a persistent odor, that usually means moisture or surface prep issues that need a deeper investigation. Also, when you’re dealing with historic plaster, lead‑based paint, or large exterior surfaces with tricky weather conditions, a pro’s equipment and expertise can save time and money. LGFMH Construction can diagnose hidden problems and ensure the underlying repair work is solid before you pour another coat.


Comments