Roof Replacement Virginia Beach: Complete Guide to Costs, Materials, and Contractors
- William McKracherne
- Dec 8, 2025
- 19 min read

Imagine standing on your porch in Virginia Beach, feeling the salty breeze, and suddenly noticing a few shingles hanging loose—like a bad hair day for your home.
You've probably thought, "Do I really need a full roof replacement, or can I just patch this up?" That moment of doubt is what most homeowners face when the roof starts showing wear after years of sun, storms, and those occasional beachfront gusts.
Here's the thing: a roof isn't just a protective layer; it's the first line of defense against water damage, mold, and energy loss. When those old shingles start cracking, the whole house can feel the strain, from higher utility bills to creepy drafts sneaking through the attic.
So, why consider a roof replacement now? Because waiting can turn a manageable repair into a costly overhaul. Think about the peace of mind you'll get knowing your home can handle the next hurricane season without a single leak.
And if you're wondering where to start, you're not alone. Many folks in Virginia Beach wonder which contractor knows the local climate best, which materials stand up to salty air, and how to budget without breaking the bank.
We've been talking to homeowners who chose the right roof replacement and instantly felt the difference—cooler rooms in summer, a quieter house when the wind whistles, and a resale value boost that actually shows up on the market.
In the next sections, we'll walk through the signs that scream "time for a new roof," break down the best shingle options for coastal living, and give you a step‑by‑step checklist to pick a contractor you can trust.
Ready to stop guessing and start planning? Let's dive in and make sure your roof is as strong and reliable as the waves crashing just beyond your doorstep.
And remember, a solid roof is an investment that protects your family and your peace of mind for years to come.
TL;DR
If your Virginia Beach roof shows shingles, leaks, or rising energy bills, a replacement can protect your home from storm damage and boost resale value. We’ll guide you through spotting warning signs, choosing durable coastal materials, and hiring a trusted local contractor so you can enjoy peace of mind year‑round.
Understanding Roof Replacement Costs in Virginia Beach
When you start looking at a roof replacement in Virginia Beach, the first thing that hits you is the price tag. It’s easy to feel a knot in your stomach, especially when you picture all the other bills you’re already juggling. But let’s break it down together so the numbers don’t feel so scary.
What’s actually in the cost?
In most cases you’re paying for three big buckets: materials, labor, and the little‑but‑crucial “overhead” items like permits and disposal. Materials can swing wildly – a basic three‑tab shingle might run $80‑$120 per square (a “square” is 100 sq ft), while a premium architectural shingle can be $150‑$200. Labor in a coastal city like ours tends to be a bit higher because crews need the right safety gear for wind and salt‑air conditions.
Then there are the hidden costs: underlayment that resists moisture, flashing that seals roof penetrations, and a thorough cleanup that leaves your yard free of debris. Those extra line items can add $1,000‑$2,500 to the final invoice, depending on the scope.
How the local climate changes the math
Virginia Beach isn’t just any inland town – salty breezes and occasional hurricanes mean you’ll want a roof that can handle corrosion and uplift. That usually pushes you toward materials with a higher wind rating (Class F or higher) and a protective coating that fights rust. The upfront premium pays off when you avoid premature replacements after a storm.
Think about it like buying a pair of shoes for a marathon. You could snag the cheapest pair, but they’ll probably fall apart before the finish line. Investing a little more in a durable roof is the same idea.
So, what does a full replacement typically look like in numbers? A 2,000‑square‑foot home with an average pitch will often land between $12,000 and $20,000 all‑in. If you opt for high‑end materials or need extra structural reinforcement, you might see $25,000‑$30,000. Those ranges give you a realistic ballpark without pulling a rabbit out of a hat.
Budget‑friendly strategies
First, get at least three written estimates. Compare line items, not just the bottom line. A lower total might hide a cheap shingle that will need replacement sooner.
Second, ask about seasonal discounts – many local contractors offer reduced rates in the slower fall months. Third, explore financing options; a modest 0‑% introductory loan can spread the cost over 12‑18 months, making the expense feel more manageable.
And don’t forget the tax angle. In many cases, a roof replacement qualifies as a home‑improvement tax credit, especially if you choose energy‑efficient materials. It’s worth a quick chat with your accountant.
Here’s a quick checklist to keep you on track:
Confirm wind rating (look for “Class F” or “ASTM D7158”).
Ask for a detailed breakdown of materials vs. labor.
Verify that the contractor holds a local permit.
Check warranty length – 20‑year warranties are common for premium shingles.
Review disposal and cleanup fees up front.
Now, you might wonder how to pick the right contractor. While we won’t name competitors, a good rule of thumb is to look for companies that are active in the community, have solid reviews, and showcase recent projects on their site. For example, many homeowners appreciate a contractor that also offers complementary services like shutter installations – you can see one such specialist at Monroe Plantation Shutter Pros.
Another angle to consider is the surrounding landscape. If you’re planning a patio or outdoor paving project alongside the roof work, you’ll want a partner that understands both. A firm that handles pavers in places as far away as Texas shares valuable insights about drainage and material compatibility – see what they suggest at Texas Pavers Outdoor Living.
Finally, if you’re curious about international best practices, a quick look at how the UAE manages free‑zone construction reveals innovative waterproofing techniques that are now trickling into U.S. coastal markets. Check out the details on UAE Free Zone Finder for a broader perspective on durability standards.
Seeing the process in action can demystify the timeline – from tearing off old shingles to the final cleanup.
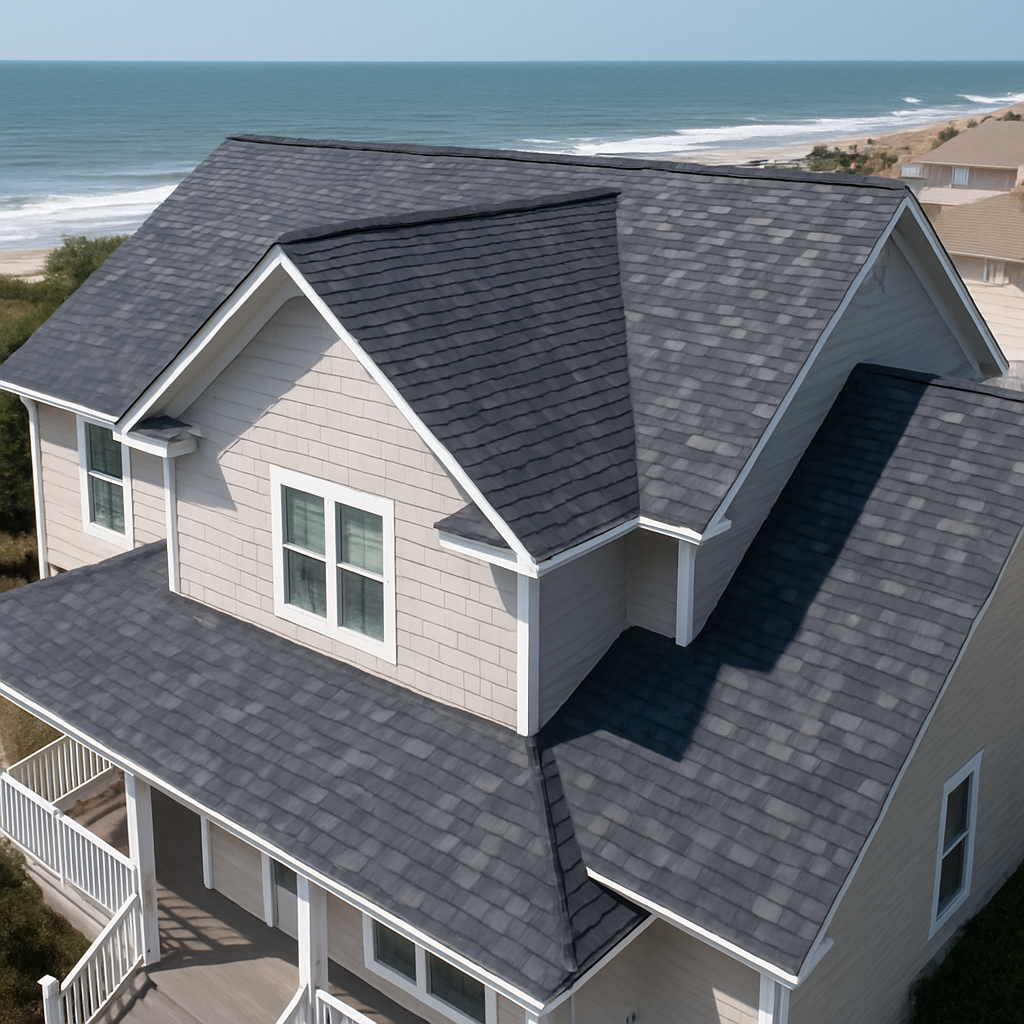
Comparing Popular Roofing Materials for Virginia Beach
Alright, let’s get real about the choices you actually have when you’re planning a roof replacement in Virginia Beach. The ocean breeze, summer humidity, and occasional hurricanes mean you can’t just pick the cheapest option and hope for the best. You need a material that laughs at salty air, doesn’t melt under 90°F sun, and stays tight when a wind gust tries to lift it off the house.
Asphalt Shingles – The All‑Rounder
Asphalt shingles are the go‑to for most homeowners because they’re affordable, easy to install, and come in a ton of styles. In our part of the coast they typically last 20‑30 years if you keep the roof clean and replace the underlayment when needed. The real upside? You can find a “cool‑roof” version with reflective granules that helps shave a few dollars off your AC bill during those scorching July nights.
Example: The Ramirez family swapped their 15‑year‑old three‑tab shingles for architectural asphalt shingles last spring. After a mild tropical storm, their new roof showed zero damage while the neighbor’s older roof had a handful of cracked tabs.
Metal Roofing – The Long‑Term Investment
Metal panels (steel or aluminum) are a favorite for coastal homes because they resist rust when coated properly and can live 40‑50 years or more. They’re also excellent at shedding rain, which means less moisture sitting on the deck—a big win against mold in a humid climate. The trade‑off? Upfront cost is higher, but the energy savings and durability often pay off within a decade.
Real‑world story: When the Martinez couple upgraded to standing‑seam metal, they noticed a 12% drop in their monthly electricity usage during summer. Their contractor also added a breathable underlayment that kept condensation from building up in the attic.
Slate – The Luxury Choice
Slate is basically the Rolls‑Royce of roofing. It can last a century, is fire‑resistant, and looks stunning on historic homes. The downside is weight—your home’s framing may need reinforcement, and the price tag can be steep. If you love the look and have the budget, slate is practically a set‑it‑and‑forget‑it solution.
Case in point: A historic beachfront cottage in Virginia Beach installed a slate roof after a hurricane tore off the previous wood shake. The new roof survived the next season’s Category 1 storm without a single chip.
Tile (Clay or Concrete) – The Mediterranean Vibe
Tile roofs are heavy, but they’re also incredibly durable and fire‑resistant. They handle heat well, especially the lighter‑colored options that reflect sunlight. In a coastal setting you’ll want a tile with a sealed glaze to keep salt from seeping into the joints.
One homeowner, Jenna, chose concrete tile for her new two‑story home because she wanted that sun‑baked look. After a summer with daily temps over 95°F, her roof stayed cool enough that she never cranked the AC above 72°F.
How to Choose the Right Material for Your Home
Here’s a quick checklist you can run through while you’re on the phone with a contractor:
Budget:Determine how much you can spend now versus over the life of the roof.
Structure:Verify that your framing can support heavier options like slate or tile.
Energy goals:If lower cooling costs matter, lean toward reflective metal or cool‑roof shingles.
Maintenance comfort:Asphalt and metal need occasional cleaning; slate and tile are low‑maintenance but may need professional inspections.
Ask your roofer to provide a side‑by‑side cost‑per‑square comparison, plus estimated lifespan and warranty details. That transparency lets you see exactly where you’ll get the most bang for your buck.
Quick Decision Table
Material | Typical Lifespan | Key Pros | Considerations |
Asphalt Shingles | 20‑30 years | Affordable, many styles, cool‑roof options | Shorter life, may need more frequent repairs |
Metal Roofing | 40‑50 years | Corrosion‑resistant, excellent rain shedding, energy savings | Higher upfront cost, noise can be mitigated with insulation |
Slate | 80‑100 years | Ultra‑durable, fire‑resistant, timeless look | Heavy, may require structural reinforcement, pricey |
Tile (Clay/Concrete) | 50‑75 years | Heat‑resistant, fire‑proof, aesthetic appeal | Heavy, needs proper flashing, higher material cost |
Bottom line: there’s no one‑size‑fits‑all roof for Virginia Beach, but you can narrow it down by matching the material’s strengths to your home’s quirks and your personal priorities. Grab a notebook, run through the checklist, and ask the contractor to walk you through the numbers. When you’ve got the data in front of you, the decision feels a lot less like a gamble and more like a smart investment in your home’s future.
Hiring Licensed Roof Replacement Contractors in Virginia Beach
Now that you’ve narrowed down the material, the next big hurdle is finding someone you can actually trust to put it on your house.
Do you know how to separate a legit pro from the guy who shows up with a ladder and a smile but no proper paperwork? It’s easy to get swayed by a low quote, but a cheap mistake can cost you thousands down the road.
First things first: make sure the contractor holds a current Virginia Beach roofing license. The city requires a specific trade license for roof replacement work, and that license guarantees the crew meets safety, insurance, and training standards.
Why licensing matters
A licensed roofer is vetted by the local building department, which means they’ve passed background checks, liability insurance requirements, and continuing‑education on coastal code updates. In a place where wind uplift and salt corrosion are real threats, you want a team that knows the latest wind‑load calculations and proper flashing techniques.
Ask to see the license number and verify it on the Virginia Department of Professional and Occupational Regulation website. A quick lookup can save you from a contractor who’s operating under a borrowed or expired certificate.
Red flags to watch for
If a contractor can’t produce a copy of their license, or if the number they give you leads to a “no record found” page, walk away. Same with vague insurance details – you need both general liability and workers’ compensation coverage, and the policy should list you as an additional insured.
Another tell‑tale sign is a “cash‑only” payment request. Reputable companies accept credit cards or checks because they leave a paper trail and often come with built‑in fraud protection.
Questions to ask before you sign
Here’s a short checklist you can run through on the phone or during the on‑site estimate:
What is your license number and where can I verify it?
Do you carry both general liability and workers’ compensation insurance? Can you provide certificates?
Will you pull the required permits for a roof replacement in Virginia Beach?
Can you give me a written, itemized estimate that breaks down labor, materials, disposal, and any extra work?
How long do you expect the project to take from start to finish?
Writing down the answers helps you compare multiple bids without getting lost in vague “we’ll do a great job” promises.
Check the paperwork
When you get a written quote, look for a clear scope of work. It should state the exact material brand, color, and warranty details, plus the underlayment type you’ve discussed. A solid contract also lists a start date, a completion date, and a penalty clause if the crew misses the deadline without a valid reason.
Don’t forget the permit copy. The City of Virginia Beach requires a roofing permit for any replacement, and the contractor should submit the permit on your behalf and provide you with the approval notice.
Local reputation matters
Even with a license in hand, a contractor’s track record in the neighborhood is priceless. Ask neighbors who have recently replaced roofs about their experience. Look for consistent praise about clean work sites, respectful crews, and how well the new roof held up after the last storm.
Because we’re local, we love hearing those stories and we’re happy to share references from dozens of Virginia Beach families who’ve trusted us with their roof replacement projects.
Bottom line: a licensed, insured, and well‑reviewed contractor isn’t just a nice‑to‑have—it’s the foundation of a roof that will stand up to salty breezes and hurricane‑force winds for decades. Take the time to verify credentials, ask the right questions, and get everything in writing. When you do, the whole process feels less like a gamble and more like a confident step toward protecting your home.
Roof Replacement Process Timeline and What to Expect
So you’ve signed the contract and the crew is set to show up next week. What actually happens between the first knock on your door and the day you can finally enjoy a dry attic? Let’s walk through a typical roof replacement timeline in Virginia Beach, sprinkle in a few real‑world stories, and give you a checklist you can print out.
1. Pre‑Installation Walk‑Through & Permit Pull
Before any shingles touch your home, the contractor does a detailed walk‑through. They’ll measure every “square,” note roof pitch, and flag any hidden damage like rot under the deck. This is the moment you hear the phrase “permit required.” In Virginia Beach a roofing permit is mandatory for any replacement, and the city’s online permitting service lets you schedule inspections up to five days in advance. Virginia Beach building permits outline exactly which inspections you’ll need – framing, final, and everything in between.
Example: The Patel family in Oceanfront asked their roofer to pull the permit. The city approved it within two days, and the crew could start on schedule, avoiding a costly delay.
2. Material Ordering & Delivery Window
Once the permit is in hand, the contractor orders the roofing material. For coastal homes, many choose GAF architectural shingles or standing‑seam metal because they hold up to salty air. Delivery usually lands a day or two before the old roof is ripped off – that way there’s no exposure risk.
Pro tip: ask the installer for a delivery confirmation and keep a copy of the receipt. If you’re on a tight budget, you can sometimes negotiate a “off‑season discount” if the material arrives in the cooler months.
3. Tear‑Off & Deck Inspection
The crew arrives, sets up safety gear, and begins removing the old roof. This can take anywhere from a half‑day on a modest 1,500‑sq‑ft ranch to two full days on a multi‑story colonial with dormers. As the shingles come off, the roofer inspects the deck for soft spots, mold, or water stains.
Real‑world note: When the Martinez couple’s deck showed water damage, the contractor paused the install, replaced the compromised plywood, and added a higher‑grade underlayment. It added a day to the schedule but saved them from future leaks.
4. Underlayment, Flashing & Ventilation
Next comes the underlayment – a waterproof barrier that’s often overlooked by DIYers. In a humid coastal climate, a synthetic underlayment with a built‑in vapor barrier is worth the extra few dollars. Proper flashing around chimneys, skylights, and valleys is installed at this stage; it’s the part that keeps wind‑driven rain from sneaking in.
Don’t forget ventilation. A well‑ventilated attic reduces heat buildup, which prolongs shingle life and cuts cooling bills.
5. Shingle (or Metal) Installation
Now the fun part: laying the new roof. Installers start at the eave and work upward, overlapping each course by about an inch. For metal panels, they’ll use concealed fasteners that lock the seams. The crew will typically finish the visible work by late afternoon on the final day.
Tip: Stand on the roof (safely) and ask the crew to point out the “starter strip” – that tiny piece shows you they began correctly.
6. Final Inspection & Cleanup
When the last shingle is nailed down, the contractor schedules the city’s final inspection. The inspector checks that the work matches the approved plans, that flashing is sealed, and that the debris is cleared. Once you get the sign‑off, the job is officially done.
Example: The Johnsons were nervous about the final walk‑through. The inspector noted the proper roof‑to‑wall flashing and gave them a clean bill of health – they could finally relax.
7. Post‑Install Walk‑Through & Warranty Activation
Before the crew packs up, you get a walkthrough. The roofer should hand you a warranty booklet, a copy of the permit, and a list of any maintenance recommendations (like cleaning gutters after the first rain). This is also a good time to ask about matching your new roof with new shutters – a fresh roof pairs nicely with upgraded Monroe Plantation Shutter Pros for added curb appeal and protection.
Quick Timeline Checklist
Day 0‑2: Permit pull & approval (online scheduling)
Day 3‑5: Material order & delivery confirmation
Day 6‑7: Tear‑off and deck inspection
Day 8: Underlayment, flashing, ventilation installation
Day 9‑10: Shingle/metal placement
Day 11: Final city inspection
Day 12: Owner walk‑through, warranty paperwork
Feel free to print this checklist and tick each box as you go. If any step feels fuzzy, ask your roofer to explain – a transparent process is the best way to avoid surprise costs.
Need a trusted crew that knows Virginia Beach’s salty climate inside out? Check out LGFMH Construction Roofing for a team that handles permits, inspections, and the whole replacement process from start to finish.
Maintaining Your New Roof After Replacement in Virginia Beach
Congratulations, you’ve just gotten a brand‑new roof in Virginia Beach. The salty breeze feels a little less threatening, but the work isn’t done yet. A roof is like a good pair of shoes – you’ve got to break them in, keep them clean, and give them a little love now and then. Below is a down‑to‑earth guide that helps you protect that investment for the long haul.
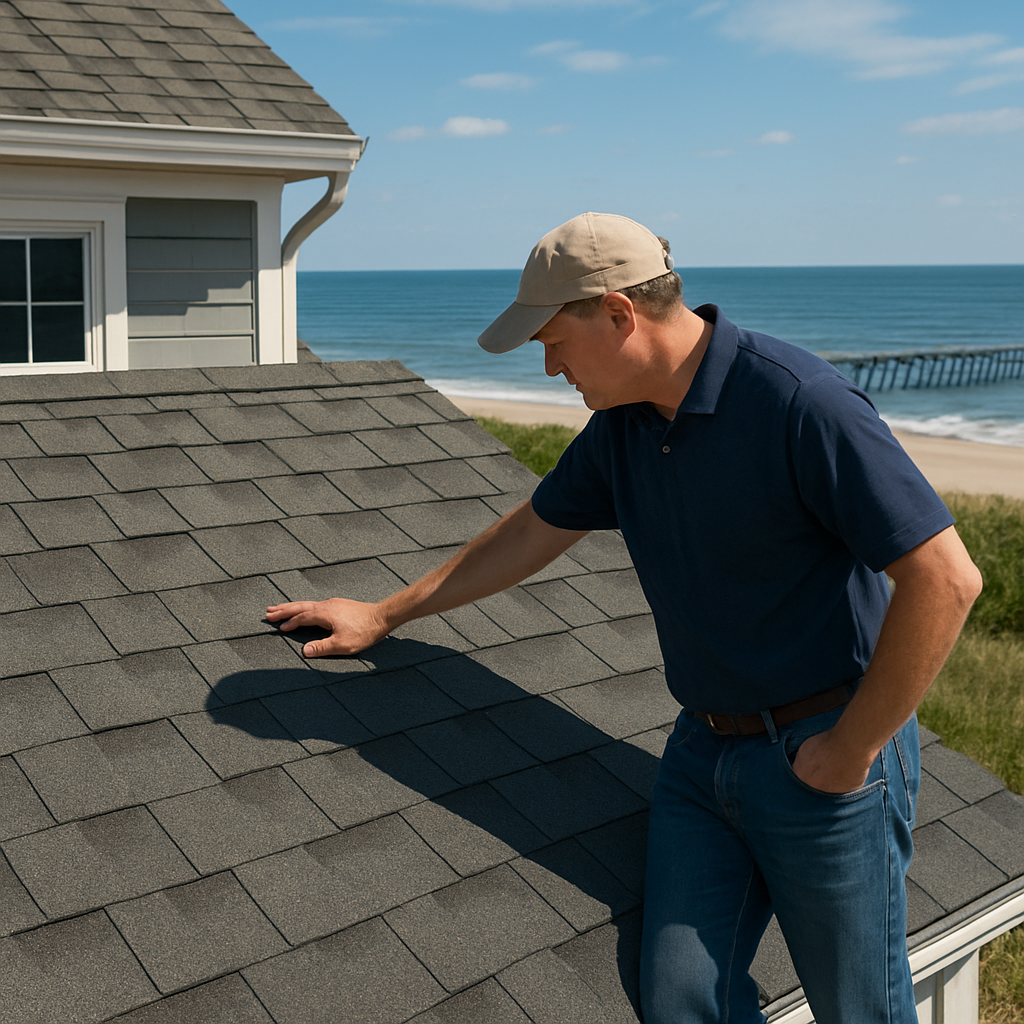
1. Schedule a “first‑look” inspection within 30 days
Even the best crews can miss a loose shingle or a tiny flash‑ing gap right after installation. Walk the perimeter of your home, climb a ladder (or ask a trusted neighbor) and check for any nails that look out of place, missing vent boots, or water‑stained decking. If you spot something, call your contractor immediately – most warranties cover fixes made within the first month.
2. Clean gutters and downspouts after the first rain
That first storm after a replacement is a perfect test. Watch how water flows from the roof into your gutters. If you see overflow, debris, or water spilling onto the siding, it’s time to clear the gutters. A quick clean every season prevents water from backing up under the underlayment, which is a common source of leaks in coastal homes.
3. Embrace a regular roof‑maintenance calendar
We like to think of maintenance as a simple checklist you can print and stick on the fridge. Here’s a practical schedule:
Quarterly (spring, summer, fall, winter):Scan for loose shingles, clear debris, and check flashing around chimneys and vents.
Bi‑annual:Inspect the attic for signs of moisture or mold. If you notice a musty smell, pull the insulation back a bit and look for damp spots.
Every 5‑7 years:Apply a protective coating to metal roofs or a sealant to the roof’s edges. This extra barrier helps combat the relentless salt air that Virginia Beach throws at you.
Stick to the calendar and you’ll catch small problems before they become expensive repairs.
4. Choose the right cleaning method for your material
Not all roofs love a power washer. Asphalt shingles can be damaged by high‑pressure streams, while metal panels appreciate a gentle rinse. For most homes, a soft‑bristle brush and a mild soap solution (just a splash of dish detergent in a bucket of water) does the trick. Rinse with a garden hose, not a pressure washer, and avoid walking on the shingles whenever possible.
5. Keep an eye on the surrounding landscape
Tree branches that overhang your roof are more than an aesthetic issue. As leaves fall, they trap moisture against the shingles, and wind can fling debris that scratches metal panels. Trim branches back at least three feet from the roofline. In Virginia Beach, a well‑trimmed palm or oak can also reduce the amount of salt‑sprayed sand that settles on the roof.
6. Monitor for salt‑air damage and act fast
Salt air is a silent attacker. Over time it can cause corrosion on metal fasteners and degrade the granules on asphalt shingles. Look for signs like:
White or chalky residue on shingle surfaces – a sign of salt buildup.
Rust spots on metal flashing or nail heads.
Granule loss, which appears as tiny dark specks in gutters after rain.
If you see any of these, rinse the affected area with fresh water and schedule a professional check. A quick rinse after a strong sea‑breeze can dramatically extend the life of your roof.
7. Leverage warranty paperwork
Most reputable contractors give you a written warranty that covers material defects for 20‑30 years and workmanship for at least 10 years. Keep that booklet in a safe place, but also digitize it and store it in a cloud folder labeled “Roof Docs.” When you call for a service call, reference the exact warranty clause – it speeds up approvals and keeps the contractor honest.
8. Real‑world example: The Ramirez family
The Ramirezes installed architectural asphalt shingles last summer. Six months later, after a weekend of strong on‑shore winds, they noticed a few chalky spots near the eaves. They gave their roof crew a call, rinsed the area with a garden hose, and the contractor inspected the flashing. A single rusted nail was replaced, and the roof performed flawlessly through the next hurricane. Their quick action saved them a potential leak and a $1,200 repair bill.
9. Pro tip: Add a breathable underlayment upgrade
If you’re still in the warranty period, ask your roofer about swapping the standard felt underlayment for a synthetic, vapor‑barrier‑free version. It lets moisture escape while still shielding the deck from rain – a win‑win for humid coastal climates.
Bottom line? A new roof in Virginia Beach gives you peace of mind, but only if you treat it like a living part of your home. A little inspection, a seasonal cleaning ritual, and prompt attention to salt‑air signs will keep your roof singing for decades.
Take a few minutes this weekend to walk the roof perimeter, jot down any observations, and add the next maintenance date to your calendar. Your future self (and your wallet) will thank you.
Conclusion
We've walked through everything—from spotting the first warning signs to picking the right material and hiring a licensed crew—so you now have a clear roadmap for a roof replacement Virginia Beach.
Think about that moment when the Ramirez family rinsed off a salty residue and avoided a $1,200 repair. It shows how a few minutes of inspection can save you a big headache later.
So, what's the next step? Grab a notebook, walk your roof perimeter this weekend, and jot down any loose shingles, rusted nails, or gutter clogs. Then schedule a quick “first‑look” visit with a licensed contractor who can verify the work and lock in your warranty.
Remember, a roof is more than a shelter; it's the first line of defense against the ocean’s breath and the next hurricane. Treat it like a living part of your home—regular checks, seasonal cleaning, and prompt repairs keep it singing for decades.
Ready to protect your family and your wallet? Reach out to a trusted local pro, get a detailed, itemized estimate, and set that maintenance date on your calendar. Your future self will thank you. And when that roof stands strong through the next storm, you'll know you made the smartest home‑improvement decision of the year.
FAQ
How do I know if I need a roof replacement in Virginia Beach?
If you’re spotting cracked or curling shingles, water stains on your ceiling, or a sudden jump in energy bills, those are solid warning signs. Also, count the age of your roof—most asphalt shingles hit the 20‑year mark before they start to lose their bite. When you notice any of these clues, it’s time to schedule a professional inspection before small problems become big money‑savers.
What is the typical cost range for a roof replacement Virginia Beach?
Pricing varies with size, pitch, and material, but most homeowners see a ballpark between $8,000 and $20,000 for a standard 1,500‑sq‑ft home. A steep roof or premium metal can push the total higher, while a simple asphalt job on a low‑slope roof stays toward the lower end. Getting a detailed, itemized quote lets you see exactly where you can save without sacrificing quality.
Which roofing materials work best with the salty coastal climate?
Metal panels and high‑quality architectural shingles are the go‑to choices for Virginia Beach’s salty breezes. Metal resists corrosion when properly coated, and many products come with a reflective finish that cuts cooling costs. Asphalt shingles with a “cool‑roof” rating hold up well too, especially if you pick a brand that’s tested for coastal durability. Avoid untreated wood or low‑grade tiles that can soak up salt and rot.
How can I find a licensed contractor for roof replacement Virginia Beach?
Start by checking the Virginia Department of Professional and Occupational Regulation for a current roofing license. Ask any prospect for that license number and verify it online—if it’s missing, walk away. Next, request proof of both general liability and workers’ compensation insurance, and make sure they’ll pull the required city permits. A reputable contractor will gladly share references from neighbors who’ve just finished a roof.
What permits and inspections are required for a roof replacement in Virginia Beach?
The city mandates a roofing permit before any demolition begins. Your contractor should file the paperwork, which usually costs a few hundred dollars, and schedule a final inspection once the job’s done. The inspector will confirm proper flashing, ventilation, and that the work matches the approved plans. Keeping a copy of the permit and inspection sign‑off in your home file protects you if you ever sell the house.
How long does a roof replacement usually take from start to finish?
For an average single‑story home, expect about 3‑5 days of crew time: one day for tear‑off, a day for deck repair and underlayment, and another day or two for shingle or metal installation. Add a couple of days for permit processing and final city inspection. Weather can add delays, so plan a buffer week in your calendar to avoid surprises.
What maintenance should I do after my new roof is installed?
Start with a “first‑look” walk‑around within 30 days to catch any loose shingles or flashings. Then set a seasonal routine: clear gutters after every big rain, trim overhanging branches, and rinse the roof with fresh water after a salty sea breeze. Inspect the attic twice a year for moisture or mold, and keep your warranty paperwork handy for quick claims.


Comments