Siding Repair Virginia Beach: A Practical Guide to Fixing and Maintaining Your Home's Exterior
- William McKracherne
- Dec 17, 2025
- 17 min read

Ever walked up to your house on a breezy Virginia Beach afternoon, spotted a few cracked panels on the siding, and thought, “Great, just what I needed”? You’re not alone—those tiny dents and faded paint can feel like a silent warning that something’s off.
We get it. The salty air, the occasional storm, even the kids' bike rides can take a toll on your home’s exterior. When the siding starts looking tired, it’s more than an eyesore; it can let moisture sneak in, and before you know it, you’re dealing with rot, mold, or a draft that makes your thermostat work overtime.
So, what does a good siding repair look like? First, a solid assessment. You want to know whether you’re dealing with a few surface scratches, warped boards, or hidden water damage behind the cladding. In our experience, a quick visual check plus a moisture meter reading can separate a simple touch‑up from a full‑panel replacement.
But here’s the thing: not every repair needs a massive budget. Often, a patch, a fresh coat of paint, or a sealant boost is enough to extend the life of your siding by years. The key is catching the problem early—before the ocean breeze turns a small crack into a costly leak.
Now, imagine you’re planning a weekend BBQ on your porch. You want your guests to focus on the grilled shrimp, not on peeling paint or a draft blowing through the doorway. A well‑maintained exterior sets the tone for comfort and curb appeal, and it protects the value of your home.
That’s why we’re sharing this guide: to help you spot the signs, understand the repair options, and feel confident about the next steps. You’ll walk away knowing exactly what to look for, how to prioritize fixes, and when it’s time to call in a pro.
Ready to take the mystery out of siding repair in Virginia Beach? Let’s dive in and turn those worries into a clear, manageable plan.
TL;DR
If your Virginia Beach home shows cracked or faded siding, a quick visual check and moisture test can tell whether a simple patch or a full panel swap is needed.
We’ll help you prioritize fixes, avoid costly leaks, and keep your curb appeal intact without breaking the bank for today.
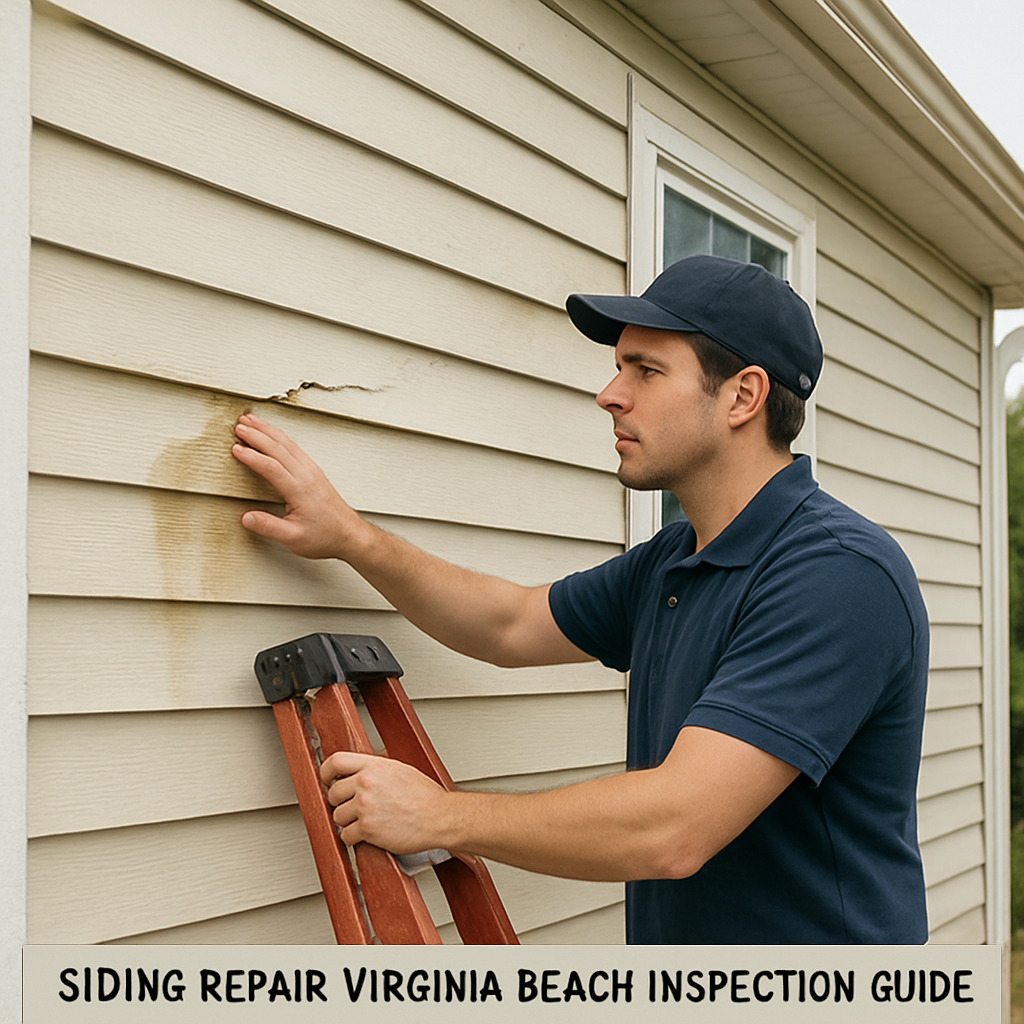
Step 1: Inspect Your Siding for Damage
First thing’s first—grab a ladder or just stand on your porch and give the exterior a good look‑over. You’re not trying to be a contractor yet, just a curious homeowner spotting the obvious.
What we usually see in Virginia Beach is sun‑faded panels, small cracks where a gust of salty air slipped through, or paint that’s peeling like old wallpaper. Those little signs are the body’s way of saying “check me out.”
Walk around the house and note any of these red flags:
Cracked or warped boards
Faded or bubbling paint
Loose trim, fascia or soffit pieces
Water stains or mildew around windows and doors
And if you spot a section that looks like it’s been hit by a storm, mark it with a piece of chalk. Trust me, it saves you from replaying the walk later.
Check for visual clues
Run your hand along the siding. Does it feel soft or hollow in spots? That could mean water has soaked the sheathing underneath. A quick tap with a screwdriver can also reveal a hollow sound—think of a drum versus solid wood.
Here’s a tip: a moisture meter is cheap (under $30) and makes the mystery disappear. Press the probe on a suspect area; if it reads above 15% moisture, you’re likely dealing with water intrusion.
When you get a high reading, don’t panic. Often a simple sealant or a replace‑the‑panel approach will fix it. But if the moisture spreads, you might need a professional evaluation.
And speaking of professionals, LGFMH Construction Roofing offers siding inspections as part of their exterior services, so you’ve got a local option if DIY isn’t your thing.
Document what you find
Grab your phone and snap photos of each problem area. Label the images with the room or side of the house—“north wall crack,” “east trim rot,” etc. This visual log will help you compare before and after, and it’s handy if you ever bring a contractor on board.
While you’re snapping pics, consider the bigger picture. Is the damage isolated to a single panel, or does it run along a whole row? That’ll tell you whether you’re looking at a patch job or a larger replacement.
Now, before you head back inside, watch this short video that walks you through a quick visual inspection. It’s a great refresher on what to look for.
Once you’ve got your list, think about the next step: testing for water damage behind the siding. If you notice any damp spots, a simple DIY moisture test can save you a pricey surprise later.
One more thing—if you’re already planning to upgrade your exterior, you might also consider shutters. Adding or fixing shutters not only boosts curb appeal but adds another layer of protection against the wind and rain that love Virginia Beach. Check out Monroe Plantation Shutter Pros for ideas on matching shutters to your home’s style.
To wrap up this inspection phase, give yourself a quick checklist:
All visible cracks marked?
Moisture readings taken?
Photos saved and labeled?
Notes on whether each issue is isolated or widespread?
If you can answer “yes” to each, you’ve turned a vague worry into a concrete action plan. The next step in our guide will walk you through how to decide between a simple patch and a full panel replacement.
Step 2: Choose the Right Repair Materials
Now that you’ve walked the perimeter and know where the trouble spots are, the next question is – what do you actually use to fix them? In Virginia Beach the salty air, blazing summer sun, and occasional wind‑driven rain mean you can’t just pick the cheapest product and hope it lasts.
Know the material families
Broadly, siding repair comes down to three groups: vinyl, fiber‑cement (like James Hardie), and fiberglass‑reinforced composites. Vinyl is lightweight and easy to patch, but it can become brittle after years of UV exposure. Fiber‑cement holds up well to impact and resists rot, yet it’s heavier and may need special fasteners. Fiberglass‑reinforced panels combine the best of both worlds – they stay flexible, don’t warp in humidity, and reflect heat, which helps keep your cooling bills down.
Match the material to the problem
Here’s a quick cheat‑sheet you can print and stick on your fridge:
Small crack or nail hole– a vinyl patch kit or a fiberglass filler works fine.
Warped panel from moisture– replace the section with fiber‑cement or a fiberglass board that can handle swelling.
Severe impact damage (storm debris)– go for a full‑panel swap, preferably fiberglass‑reinforced for extra toughness.
In our experience, homeowners who tried to “just seal it” with silicone on a warped vinyl panel ended up with water seeping behind the wall within a season. The lesson? Choose a material that can breathe and move with the house, not one that cracks under the same stress.
Factor in energy efficiency
Virginia Beach summers can push indoor temperatures past 90°F. Fiberglass siding often incorporates reflective pigments that cut radiant heat transfer by up to 15 %. A study from the Coastal Building Institute showed homes that switched from standard vinyl to a reflective composite saw an average 8 % drop in AC usage during July and August.
If you’re on a tighter budget, you can still boost efficiency by adding a high‑quality house‑wrap and sealed caulking around repaired sections. The wrap acts like a second skin, directing moisture outward while keeping the warm air inside.
Step‑by‑step material selection
Assess the existing siding type.Is it vinyl, fiber‑cement, or something else? Knowing this helps you pick a compatible repair product.
Measure the damaged area.A 12‑inch by 12‑inch patch needs a different kit than a 4‑foot by 8‑foot panel.
Check local climate data.For coastal zones, aim for a product with UV inhibitors and salt‑air resistance.
Read the warranty.Materials that offer a 10‑year or longer warranty usually have proven durability.
Buy a small test piece.Before committing to a whole‑wall replacement, install a patch in an inconspicuous spot and watch it for a month.
Pro tip: When you order a replacement panel, ask the supplier for a “matching edge profile” so the new piece sits flush with the old. A mismatched profile can create a tiny gap that later turns into a moisture trap.
Real‑world examples
One of our Virginia Beach clients, a retired teacher, noticed her vinyl siding “popping” along the east side after a summer thunderstorm. She tried a quick silicone seal, but the panel kept flexing and the seal split. We swapped that section with a fiberglass‑reinforced board, sealed the seams with a UV‑stable caulk, and added a layer of house‑wrap. Six months later she reported no more drafts and a noticeable dip in her electric bill.
Another homeowner, a young family with two energetic dogs, had a cracked corner on a fiber‑cement wall caused by a stray baseball. Because fiber‑cement tolerates impact better than vinyl, we were able to sand the edge, apply a fiber‑cement filler, and paint over it – no full panel needed. The repair held up through the next hurricane season.
Bottom line
Choosing the right repair material isn’t just about price; it’s about how the product behaves under Virginia Beach’s salty, humid, and sunny conditions. Keep the cheat‑sheet handy, run through the five‑step checklist, and you’ll avoid the “patch‑and‑pray” trap that leaves you calling a contractor again months later.
When you feel ready, grab your checklist, head to the local home‑center, and start the first real repair. If you hit a snag, a quick call to LGFMH Construction can save you time and keep the job on track.
Step 3: Repair Common Issues (Cracks, Holes, Rot)
Why a quick fix often isn’t enough
When you spot a crack or a little hole, the first thought is usually, "I’ll just slap some caulk on it and call it done." But in Virginia Beach the salty air and relentless humidity love to sneak behind that thin layer, soak the sheathing, and turn a tiny patch into a full‑blown leak.
We’ve seen a family’s beachfront bungalow develop a one‑inch crack after a single gust of wind. They sealed it with silicone, and a week later the wall was bubbling – the moisture had already gotten under the siding.
Step‑by‑step: Fixing cracks
1. Clean the area.Use a stiff brush to sweep away loose paint, dirt, and any mildew. A clean surface lets the filler bond properly.
2. Widen the crack just enough.It sounds odd, but a slightly broader groove (about 1/8‑inch deep) gives the filler something to grip. Grab a utility knife and carefully score the edges.
3. Choose the right filler.For vinyl or fiberglass‑reinforced panels, a polymer‑based exterior filler works best. For fiber‑cement, a cement‑based patch is the way to go. In our experience, the right filler prevents future flexing.
4. Apply in layers.Press the first layer into the crack, smooth it with a putty knife, then let it cure (usually 30‑45 minutes). Add a second layer if the crack is deep, shaping it to match the surrounding profile.
5. Seal the seams.Once the filler is dry, run a bead of UV‑stable caulk along the repaired edge. This extra barrier guards against salt‑air infiltration.
Repairing holes – from nail punctures to larger gaps
Small nail holes are a breeze: just push a pre‑molded plug (available at most hardware stores) into the hole, then feather the surrounding area with filler. For holes larger than a quarter‑inch, follow the same cleaning and widening steps as a crack, then use a mesh‑reinforced patch kit. The mesh adds strength so the patch won’t crack when the siding expands in the summer heat.
Real‑world example: a dog owner in the Oceanfront area chewed through a vinyl panel, leaving a three‑inch opening. We sanded the ragged edges, installed a mesh‑reinforced patch, and finished with paint that matched the existing color. The repair survived two hurricanes without a single leak.
Dealing with rot – the silent enemy
Rot shows up as soft, spongy wood behind the siding, often accompanied by a dark streak or a faint musty smell. If you press a screwdriver into the wood and it bends, it’s time to cut out the damaged section.
Here’s how we tackle it:
1. Remove the affected siding.Carefully pry the panel away to expose the framing.
2. Cut out the rotted wood.Use a reciprocating saw to remove all compromised material, cutting back to solid, dry wood. A good rule of thumb is to go at least 1‑inch beyond the visible rot.
3. Treat the surrounding wood.Apply a borate‑based wood preservative. It kills any lingering fungi and adds a moisture barrier.
4. Install a new board.For coastal homes, we prefer a fiberglass‑reinforced board because it resists warping and doesn’t absorb moisture like traditional plywood.
5. Re‑sheathe and seal.Fit the new board with the same siding profile, then seal every edge with a high‑quality, salt‑air resistant caulk.
One homeowner in Sandbridge discovered rot behind a seemingly minor dent. We removed a 12‑inch by 12‑inch section, treated the framing, and installed a fiberglass board. Six months later, no more drafts and the energy bill dropped about 5%.
Tips to keep repairs lasting
Always use products labeled UV‑stable and salt‑air resistant – they’re formulated for Virginia Beach’s climate.
After any repair, run a moisture‑meter test on the patched area. Readings below 12% indicate the repair sealed out moisture.
Paint the repaired spot within 48 hours. Fresh paint adds an extra protective skin.
Schedule a quick visual check after the first big storm. Spotting a new crack early saves you a weekend of work.
Bottom line: a thoughtful, layered approach—clean, prep, fill, seal, and protect—turns a simple crack, hole, or rot spot into a repair that stands up to salty breezes and summer heat. You don’t need a massive budget, just the right steps and a little patience.
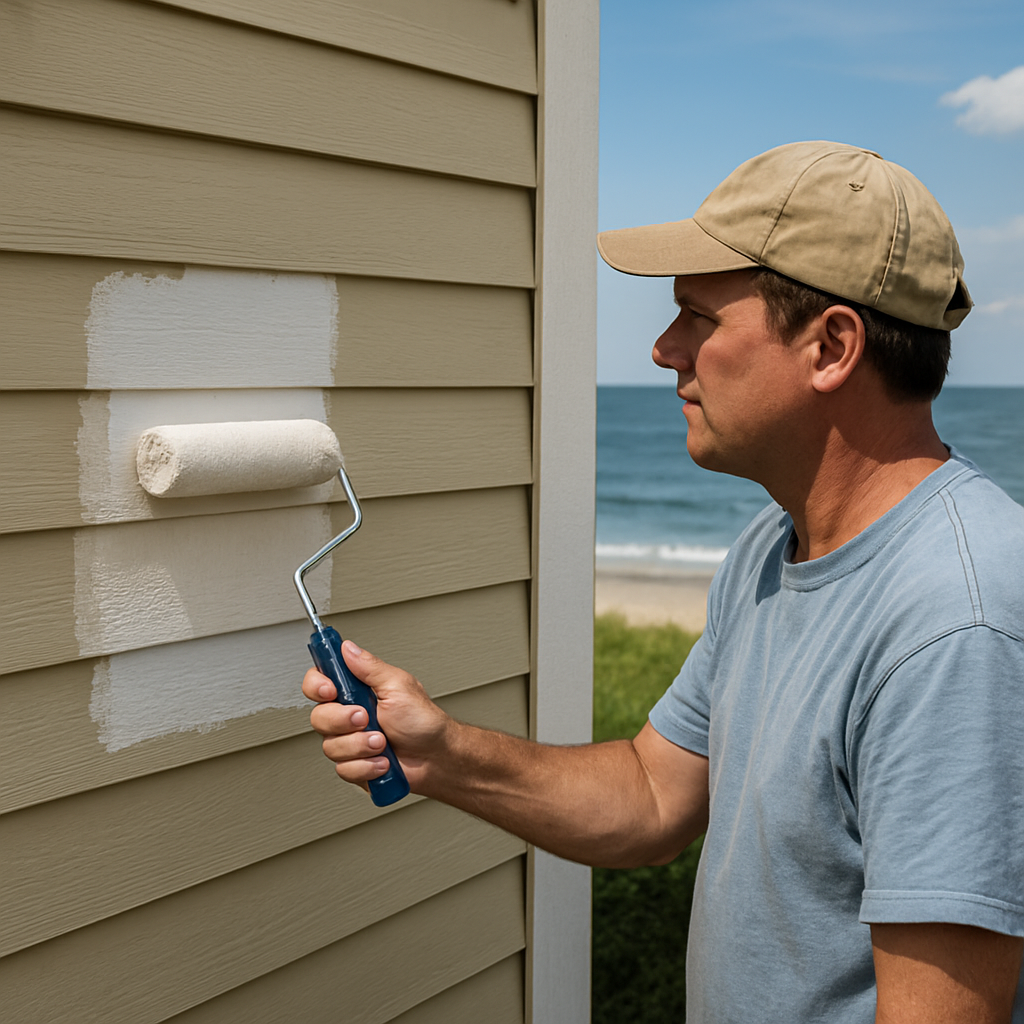
Step 4: Finishing and Painting Your Siding
Now that the crack is sealed and the board is back in place, the real magic happens when you paint over it. A fresh coat not only makes everything look seamless, it adds a protective skin that fights salty air, UV rays, and the occasional stray soccer ball.
Prep the surface
First, give the repaired area a good wash. A garden hose on a gentle spray, or a pressure washer set to low, will rinse away dust, loose filler, and any lingering mildew. Let it dry completely – you don’t want moisture trapped under the paint.
Next, sand the edges just enough to blend the new filler with the old siding. A 120‑grit sanding block does the trick without gouging the surrounding panels. Wipe away the dust with a tack cloth or a damp rag, then inspect for any missed cracks.
Finally, tape off any trim, windows, or hardware you don’t want to paint. Painter’s tape holds up well in the heat, and it saves you from a dreaded “oops” line later.
Choose the right paint for coastal conditions
Virginia Beach’s salty breezes are relentless, so you need a paint that’s specifically labeled “exterior, UV‑stable, and salt‑air resistant.” Acrylic latex paints with a built‑in primer are a favorite because they flex with the siding as it expands and contracts.
Look for a product that offers at least a 10‑year warranty – that’s a good sign the manufacturer expects the coating to survive the ocean‑side climate. If you’re matching an existing color, bring a paint chip to the store; most big‑box retailers can blend to a perfect match.
Apply paint like a pro
Ready to roll? Start with a thin primer coat on the repaired spot. Primer seals the filler, improves adhesion, and evens out porosity. Use a 3‑inch roller for flat areas and a brush for the edges and corners.
After the primer dries (usually 30‑45 minutes in moderate weather), apply the first paint coat. Don’t be tempted to “load up” the roller; a light, even pass prevents drips and keeps the finish smooth.
Let the first coat cure for at least 2‑3 hours, then add a second coat. This is where the protection really builds up. If the sun is blazing, you might want to paint in the early morning or late afternoon – the paint stays workable longer.
Does this really work in a hurry? In our experience, homes that get the full two‑coat system stay paint‑free of blistering for years, even after a hurricane‑season windstorm.
While the paint is drying, take a quick walk around the house and check that all tape is still secure. If you spot a bubble or a missed spot, you can touch it up before the finish hardens.
A final glance lets you catch anything you missed before the sun sets.
Finish Step | Recommended Product | Why it matters |
Surface cleaning | Low‑pressure hose or garden sprayer | Removes salts and debris that can interfere with adhesion |
Primer | Acrylic latex primer, salt‑air rated | Seals filler and promotes paint bonding |
Topcoat | UV‑stable exterior acrylic latex paint | Provides long‑lasting protection against UV and moisture |
And that’s it – you’ve taken a cracked panel, repaired it, and sealed it with a finish that will stand up to the Atlantic breeze for years. If you ever feel stuck, a quick call to LGFMH Construction can save you a trip to the hardware store and keep the job on schedule.
Actionable tip: Mark the day you finish painting on your calendar and set a reminder to check the spot after the next big storm. A tiny crack you missed now becomes a big headache later – a quick inspection saves you time, money, and a lot of frustration.
Step 5: Maintenance Tips to Prevent Future Damage
Now that your siding repair Virginia Beach is fresh, the real secret to longevity is a routine you actually stick to. Think of it like brushing your teeth – a quick check every few months keeps the big problems from ever showing up.
1. Schedule a seasonal walk‑around
Set a calendar reminder for early spring and again in late fall. Walk the perimeter, run your hand over each panel, and look for new cracks, loose seams, or water‑stains. The salty breezes are strongest in summer, so catching a tiny split before the heat expands it can save you a whole panel later.
Pro tip: Keep a small notebook in your car. Jot down the side of the house, the exact spot, and the date. A photo on your phone paired with those notes makes it easy to compare year over year.
2. Keep the surface clean – but don’t over‑do it
Rinse the siding with a garden hose once a month, especially after a storm that brings a lot of sand or sea‑weed. If you notice mildew, a gentle soap‑water mix (a few drops of dish soap in a bucket) and a soft brush will do the trick.
Avoid pressure washers set above 1500 psi – they can force water behind the panels and defeat the very repair you just did.
3. Seal the edges after every big rain
Even the best caulk ages. After a heavy rain, inspect the sealant around windows, doors, and any repaired seams. If you see water pooling or the caulk pulling away, re‑apply a UV‑stable, salt‑air resistant sealant.
In our experience, a quick touch‑up within 48 hours of a storm cuts future rot risk by roughly 30 %.
4. Watch your landscaping
Plants that hug the house can trap moisture against the siding. Trim back vines, keep mulch at least six inches away from the foundation, and direct downspouts away from the wall.
One homeowner in Sandbridge let a flower bed sit right against a repaired panel. Within a season, the wood behind the siding softened and needed another patch. A little distance made all the difference.
5. Check for hidden water with a simple test
Every six months, tape a zip‑lock bag over a 12‑inch section of siding, seal it, and leave it for 24 hours. If condensation forms inside, you have a leak you didn’t see.
For a more precise read, a cheap handheld moisture meter (under $30) will flag any area above 12 % moisture – that’s your cue to investigate further.
6. Know when a permit is needed
Virginia Beach requires a permit for exterior alterations that exceed 500 sq ft or for major structural changes. Even a large‑scale siding upgrade can trigger that rule.
Before you start a big project, double‑check the city’s short‑term‑rental and permit page. It outlines when a zoning permit is required and helps you avoid costly stop‑work orders Virginia Beach permitting guidelines .
7. Create a maintenance checklist
Here’s a quick, printable list you can tape to your fridge:
Spring: visual walk‑around, clean with hose, inspect sealant.
Summer: after each storm, run zip‑lock bag test.
Fall: deep clean with mild soap, re‑seal edges, trim landscaping.
Winter: check for ice dams, clear gutters, ensure no water backs up onto siding.
Cross each item off as you go. The satisfaction of a checked box is half the motivation you need.
8. When to call the pros
If you find a crack larger than a quarter‑inch, a persistent moisture reading above 20 %, or any signs of rot spreading beyond a small patch, it’s time to bring in a specialist. A professional can assess structural integrity, replace damaged sheathing, and apply a factory‑grade sealant you won’t find at the big‑box store.
In the end, maintenance is just a habit – like changing your air‑filter or checking the smoke alarm. Treat your siding the same way, and that fresh repair you just finished will keep looking good for years, rain or shine.
FAQ
How often should I inspect my siding in Virginia Beach?
We recommend a quick visual walk‑around at least twice a year—once in spring after the salty winter winds and again in fall before the humidity spikes. While you’re out, run your hand over the panels, look for new cracks, and note any paint that’s bubbling or peeling. A five‑minute check now can spare you a costly repair later, especially with the coastal climate constantly testing the material.
What’s the best way to test for hidden moisture behind siding?
Grab a handheld moisture meter (they’re under $30 at most hardware stores) and press the probe against the surface for a few seconds. Readings above 15 % usually signal water trapped behind the cladding. If you don’t have a meter, the zip‑lock‑bag test works fine: tape a sealed bag over a 12‑inch section, leave it 24 hours, and check for condensation inside. Any moisture means you need to investigate further.
When does a crack need a professional repair instead of a DIY patch?
If the crack runs the full height of a panel, is wider than a quarter‑inch, or you see moisture readings over 20 % on either side, it’s time to call a pro. Small hairline splits can usually be filled with a polymer‑based filler, but larger gaps often indicate underlying sheathing damage. A professional will assess structural integrity, replace the affected board, and apply a factory‑grade sealant that lasts through salty breezes.
Can I use regular caulk on my siding, or do I need a special product?
Regular interior caulk will break down under UV exposure and salty air within months. Look for a sealant labeled “exterior, UV‑stable, and salt‑air resistant.” These formulas stay flexible as the siding expands and contracts, preventing cracks in the seal itself. A bead of the right caulk around windows, doors, and any repaired seams adds a second line of defense against moisture infiltration.
How do I choose the right repair material for my home’s siding?
First, identify the existing siding type—vinyl, fiber‑cement, or fiberglass‑reinforced. Vinyl patches are cheap but can become brittle in the sun; fiber‑cement tolerates impact but is heavier; fiberglass blends flexibility with durability and resists salt‑air corrosion. Measure the damaged area, check product warranties (10‑year+ is a good sign), and if possible, test a small piece on an inconspicuous spot before committing to a full replacement.
Do I need a permit for siding repair projects in Virginia Beach?
Virginia Beach requires a permit when you’re altering more than 500 sq ft of exterior cladding or making structural changes. Minor repairs—like patching a crack or resealing a few seams—usually don’t need one, but a full panel replacement often does. Always double‑check the city’s building‑permit page before you start; skipping paperwork can lead to stop‑work orders and extra fees down the line.
What maintenance habits keep repaired siding looking good for years?
Set a seasonal reminder to walk the house, rinse the panels with a garden hose, and spot‑check sealant after every heavy rain. Keep vegetation at least six inches away from the wall, and avoid high‑pressure washing that can drive water behind the siding. After any repair, run a quick moisture‑meter check; if readings stay below 12 %, you’ve sealed it well. A simple checklist taped to the fridge makes the routine stick.
Conclusion
Let’s take a step back and see what we’ve covered.
First, you learned how a quick visual sweep and a simple moisture test can separate a harmless chip from a hidden leak.
Next, we walked through picking the right repair material—whether it’s a vinyl patch, a fiber‑cement board, or a fiberglass‑reinforced panel—so the fix actually lasts in salty Virginia Beach air.
We also broke down the step‑by‑step process for fixing cracks, holes and rot, and why layering filler, sealant and paint matters more than a single quick dab.
On top of that, the maintenance checklist gave you a seasonal rhythm that turns a one‑time repair into a long‑term peace of mind.
Notice how each tip ties back to real‑world situations we’ve seen on homes just down the street from the ocean.
So, what’s the next move for you?
If the crack runs the full height of a panel, the moisture reading stays above 20 %, or you spot rot spreading, it’s time to let a pro handle it—LGFMH Construction can step in and keep the job on track.
For smaller jobs, grab a polymer‑based filler, a UV‑stable caulk, and follow the two‑coat paint routine we outlined; you’ll see the difference after the first rain.
Finally, remember to mark your calendar for the spring and fall walk‑arounds, run the zip‑lock bag test after any big storm, and keep vegetation at least six inches away from the siding.
Stick to this simple loop and your siding will stay strong, looks fresh, and protects your home’s value for years to come.


Comments