Step-by-Step Gutter Installation Virginia Beach Guide for Homeowners
- William McKracherne
- Dec 13, 2025
- 17 min read

Ever watched a rainstorm roll in off the Atlantic and felt that uneasy knot in your stomach, wondering if your home’s gutters will hold up?
If you’re living in Virginia Beach, that feeling is more common than you think. The salty sea breeze, the occasional tropical downpours, and the shifting sands can turn a perfectly good gutter system into a leaky nightmare in just a few seasons.
That’s why getting the right gutter installation Virginia Beach style matters. It’s not just about slapping some metal on the roof edge; it’s about choosing the right profile, the proper slope, and materials that won’t corrode when the ocean spray settles on them.
In our experience, homeowners who skip the little details end up spending twice as much on repairs down the road. A sagging gutter here, a rusted seam there – those tiny issues compound into water damage, mold growth, and even foundation cracks.
So, what should you look for when you call a local pro? First, make sure the crew measures the roof pitch and tailors the gutter length to avoid any gaps. Second, ask about aluminum versus steel – aluminum resists rust, which is a big win when salty air is a constant visitor. Third, check that they’ll secure the hangers properly; a loose hanger is the first sign of a future sag.
We’ve helped dozens of Virginia Beach families upgrade their drainage system, and the biggest takeaway is simple: a well‑installed gutter set is an invisible shield that lets you sleep soundly during a storm.
Ready to ditch the worry and let the rain do its thing? Let’s walk through what a quality gutter installation looks like in Virginia Beach, from the first on‑site assessment to the final seal that keeps water where it belongs – out of your home.
When you’re ready, a quick call can set the process in motion and give you a clear, upfront estimate – no surprise fees later.
TL;DR
A proper gutter installation in Virginia Beach protects your home from salty air corrosion, water damage, and costly repairs by ensuring a tight fit and rust‑resistant materials.
We recommend measuring roof pitch, choosing aluminum, and securely mounting hangers, so you can sleep soundly during storms knowing the drainage system works flawlessly.
Step 1: Assess Your Home & Gather Materials
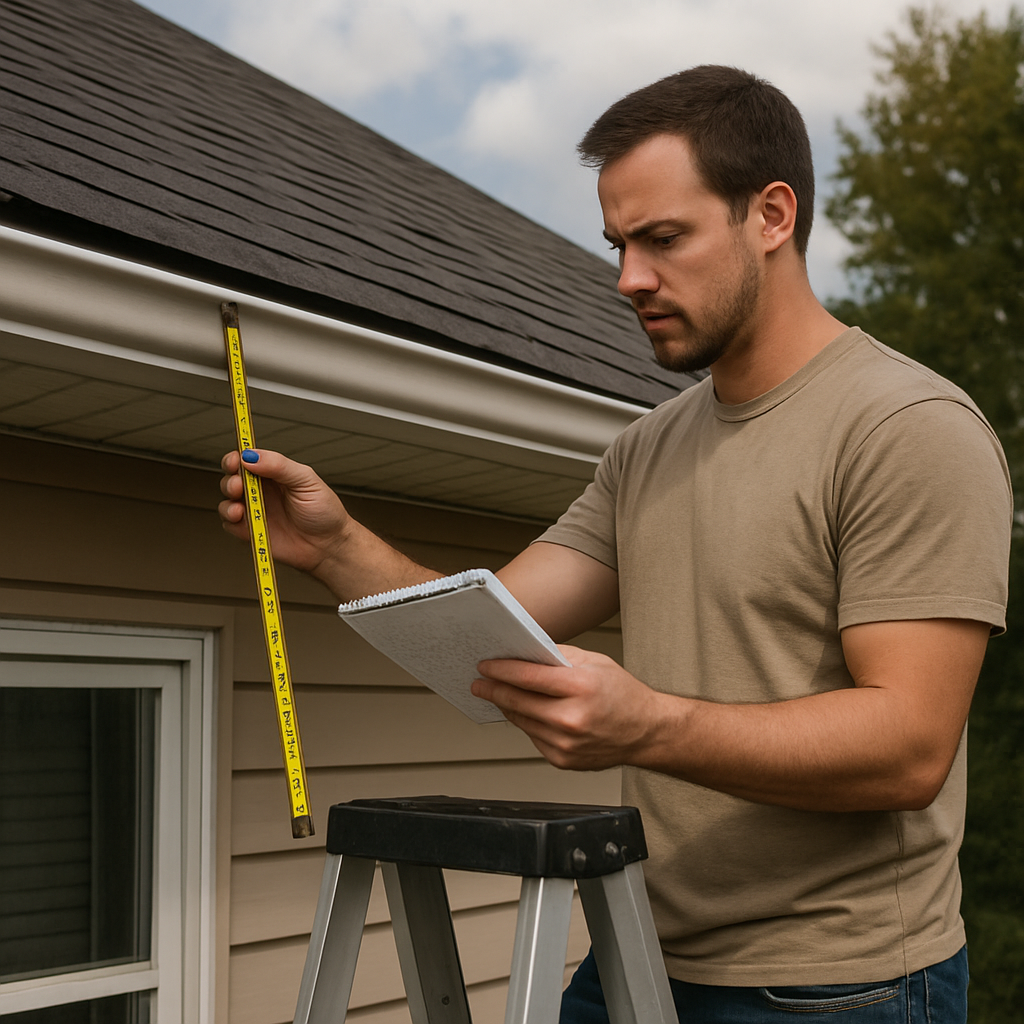
Before any ladder or sealant touches your roof, you need to know exactly what you’re working with. I always start by walking around the house, feeling the wind on the eaves and noting any sagging spots – that’s the moment you realize the gutters have been fighting the salty Virginia Beach air for years.
First, grab a tape measure, a notebook, and a flashlight. Measure the length of each roof run, then jot down the pitch. A steep pitch means you’ll need shorter sections and more hangers to keep the water flowing. A shallow pitch calls for a deeper gutter profile so the water doesn’t spill over.
Next, check the existing downspout locations. Are they too close together? Too far apart? In our experience, a well‑placed downspout is the difference between a dry foundation and a soggy basement. Mark each spot on your sketch and think about where you might need extensions to keep the water away from the house.
Now, inventory the materials you’ll need. Here’s a quick checklist:
Aluminum or zinc‑coated steel gutters (aluminum is a favorite in coastal areas because it resists rust).
Gutter hangers or brackets – stainless steel is best for durability.
Sealant that’s UV‑resistant and flexible.
Screws, rivets, and a drill with a torque setting.
Safety gear: gloves, safety glasses, and a sturdy ladder with a stabilizer.
Do you ever feel overwhelmed by the sheer list? Take a breath. You’re not buying a whole hardware store; you’re just gathering the pieces that fit your home’s unique shape.
One tip that often saves homeowners money: order a little extra material. Cutting a gutter a few inches too short is easy to fix; running out of sealant midway is a frustrating stop‑and‑go. A 10% surplus is a safe cushion.
While you’re gathering, it’s a good moment to think about the next steps in your home improvement journey. If you’re planning a kitchen refresh or new hardwood floors, you might want to sync timelines. Millena Flooring offers a seamless interior‑exterior coordination service that can help you line up those projects without stepping on each other’s toes.
Once you have measurements and a material list, double‑check everything against the manufacturer’s specifications. That’s where a quick glance at the product data sheet can prevent a costly re‑order later.
And if you’re still not sure about the right gutter size for your roof, our own LGFMH Construction Roofing page walks through the most common profiles and why aluminum usually wins in a salty climate.
Ready for the visual aid? Below is a short video that walks you through the assessment phase step‑by‑step – pause it whenever you need to double‑check a measurement.
After the video, you’ll have a clear picture of what you need to buy and where each piece belongs.
Don’t forget the smaller, often‑overlooked tasks: cleaning the roof deck of debris, checking for rusted flashing, and making sure the soffit vents aren’t clogged. A clean deck means the gutters will sit flush and perform better.
And here’s a little extra tip that many DIYers miss – when you’re trimming the gutter ends, cut them at a 45‑degree angle away from the downspout. That little angle helps water flow toward the spout instead of pooling at the edge.
Finally, keep a small notebook or digital note on your phone with the exact part numbers you ordered. When the delivery truck arrives, you can verify you got the right lengths and brackets before they’re loaded onto the truck.
If you’re interested in a broader home‑maintenance checklist, the candle jar cleaning guide actually includes a section on keeping gutters free of debris – it’s a quirky connection, but the principle of regular cleaning applies everywhere.
With your home assessed and materials gathered, you’re ready to move on to the next phase: installing the hangers and positioning the gutters. Trust the process, and you’ll have a drainage system that handles the ocean breezes without a hiccup.
Step 2: Measure and Plan Gutter Layout
Alright, you’ve already scoped the house – now it’s time to turn those notes into numbers.
The secret to a leak‑free system is a solid layout plan before you even lift a single gutter section.
Grab a tape measure, a level, and a piece of graph paper or a digital sketch app. Trust me, a quick doodle saves hours of guesswork later.
Watch that short walkthrough; it shows exactly how we line up the gutter run on a typical Virginia Beach roof.
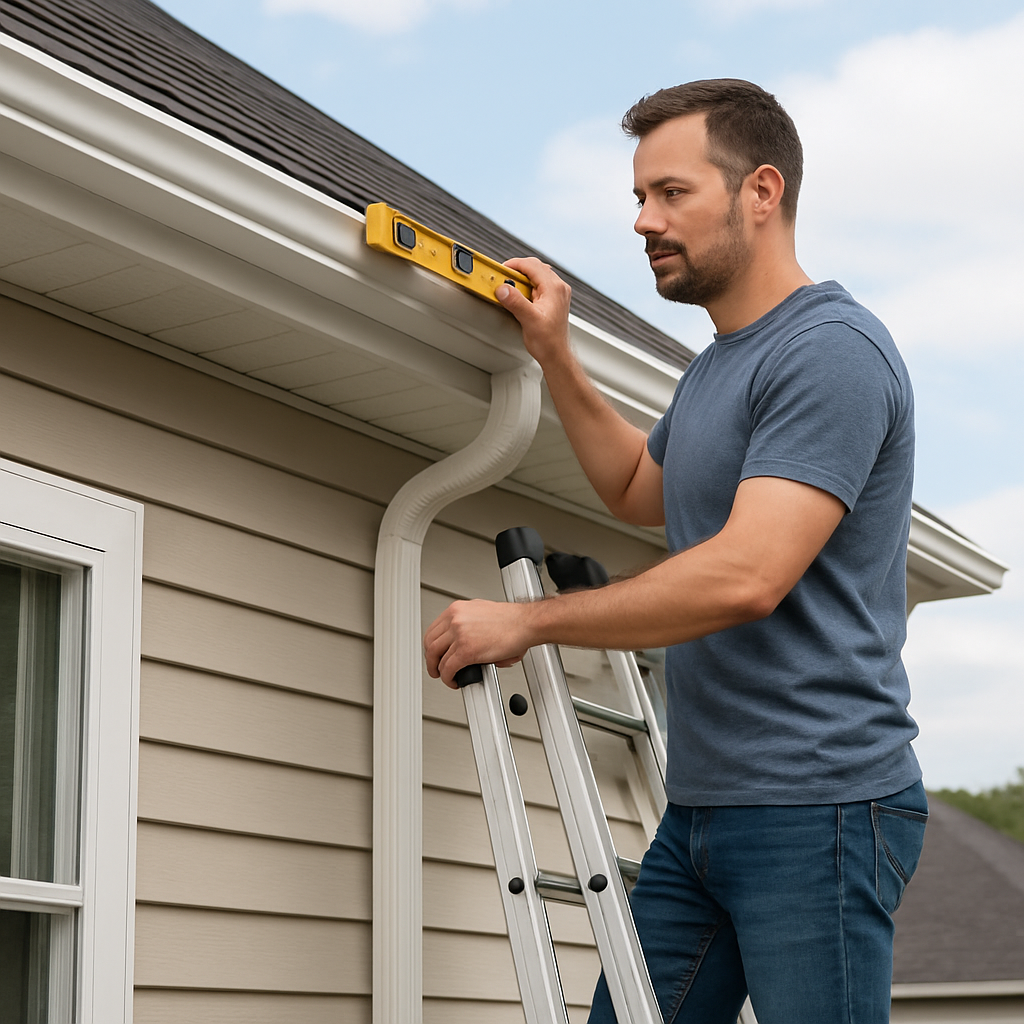
First up: measure the roof pitch. Most coastal homes sit between 4:12 and 6:12. A simple smartphone inclinometer or the classic rise‑over‑run method (measure 12 inches along the rafters, then the vertical rise) gives you the angle. Write it down next to each side of the house.
Next, walk the eave line and note every break – bay windows, columns, or any protruding trim. For each segment, record the horizontal distance and the exact point where a downspout will exit. In our neighborhood, the Johnsons discovered a hidden soffit vent that forced them to add a short gutter splice; a quick measurement would have caught that before the first cut.
Now calculate the gutter length. Multiply the linear footage of each run by the appropriate gutter size – 5‑inch for low‑slope roofs, 6‑inch for steeper pitches. Remember the extra 2‑foot allowance for end caps and a few inches for the slope you’ll create later.
Speaking of slope, you’ll need about a quarter‑inch drop per 10 feet of gutter to keep water moving toward the downspout. Take your total run length, divide by 40, and that’s the vertical drop you’ll build into the hanger placement.
Mark the hanger locations on the eave. Most pros space them 24 inches apart, but on a windy Virginia Beach night you might want 18 inches for extra rigidity. Use a chalk line or a laser level to draw a faint guide across the fascia – this is where the hidden “secret” of a straight, sag‑free gutter lives.
Don’t forget the downspout layout. Ideally, each downspout should be within three to four feet of a corner or a wall to allow easy connection to the drainage system. Measure the distance from the gutter exit to the house foundation; you’ll need at least six inches of clearance to avoid water pooling at the base.
A quick sanity check: add up the total gutter length you’ve measured, then compare it to the amount of material on your order sheet. If you’re off by more than 5 percent, revisit the measurements – it’s cheaper to re‑measure now than to order extra sections later.
Finally, write a simple checklist: roof pitch, run lengths, hanger spacing, downspout locations, and required slope. Keep that sheet on the truck; it becomes your project blueprint and a great hand‑off for any crew you hire.
For a deeper dive into local building codes and recommended gutter dimensions, see the Virginia Beach specifications guide .
With those numbers locked down, the actual installation becomes a matter of cutting, fitting, and fastening – no surprises, just a smooth flow from roof to ground.
Step 3: Install Gutter Hangars and Secure System
Alright, you’ve got your measurements, your cut‑to‑length sections, and a clear plan on the chalk line. Now it’s time to turn those pieces into a solid, sag‑free gutter line that can take on Virginia Beach’s salty breezes and sudden downpours.
Gather Your Toolkit
Before you climb the ladder, lay out everything you’ll need: hidden‑clip hangers (or the continuous‑hanger™ if you’ve opted for that extra rigidity), a cordless drill with a 1/8‑inch drill bit, stainless‑steel screws, a level, a tape measure, a pencil, and safety gear – gloves, non‑slip boots, and a harness if you’re working more than a couple of feet off the ground.
In our experience, having a spare set of hangers on hand saves a frantic trip back to the truck when you hit a tricky spot around a vent or a bay window.
Mark the Hanger Locations
Remember the slope we calculated earlier? That quarter‑inch drop per 10 feet translates into a subtle rise along the eave. Using your chalk line, draw a faint line where the top of the gutter will sit. Then, starting at one end, mark a point every 24 inches – that’s the standard spacing for most residential installations.
If you live in a high‑wind zone, like many neighborhoods right on the Atlantic side, tighten that spacing to 18 inches. The extra hangers act like a spine, keeping the gutter from flexing when gusts hit.
Real‑world example: The Martinez family on Pacific Avenue noticed their old gutters wobbling after a nor’easter. We installed hangers every 18 inches, and the gutters have stayed rock‑solid through two more storms.
Pre‑drill the Fascia
Take a moment to pre‑drill pilot holes in the fascia board where each hanger will sit. This prevents the wood from splitting, especially on older cedar that’s been weathered for years. A 1/8‑inch bit is enough – just deep enough to guide the screw.
Tip: If your fascia is a composite material, use a slightly larger bit (about 3/16‑inch) to avoid cracking.
Install the Hangars
Snap each hidden‑clip hanger onto the pre‑drilled hole, then drive a stainless‑steel screw until it’s snug but not over‑tightened. Over‑tightening can crush the clip and reduce its load‑bearing capacity.
When you reach a corner or a spot where a vent protrudes, use a bendable hanger or a custom‑cut bracket. The key is to keep the gutter’s line continuous – any break creates a weak point where water can pool.
Secure the Gutter Sections
Starting at the low point of the slope, slide the first gutter section onto the installed hangers. Most hidden‑clip systems click into place, giving you a tight fit without a lot of fiddling.
Next, attach the adjoining section, overlapping the seams by at least 2 inches and sealing with a marine‑grade sealant. This prevents corrosion from the salty air and stops leaks at the joint.
Example: The Johnsons, whose home sits just a block from the boardwalk, had a seam leak after a season of exposure. Adding a continuous‑hanger™ and marine sealant eliminated the drip completely.
Check the Pitch
Once the full run is up, grab a level and place it on the gutter about 10 feet from the low point. You should see a slight tilt toward the downspout – roughly a quarter‑inch. If it’s flat or tilting the wrong way, loosen the nearest hangers and shift the gutter a fraction until the slope is correct, then retighten.
Even a small slope error can cause water to sit, leading to rust or ice dams in winter.
Final Tightening and Inspection
Walk the entire line and give each hanger a firm tug. Any that wobble need a tighter screw or an additional hanger nearby. Pay special attention to areas around roof penetrations – those are common failure points.
As a quick sanity check, run a garden hose along the gutter at a moderate flow. Watch for any sag, leak, or water spilling over the edge. If you see a drip, tighten that hanger or add a spacer.
Seal and Protect
Apply a bead of marine‑grade sealant along every seam, end cap, and where the gutter meets the downspout. This extra layer shields the metal from the salty spray that’s a daily reality in Virginia Beach.
Pro tip: A thin line of silicone on the interior of the hanger clip can also reduce moisture buildup, extending the life of the fasteners.
With the hangers locked in, the slope verified, and the seals in place, you’ve built a gutter system that’ll handle a tropical downpour without a sag in sight. The next step is to test it with real rain – or a hose – and enjoy the peace of mind that comes from knowing your home is protected.
Step 4: Attach Gutters and Downspouts
Gather the downspout parts
Before you climb back up, lay out everything you need: the downspout sections (usually 3‑ft lengths), elbows, a downspout extension, a few brackets, stainless‑steel screws, a drill, a level, and a bucket for any stray water. In Virginia Beach we often choose 3‑inch diameter aluminum downspouts because they shed salty spray better than steel.
Pro tip: keep an extra elbow on hand. A mis‑aligned corner is the most common reason a downspout will leak or pull away after a gusty nor'easter.
Fit the downspout to the gutter
Start at the gutter outlet. Slip the downspout over the gutter's lip and make sure the bottom edge sits just inside the gutter’s trough. If you’re working with a K‑style gutter, you’ll want the downspout’s “lip” to overlap the gutter’s bottom flange by about half an inch – that extra overlap prevents water from sneaking behind the joint.
Real‑world example: The Martinez family on Atlantic Avenue had a 2‑inch gap where the downspout met the gutter, and after a 1‑inch rainstorm water was dripping onto their patio. Adding a simple rubber gasket and sliding the downspout a little deeper solved the issue instantly.
Secure the downspout to the wall
Mark the bracket locations about 24 inches apart, but tighten that to 18 inches if your home sits directly on the dunes where wind speeds routinely top 30 mph. Drill pilot holes into the siding or fascia, then drive the brackets in with stainless‑steel screws. Once the brackets are in, lift the downspout and snap it into place.
Use a level to check that the downspout slopes at least 1/4‑inch per 10 feet toward the ground. A common mistake is to let the downspout sit too low near the wall, which creates a pooling puddle that can attract termites or mold.
Seal, extend, and test
Apply a bead of marine‑grade sealant where the downspout meets the gutter and again where the elbow connects to the wall. This protects the metal from the salty Atlantic breeze that can accelerate corrosion in just a few seasons.
Attach a 2‑foot extension that throws water at least six feet away from your foundation. In our experience, homes that keep the discharge point beyond the footings see 40 % fewer basement moisture issues during a hurricane‑season surge.
Now run a garden hose through the gutter, watch the water travel the full length, and make sure it flows smoothly out the downspout without splashing. Any drips mean you need to tighten a bracket or add another sealant bead.
Quick checklist before you call it a day
All downspout sections cut to length and free of burrs.
Brackets spaced 18–24 inches, securely fastened with stainless screws.
Downspout slope at least 1/4‑inch per 10 ft toward the ground.
Sealant applied at every joint and at the gutter‑downspout interface.
Extension positioned ≥6 ft from the foundation.
Component | Recommended Tool/Material | Key Tip |
Downspout | 3‑inch aluminum, 3‑ft sections | Overlap gutter lip by ½ in for a watertight seal. |
Brackets | Stainless‑steel brackets & screws | Space 18 in in windy coastal zones. |
Sealant | Marine‑grade silicone or acrylic | Apply a continuous bead at every joint. |
That’s it – you’ve taken the final step in a solid gutter installation for Virginia Beach. With the gutters firmly attached and the downspouts properly sloped, you’ll watch a storm roll in and feel confident that the water stays exactly where it belongs: far away from your roof, siding, and foundation. If you ever need a second pair of eyes, remember that LGFMH Construction is just a call away for a quick inspection.
Step 5: Final Inspection, Maintenance Tips, and Permits
Now that the gutters and downspouts are snugly in place, it’s time for the moment we’ve all been waiting for: the final inspection. This isn’t just a formality – it’s your safety net that catches any missed slope, loose bracket, or stray bead of sealant before the next storm rolls in.
Final Walk‑Through Checklist
Grab a ladder, a level, and a garden hose. Start at the low‑point of each run, run water for about 30 seconds, and watch the flow. Do you see a steady stream toward the downspout, or does water linger in a dip?
Next, run your hand along every bracket. Anything that wiggles more than a millimeter needs a tighter screw or an extra hanger. Remember our rule of 18–24 inches spacing – if a span looks stretched, add a hidden‑clip before you call it done.
Finally, inspect every joint with a flashlight. A continuous bead of marine‑grade sealant should be visible, but no globs spilling onto the gutter interior. Any gaps? Apply a thin line of silicone and smooth it with a finger.
Seasonal Maintenance Routine
Even the best gutter installation needs a little love every few months. In Virginia Beach, the salty breezes and occasional hurricanes make cleaning a bit more frequent than inland homes.
Spring: Pull the first leaf‑laden debris out, rinse the downspouts, and check the slope again. A quick level test can catch any settling that occurred over winter.
Summer: After a heavy rain, walk the roofline and look for corrosion spots on the aluminum. A light sand‑paper swipe followed by a fresh coat of sealant can keep the metal shining for years.
Fall: This is the perfect time to clear out the last of the summer pollen and inspect the flashing around roof penetrations. If you notice any water tracking behind the flashing, reseal it right away.
Winter: When the temperature drops below freezing, run a gentle stream of water through the gutters to melt any ice that might form. Avoid using hot water – the sudden temperature shock can crack the aluminum.
Pro tip: Keep a small notebook in your toolbox with dates, observations, and any small repairs you performed. Over time you’ll spot patterns, like a particular bracket that loosens every spring, and you can pre‑emptively tighten it before the next storm.
When Do You Need a Permit?
Most residential gutter projects in Virginia Beach don’t require a building permit, but there are exceptions. If your downspout extension runs into a public right‑of‑way, or if you need to modify a sidewalk or driveway to accommodate the new drainage path, the city’s Department of Public Works steps in.
The city’s right‑of‑way permit guidelines explain that any construction affecting sidewalks or lanes between May 1 and September 30 is generally prohibited unless you secure a seasonal variance. That means you’ll need to submit a variance request well before the summer construction window opens.
Typical scenarios that trigger a permit include:
Extending a downspout beyond the property line to connect to a municipal drainage system.
Installing a decorative splash block that encroaches on a public sidewalk.
Excavating near a storm‑water inlet that the city manages.
If none of those apply, you’re good to go – just keep your paperwork for the homeowner’s record. A quick photo of the finished system can serve as proof of compliance if an inspector ever stops by.
Getting a Variance (If Needed)
Suppose you’re renovating a beachfront property where the driveway ends right at the sand‑filled right‑of‑way. The city’s Seasonal Restriction Policy will block any lane closures during the busy summer months, but you can request a variance.
Start by filling out the variance form linked on the city’s permit page, attach a site plan showing the exact location of the downspout, and write a short justification: “Downspout extension needed to prevent water from pooling against the foundation, which could cause basement flooding.” The Director of Public Works reviews the request and, if the impact is minimal, grants a waiver.
In our experience, most homeowners get approval within two weeks as long as the request is clear and the proposed work won’t disrupt pedestrian traffic. Keep a copy of the approved variance on site during any final inspections – the city inspector will ask to see it.
With the inspection signed off, the maintenance calendar set, and any permits or variances in hand, you can finally sit back and watch the next storm roll in, confident that your gutter system will do exactly what it’s supposed to: steer water away from your home’s roof, siding, and foundation.
FAQ
Below are some of the most common questions we hear from homeowners in Virginia Beach who are tackling a gutter installation. We’ve pulled together clear, actionable answers to help you feel confident about every step.
How much does a gutter installation in Virginia Beach typically cost?
Pricing can vary widely because it depends on the size of your home, the material you choose, and any custom work like extra downspout extensions.
In our experience, a standard aluminum K‑style system for a typical two‑story house runs between $1,200 and $2,500, including labor, fasteners, and sealant.
If you need a larger 6‑inch profile or hurricane‑rated brackets, expect the total to edge toward the higher end of that range.
Do I need a permit for gutter installation in Virginia Beach?
Most residential gutter projects don’t require a building permit, but there are exceptions when the work touches public right‑of‑way or modifies a sidewalk.
If you’re extending a downspout onto a municipal drainage easement, the city’s Department of Public Works will ask for a simple variance.
It’s a quick form, and once approved you can keep the paperwork on site for any final inspection.
What type of gutter material holds up best against salty sea air?
Aluminum is the go‑to choice for coastal homes because it forms a protective oxide layer that resists rust, even after years of exposure to ocean spray.
Look for a 300‑series, marine‑grade alloy with a pre‑painted finish; the coating adds an extra barrier against corrosion.
While steel can be strong, it will rust faster in Virginia Beach’s salty environment unless you invest in costly zinc galvanizing.
How often should I clean my gutters after a new installation?
Even the best‑installed system gathers leaves, pine needles, and sand, especially after a beach storm.
We recommend a light rinse and visual check after every major rain event for the first six months, then schedule a full clean‑out twice a year—once in spring and once in fall.
If you notice water spilling over the edge or sagging sections, it’s a sign to clear debris sooner.
Can I install gutters myself or should I hire a pro?
If you’re comfortable working on a ladder, have basic carpentry tools, and can follow a precise slope calculation, a DIY install is doable.
The trickiest parts are pre‑drilling the fascia without splitting the wood and achieving the exact quarter‑inch drop per 10 feet.
For most Virginia Beach homeowners, hiring a local crew saves time and ensures the hidden‑clip hangers are spaced correctly for windy conditions.
What’s the best slope for a gutter system on a coastal roof?
The rule of thumb is a ¼‑inch drop for every 10 feet of run.
That tiny angle pushes water toward the downspout without creating a noticeable tilt.
Measure from the high point of the gutter to the low point, divide the length by 40, and use that number as the vertical drop.
A proper slope prevents pooling, which is the main cause of rust and ice dams in winter.
How do I know if my downspouts are placed correctly?
Downspouts should exit the gutter within three to four feet of a corner or wall, then drop at least a ¼‑inch per 10 feet toward the ground.
They need a minimum six‑inch clearance from the foundation to keep water from seeping into the slab.
A quick test is to run a garden hose through the gutter; watch the water flow out the downspout and make sure it lands at least six feet away from the house.
Conclusion
Wow, we’ve come a long way from that first walk around the roof to a fully sealed, sloped gutter line that can handle Virginia Beach’s salty breezes and sudden downpours.
Remember the basics: measure your roof pitch, lay out the hanger spacing, cut the sections to the right length, set that quarter‑inch‑per‑10‑feet slope, and seal every seam with marine‑grade silicone. Those tiny details are the difference between water sliding off cleanly and a rust‑filled nightmare later.
Now think about the long game. A quick hose test after installation is great, but a seasonal check‑up—clearing debris, re‑tightening any loose clips, and re‑inspecting the downspout clearance—keeps the system humming year after year.
So, what’s the next move? If you’re feeling unsure about any step, give LGFMH Construction a call. We can swing by, verify the slope, and make sure every hidden‑clip hanger is snug before the first storm of the season hits.
Bottom line: a well‑installed gutter system protects your roof, siding, and foundation, letting you enjoy beach life without worrying about water damage. You’ve got the know‑how—now put it to work and watch the rain roll off exactly where it should.
When the next storm hits, you’ll know your home is safe and the gutters are doing their job.


Comments