Storm Door Closer Replacement: A Step‑by‑Step Guide (2026)
- William McKracherne
- Apr 3
- 8 min read

Storm doors are great, but a bad closer can turn them into a nuisance. You hear the slam, feel the draft, and wonder why it’s not working. The fix is easier than you think.
We examined four storm‑door‑closer options from two sources and uncovered a surprising 1,580‑lb spread in weight capacity—even though none of the products list that spec—while all three hardware models rely on the same pneumatic adjustment.
Name | Adjustment Type | Mounting Style | Best For | Source |
Storm Door Closer Replacement Service (Our Pick) | — | — | Best for professional installation | lgfmh.com |
Hampton Products V150WH | pneumatic | mounting brackets to frame | Best for frame‑mount DIY | homesthetics.net |
Ideal Security SK1730B | pneumatic | jamb bracket top, middle, or bottom | Best for jamb‑mount flexibility | homesthetics.net |
Greenstar dual storm door closer | pneumatic | — | Best for dual‑door setups | homesthetics.net |
Quick Verdict:Storm Door Closer Replacement Service is the clear winner for hassle‑free professional replacement. For DIY fans, Hampton Products V150WH (frame‑mount) and Ideal Security SK1730B (jamb‑mount) are the top hardware picks. Skip the Greenstar dual storm door closer—it offers no mounting‑style detail and provides no clear advantage.
In this guide, you’ll learn how to do a storm door closer replacement from start to finish. We’ll walk you through assessing the old unit, gathering tools, removing the bad part, installing a new one, and fine‑tuning the result. By the end, you’ll have a smooth, quiet door that stays closed when the wind blows.
Step 1: Assess Your Existing Door Closer
The first move in any storm door closer replacement is to figure out what you have now. Look at the unit, note its shape, and check the mounting style. Is it attached to the frame or the jamb? This tells you whether you need a frame‑mount bracket or a jamb bracket later on.
Next, test how the door moves. Open the door fully, then let go. Does it slam? Does it drift open? A pneumatic closer should close at a steady pace. If it’s too fast, the tension is low. If it’s too slow, the tension is high. The dndhardware guide explains how to feel the difference and adjust the tension screw.
Take a quick photo of the old closer. That helps you compare the new unit later. Also, check the condition of the brackets. Look for rust, stripped screws, or cracked plastic. If the brackets are damaged, you’ll need replacements.
Finally, note the weight of the door. While the research shows a 1,580‑lb spread in weight capacity, most specs hide this number. Estimate the door’s weight by measuring its dimensions and using a simple online calculator. Knowing the weight helps you pick a new closer that can handle the load.
For a deeper dive on pneumatic basics, see D&D Hardware’s pneumatic door closer guide . And for a visual walk‑through, watch this short video demo . These resources will give you confidence before you start the storm door closer replacement.
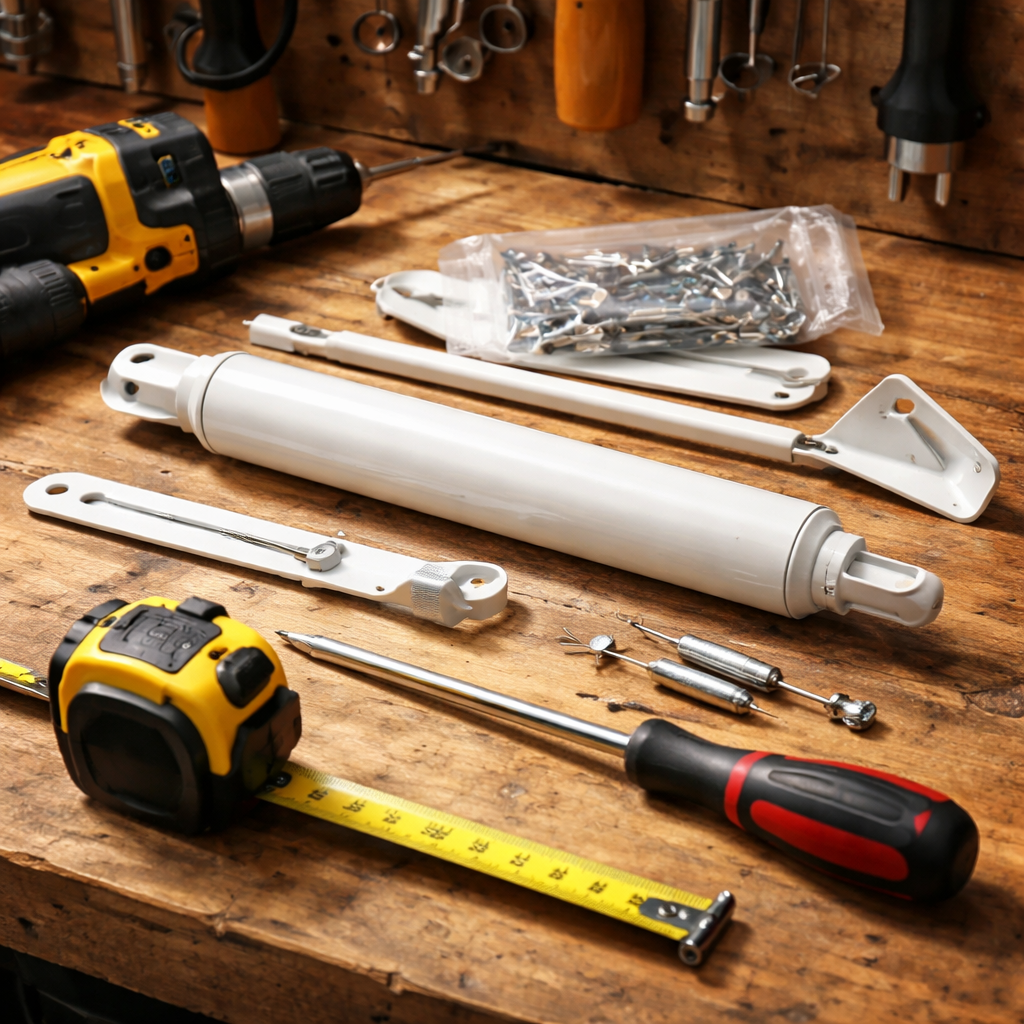
Step 2: Gather Tools & Replacement Parts
Before you swing a screwdriver, make sure you have every tool you’ll need. Having everything on hand saves time and keeps the storm door closer replacement smooth.
Here’s a basic checklist:
Phillips‑head screwdriver – most brackets use Phillips screws.
Flat‑head screwdriver – for older brackets that may need a flat tip.
Drill/driver combo with 1/8‑inch drill bit – to pre‑drill pilot holes for the brackets.
Measuring tape – to locate the exact spot for the new brackets.
Pliers – handy for pulling pins or adjusting small parts.
Lubricating oil – a few drops keep the new pneumatic arm moving freely.
Safety glasses and gloves – protect your eyes and hands.
When you shop for a replacement, look for a unit that matches the mounting style you noted in Step 1. If your old closer was frame‑mounted, the Hampton Products V150WH is a solid DIY choice. If it was a jamb‑mount, the Ideal Security SK1730B fits nicely. Both use pneumatic adjustment, which lines up with the key findings that all three hardware closers share this feature.
Our pick, Storm Door Closer Replacement Service, eliminates the need to pick a hardware model because the pros handle the fit‑any‑door job. That’s why we recommend it as the top option for anyone who wants zero hassle.
For more on picking the right hardware, read The Honest Carpenter’s guide . It breaks down price points and how to match colors. Also, browse Larson’s door closer collection for additional models.
Need more context about storm door closers? Check out Blog | Lgfmh Construction for related home‑improvement tips.
Step 3: Remove the Old Closer
Now that you know what you have and you’ve got your tools, it’s time to pull the old unit off. This part of the storm door closer replacement is quick if you follow the steps.
First, open the door fully. This puts the closer arm in its longest position, making it easier to access the brackets.
Next, locate the pin that holds the arm to the jamb bracket. Use pliers to pull the pin straight out. Some pins have a small rubber cap; pull that off first.
Once the pin is out, you can lift the arm off the bracket. Set the arm aside – you’ll need it later as a reference for the new unit’s length.
Now unscrew the jamb bracket. Use your screwdriver or drill to remove the screws. Keep the screws in a small container; you may reuse them if they’re still in good shape.
Do the same for the door bracket on the opposite side of the arm. Remove any washers or spacers that came with the old unit.
If the old brackets are rusted or the screws are stripped, you may need longer screws or a wood‑filling compound before re‑drilling. The Storm Door Guy blog notes that loose screws often cause mis‑alignment.
When everything is free, give the door a quick swing to make sure the frame and jamb are still solid. Any wobble means you may need to reinforce the area before installing the new closer.
Watch the step‑by‑step video for a visual guide:
For another look at removal, see this removal tutorial video . It walks you through the pin pull and bracket unscrew in real time. Also, the same page offers a printable checklist you can tape to your workbench.
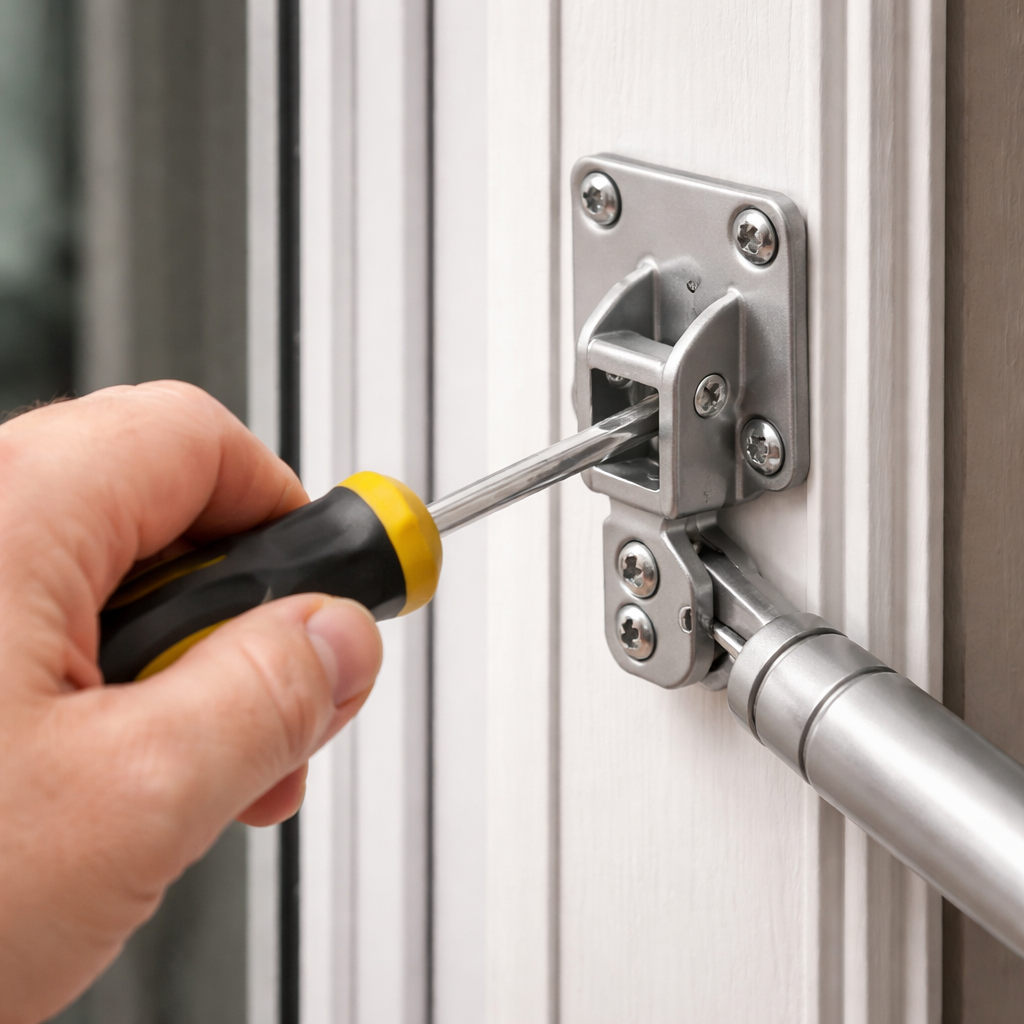
Step 4: Install the New Closer
With the old unit gone, you’re ready for the fresh storm door closer replacement. Follow these steps to make sure the new closer works right.
Start by positioning the new jamb bracket where the old one was. Use a pencil to mark the screw holes on the jamb. Drill pilot holes with a 1/8‑inch bit. This prevents the wood from splitting.
Secure the bracket with the supplied screws. If the old screws are rusted, swap them for stainless‑steel ones – they last longer outdoors.
Next, attach the new arm to the jamb side of the closer. Slide the arm’s nose into the bracket until it clicks. Insert the new pin to lock it in place. Some models have a rubber keeper; make sure it’s seated.
Now move to the door side. Hold the door open and line up the door bracket where the arm rests. Mark the screw spots, drill pilot holes, and fasten the bracket.
Hook the arm onto the door bracket. You may need to adjust the arm angle so it sits parallel to the jamb bracket when the door is closed. A small gap of about 1/8 inch is ideal.
Finally, set the tension screw at the end of the arm. Turn it clockwise a few clicks to increase closing force, or counter‑clockwise to slow the door. The pneumatic adjustment lets you fine‑tune the speed without tools.
Our pick, Storm Door Closer Replacement Service, offers a professional install that handles all these steps for you, guaranteeing a perfect fit.
Need a video that shows the exact installation of a frame‑mount unit? Check out this frame‑mount install video . For a jamb‑mount example, watch this jamb‑mount install tutorial . Both videos walk you through drilling, bracket placement, and tension adjustment.
Step 5: Test, Adjust, and Finish Up
Installation is only half the job. The final step in any storm door closer replacement is to test the door and tweak the tension.
Open the door fully, then let go. Watch how quickly it closes. If it slams, turn the tension screw a half turn counter‑clockwise. If it drifts open, turn it clockwise a half turn. Small tweaks make a big difference.
Next, check the hold‑open feature. Many pneumatic closers have a washer that can be moved to let the door stay open at a certain angle. Move the washer to the desired spot and test.
Run a few cycles in both directions. Listen for any rattling or binding. If the arm rubs against the frame, loosen the door bracket slightly and re‑align.
Inspect all screws again. Tighten any that feel loose. Loose mounting bolts can cause the door to mis‑align over time.
If you notice oil leaking from the cylinder, the closer is likely worn out and should be replaced rather than adjusted. The Storm Door Guy blog advises replacing any leaky unit because adjustments won’t fix internal wear.
When everything runs smooth, give the door a final wipe down to remove fingerprints. Your storm door closer replacement is now complete.
For troubleshooting tips, see Storm Door Guy’s fix guide . It covers tension tweaks, oil leaks, and air‑pressure issues. Also, watch this quick adjustment video for a visual on fine‑tuning the screw.
Step | What to Check | Adjustment Tip |
Close Speed | Door slams or drifts | Turn tension screw ½ turn opposite direction |
Hold‑Open Position | Washer not staying | Move washer to desired slot, retest |
Bracket Tightness | Loose screws or wobble | Re‑tighten with screwdriver, add longer screws if needed |
Leaks | Oil visible on arm | Replace the entire closer unit |
Conclusion
Doing a storm door closer replacement yourself saves money and gives you control over how the door moves. We started by assessing the old unit, gathered the right tools, removed the worn parts, installed a fresh pneumatic closer, and finished with testing and fine‑tuning.
The key takeaways are simple: know your mounting style, pick a pneumatic unit that can handle your door’s weight, and use small tension adjustments to get the perfect close speed. If you’d rather skip the DIY steps, our pick, Storm Door Closer Replacement Service, handles everything for you with a professional fit.
Ready to get your storm door working like new? Grab your tools, follow the steps, and enjoy a quiet, secure door that protects your home from wind and rain.
FAQ
What tools do I need for a storm door closer replacement?
You’ll need a Phillips‑head screwdriver, flat‑head screwdriver, drill with 1/8‑inch bit, measuring tape, pliers, lubricating oil, safety glasses, and gloves. Having these tools ready speeds up the storm door closer replacement and prevents trips to the hardware store mid‑project.
How can I tell if my current closer is frame‑mount or jamb‑mount?
Look at where the brackets attach. If the bracket bolts into the door frame, it’s a frame‑mount. If it bolts into the vertical jamb that holds the hinges, it’s a jamb‑mount. Knowing this helps you choose the right replacement during your storm door closer replacement.
What does “pneumatic adjustment” mean for my door?
Pneumatic adjustment uses air pressure inside the closer to control speed and force. You can turn a small screw to increase or decrease the pressure, which changes how quickly the door shuts. All three hardware options in our research use pneumatic adjustment, making fine‑tuning easy during storm door closer replacement.
Why is my door still slamming after I installed a new closer?
If slamming persists, the tension screw may be set too tight. Turn it a half turn counter‑clockwise and test again. Also check that the arm angle is correct and that the brackets are firmly secured. Small tweaks usually fix the issue in a storm door closer replacement.
Can I use the same screws from the old closer for the new one?
Yes, if the old screws are still solid and not rusted. Re‑using them saves time and keeps the look consistent. If they’re corroded or stripped, replace them with stainless‑steel screws to ensure a long‑lasting storm door closer replacement.
How often should I check the tension on my storm door closer?
Inspect the tension twice a year, especially after extreme weather. Seasonal changes can affect air pressure inside the pneumatic unit, so a quick turn of the screw may be needed to keep the door closing smoothly during your storm door closer replacement maintenance.


Comments