The Essential Soffit Guide: From Selection to Installation and Care
- William McKracherne
- Jan 21
- 18 min read

Let’s start with a quick truth: a soffit is the hidden hero under every eave, keeping air moving, sealing out pests, and giving your roof line that sleek finish.
When you glance up at a house, you might think the roof is the star, but the soffit quietly pulls the show together. It vents the attic, prevents moisture buildup, and keeps your insulation humming.
So, what goes wrong? Cracked boards, warped wood, or clogged vents are the usual suspects. These problems can turn a tidy attic into a damp, mold‑prone zone that eventually drips into the interior.
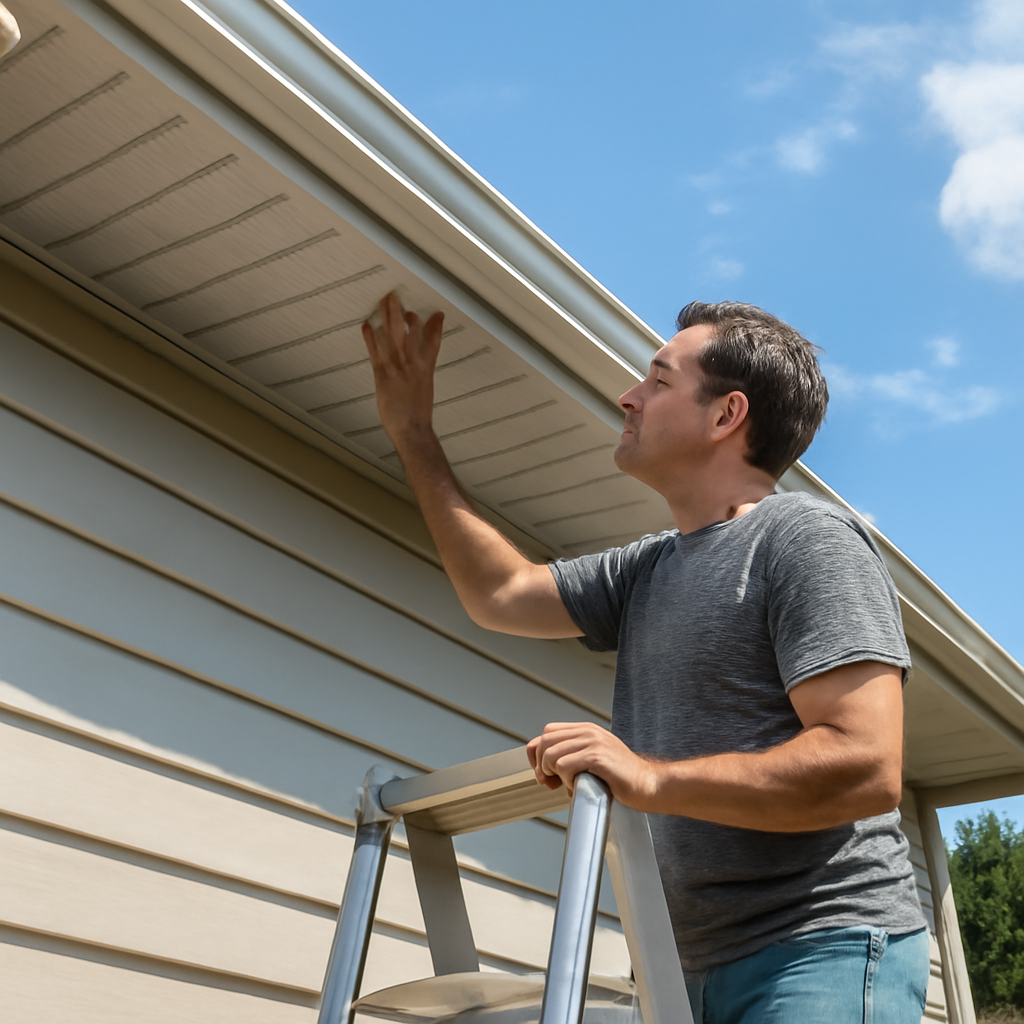
Here’s a quick inspection you can do: step off the ladder, look for any uneven boards, check that the vent louvers face straight up, and feel for any soft spots that might hint at rot. If anything looks off, you’re already halfway to a fix.
Repairing a soffit can be as simple as swapping a few damaged panels or as involved as re‑installing a full section. For most homeowners, the first step is to remove the old panels, dry‑erase the area, and then fit new pieces that match the original material. Paint or stain to match the roof, seal around the edges, and you’ll have a fresh, airtight cover.
If the damage is extensive or you’re unsure, call a pro. A local contractor will assess the condition, recommend the right type—vinyl, aluminum, or wood—and install it for you in a couple of hours, saving you a weekend of DIY work.
Maintenance is key: clean the vent openings every six months, replace any cracked boards promptly, and apply a weather‑proof sealant annually. These small habits keep the soffit working like a well‑tuned engine.
For a deep dive into every type, material, and DIY trick, check out Understanding what is soffit on a house: A Complete Guide . It’s packed with photos, step‑by‑step instructions, and real‑world examples.
And if you’re thinking about expanding your living space, a soffit-friendly roof line can make a garage conversion smoother. Dive into some great ideas at Creative Garage Apartment Ideas for Every Budget to see how the roof and soffit can work in harmony.
TL;DR
A soffit vents your attic, seals out pests, and gives your roof line a sleek finish. If boards crack, warped or vents clog, replace panels or call a pro for vinyl, aluminum, or wood options. Regular cleaning every six months and yearly sealant keeps it airtight and healthy today.
Step 1: Choose the Right Material for Your Soffit
We’ve already talked about why soffits matter, but the next big question is: which material is the best fit for your home’s look, climate, and budget? Don’t stress—you’ve got options, and picking the right one is simpler than it sounds.
Know Your Climate and Exposure
Think about the weather you see every day. If you’re in a humid area, you’ll want something that resists rot and pests. If you’re in a region with heavy snowfall, you’ll need a material that can handle ice dams and still ventilate.
For example, vinyl soffits are a fan favorite in the Midwest because they shrug off moisture and don’t require much upkeep. In coastal towns, fiber‑cement panels keep out salty air without warping.
Consider How Much Work You’re Comfortable Doing
Aluminum and vinyl come in pre‑cut panels that snap together, making a DIY job a breeze. Wood, on the other hand, needs cutting and seasoning; it’s great if you love a natural aesthetic but can be a handful if you’re not used to carpentry.
If the idea of measuring, cutting, and nailing makes your stomach turn, lean toward aluminum or vinyl. You’ll get the same ventilation and a clean look with less elbow grease.
Match the Look of Your Home
You don’t have to match exactly, but harmony matters. A cedar soffit looks great on a colonial, while a sleek metal soffit vibes with a modern ranch. Remember: your fascia, gutters, and siding should all feel like a team.
When you’re unsure, ask a local contractor or check out a finished home in your neighborhood. Seeing real examples helps narrow the field.
Budget Check
Vinyl is usually the most affordable per square foot, but the total cost depends on the size of the eave and the number of panels needed. Aluminum can be a bit pricier up front but lasts decades with minimal maintenance. Wood sits somewhere in the middle but will need periodic staining or painting.
It’s a good idea to pull a quick estimate online—most suppliers let you enter dimensions and get a price. Don’t forget to add a little cushion for shipping, fasteners, and a sealant kit.
Maintenance Mindset
Vinyl and aluminum require the least upkeep: a hose down and a quick wipe every few months keeps them looking fresh. Wood, however, needs a yearly coat of sealant to keep rot at bay, and you’ll need to inspect it for pests twice a year.
If you’re short on time or dislike paint, lean toward a low‑maintenance option. But if you enjoy a DIY routine and want a natural finish, wood might still win.
Here’s a quick checklist to decide:
Climate: humid, dry, snowy?
DIY comfort level?
Desired look: natural wood, modern metal, or classic vinyl?
Budget: upfront cost vs. long‑term maintenance?
Neighborhood style: match or stand out?
Once you answer those, the material choice will fall into place. Remember, the right soffit keeps your attic dry, extends roof life, and adds curb appeal—so picking the best fit is worth the thought.
Curious how to measure the exact eave length or what finish works best with your siding? A detailed guide covers every material type and how to get the right fit—check it out for deeper insights.
Now that you have a roadmap, it’s time to start shopping for the panels that match your style and climate. The right material will keep your house healthy and look great for years to come.
Want to dive deeper into the pros and cons of each material? This guide offers a side‑by‑side comparison to help you make an informed decision.
Step 2: Measure and Plan for Installation
Before you even think about cutting a single panel, you need a clear map of the eave. Picture it like drawing a treasure map for your roof—if the coordinates are wrong, you’ll end up with gaps or wasted material.
Get the Basics Right
Grab a framing square and a pencil. Mark the top edge of the sub‑fascia board where the first F channel will sit. That line is your runway; every panel you cut will align to it.
Use a Chalk Line for Accuracy
Once the square is set, run a chalk line along the house wall from that first mark to the opposite edge. This gives you a straight reference for all your cuts. Think of it as the horizon line in a photograph—keeps everything level.
Measure the F Channel Length
Place the tape inside the channel, extend it to the outer edge, and subtract a quarter inch. That final number is the width of each soffit panel. It sounds simple, but a half‑inch error will show up when you snap the panels together.
Cutting Time
Mark the panel width on the soffit sheet with a pencil. Snap a framing square to that line and draw a straight line up and down. Then use tin snips to slice. Remember, the colder it is, the more brittle the material becomes—handle it gently.
Plan Your Panel Sequence
Start at the lowest end of the eave and work your way up. Each panel should interlock with the one before it, just like a row of dominoes. This approach keeps the work neat and ensures a clean finish.
Secure the First Panel
Slide the first piece into the F channel. Once it’s square, hammer a roofing nail through the nailing flange into the sub‑fascia on the opposite side. This anchors the panel firmly and gives you a reference for the rest.
Keep a Consistent Nail Spacing
Use trim nails every three feet along the panel. If you’re working in a windy area, consider adding an extra nail every six feet for extra stability.
Finish the End Seam
When you reach the house’s far side, cut off the nailing flange and nail directly into the sub‑fascia. This trims the end neatly and prevents any loose edges.
Measure the Fascia
Fascia runs along the eave’s edge, hiding the gutter and roof drip. Measure the distance from the drip edge to the bird box, then add an inch for overlap. This ensures a smooth transition between sections.
Overlap Wisely
Each fascia piece should overlap the previous one by no more than an inch. A small overlap keeps water from seeping behind the boards and gives a professional look.
Handle the Bird Box Corner
Wrap the fascia around the bird box by bending it up a right angle. Score the line with a box cutter before snipping. This extra step prevents gaps and looks tidy.
Check Local Building Codes
Before you start cutting, glance at your municipality’s building regulations. A quick call to the local code office can save you from costly revisions later.
Gather Your Tools
You’ll need a framing square, chalk line, tape measure, tin snips, roofing nails, a hammer, and a safety harness if you’re working high. Having everything ready reduces mistakes and saves time.
Measure Twice, Cut Once
Marking and measuring should be double‑checked. If you’re unsure, lay the panel flat on a table and double‑check the dimensions before the final cut.
Safety First
Always secure the ladder and wear a harness when working over a roof. A fall is a hard lesson many homeowners learn too late.
Want a Visual?
Here’s a quick walkthrough that walks you through the same steps in a few minutes. It’s a great refresher before you pick up the tape measure.
After watching, you’ll have a clearer idea of how each piece fits together. If you’re still unsure, the Excellent Laborer guide provides a step‑by‑step visual reference.
Final Check
Before you call it a day, walk along the finished edge. Feel for any loose panels and double‑nail them. A smooth, even line is your badge of honor.
What’s Next?
Once the soffit and fascia are nailed in place, the next step is sealing. That’s covered in the next section, but a quick sealant squeeze now will keep moisture out for years.
In our experience, a solid measurement plan saves hours of frustration and keeps the project on budget. You’ll notice the difference when the panels snap together like a well‑tuned puzzle.
Step 3: Compare Materials and Costs
Now that you’ve measured the eave, it’s time to weigh the real numbers that will decide your budget. It’s not just a cost line on a sheet— it’s the money you’ll spend on materials, labor, and the long‑term health of the roof line.
What the Numbers Say
We’ve pulled a snapshot from Homewyse’s latest cost guide to give you a ballpark. Prices can shift with local wages and material availability, but you’ll see a consistent trend: vinyl stays the cheapest per square foot, aluminum sits mid‑range, and wood lands on the higher side when you factor in paint or stain.
Check the link to Homewyse cost guide for a quick, vendor‑neutral estimate that you can adapt to your zip code. It’s a quick way to start the conversation with a contractor or a DIY budget spreadsheet.
Three Key Factors to Compare
1.Initial Cost– the upfront price of panels and fasteners.
2.Installation Effort– how much time you or a pro will spend on cuts, nailing, and sealing.
3.Longevity & Maintenance– the expected lifespan and the upkeep you’ll need to keep the soffit looking fresh.
Putting It Into Perspective
Imagine a 400‑square‑foot eave. Vinyl might cost $0.50 per square foot for panels, so the material alone comes in around $200. Add $30 for nails and a small sealant kit, and you’re looking at roughly $230. Aluminum could be $0.70 per square foot, pushing the material cost to $280, with a similar nail and sealant total of about $310.
Wood might start at $0.85 per square foot, bringing the panel cost to $340. But you’ll need to paint or stain every few years— that can add $50–$80 per year in supplies and time. Over a ten‑year horizon, the wood option could tip the total cost past the others.
Quick Decision Checklist
•Budget?Want the lowest upfront number? Vinyl.
•DIY comfort?If you’re handy, wood can feel rewarding, but you’ll need to keep up with finish.
•Climate?High humidity or salt air favors vinyl or fiber‑cement; heavy snow leans toward aluminum for durability.
•Aesthetic?Wood gives a natural look; vinyl offers a crisp, modern profile; aluminum can match metal gutters for a unified vibe.
Table of Comparison
Material | Per‑Sq‑Ft Cost (est.) | Typical Lifespan | Maintenance Needs |
Vinyl | $0.50–$0.70 | 20–30 years | Occasional sealant wipe |
Aluminum | $0.65–$0.85 | 25–35 years | Annual inspection, paint if needed |
Wood (Cedar, etc.) | $0.80–$1.00 | 15–20 years | Regular staining, yearly touch‑ups |
What We’ve Seen Work Best
In the last year, several homeowners in the Midwest chose vinyl for its low upfront cost and minimal upkeep. In coastal towns, a few switched to aluminum because of its resilience against salty air. Each project taught us that aligning material choice with local weather, budget, and how much time you can spare makes the difference between a quick fix and a long‑term investment.
Next Step: Gather Quotes
Take the estimates you’ve sketched out, call a few contractors, and ask for itemized quotes that mirror the breakdown above. Don’t forget to include potential labor rates— a seasoned installer will add about $0.10–$0.15 per square foot to the price. That’s a handy rule of thumb while you compare.
Once you have the numbers, the choice becomes less about guesswork and more about what fits your budget, your lifestyle, and your roof’s climate. Let the math guide you, and the result will be a soffit that keeps your attic dry and your curb appeal strong.
Step 4: Install the Soffit – Practical Tips
We’ve already cut out the panels and measured the eaves. Now it’s time to actually slap the soffit on and make sure it stays put.
Step 1: Prep the F-Channel
The first thing you see is that little notch in the fascia where the soffit sits. If it’s rough, sand it smooth. A jagged edge will make the panel wobble and create gaps for rain.
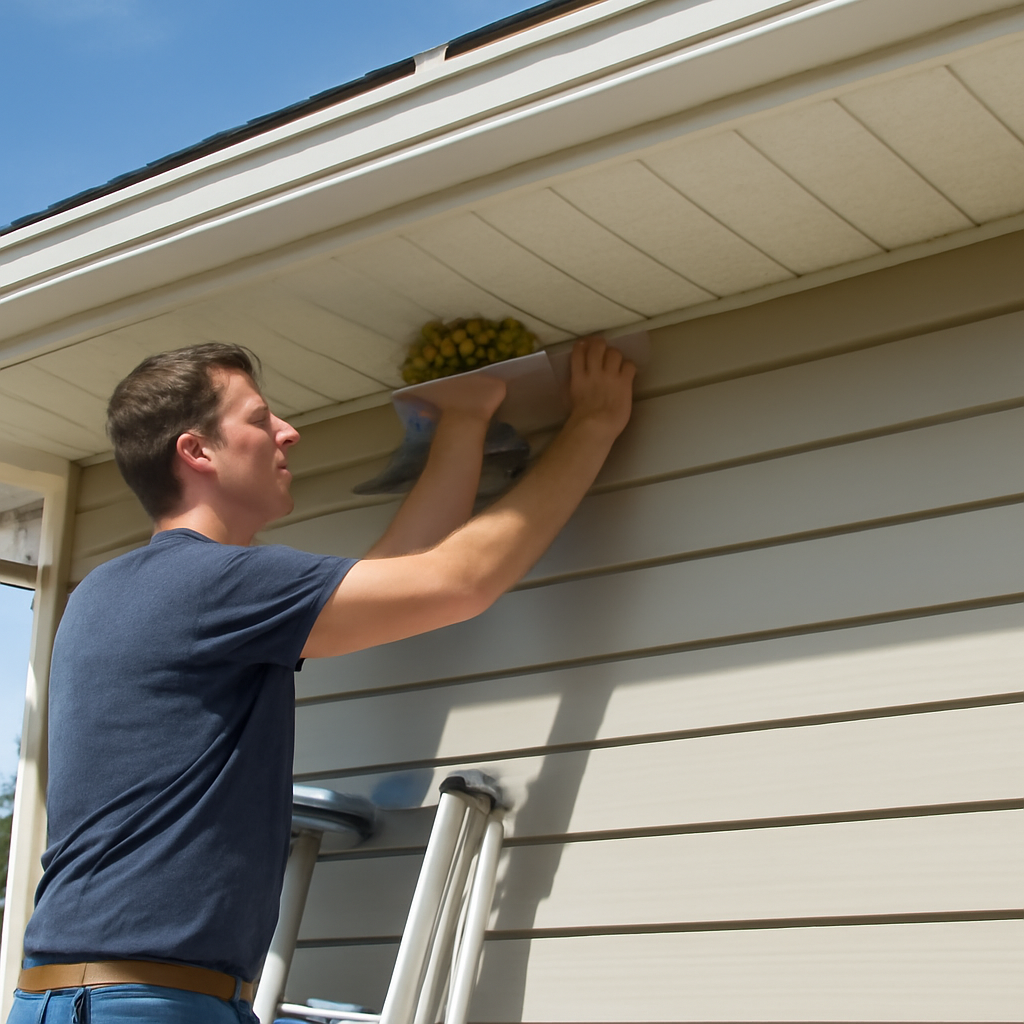
Once you’ve got a clean edge, lay a piece of paper over the channel and trace the panel width. The paper trick helps you keep a consistent spacing for every panel you install.
Step 2: Nail Down the First Panel
Slide the first panel into the F‑channel, aligning the trim edge with the notch. It should fit snugly—no play. Push a roofing nail through the backing plate into the sub‑fascia on the other side.
When you nail, keep the hammer blow short and straight. A bent nail can split the panel or leave a hole that later lets water in.
Step 3: Keep the Sequence Flowing
Work from the lowest point up. The last panel you install will be the one that covers the fascia’s end. Because of that, you’ll need to cut its backing plate and nail straight into the fascia instead of the channel.
It helps to have a friend hold the panel while you drive the nail. That way you can keep a steady rhythm and avoid wobble.
Step 4: Seal Every Seam
Once every panel is in place, grab a high‑temperature caulk gun and run a thin bead along each seam. The sealant fills the tiny gaps that the panels can’t hide from the wind.
Let the caulk dry for 24 hours before you touch it. The weather matters—if it’s raining, you’ll want to wait a bit longer or cover the area with a plastic tarp.
Step 5: Check for Gaps and Overhangs
Run your finger along the top edge. If it’s a bit loose, add a second nail every 3 to 4 feet. A quick double‑nailing keeps the panels from shifting over time.
Also, make sure the fascia overhangs the panel by about an inch. That tiny overlap stops water from seeping behind the panels when rain hits the fascia.
Step 6: Inspect the Vent Holes
Remember, the soffit isn’t just a cover—it’s also a vent. If you’re using individual panel vents, verify that the perforations are facing upward and not blocked by insulation or debris.
In a real‑life example, a homeowner in the Midwest found a block of insulation was wedged against the panel edge, cutting ventilation by 70%. After trimming the insulation back, the attic temperature dropped by 15°F.
Final Check and Clean‑Up
Walk around the entire eave, feeling for any loose edges or unsealed gaps. A quick walk‑through can catch a problem before it turns into a leak.
Once satisfied, sweep the area, wipe down the newly sealed seams, and let the caulk set overnight. The next day, you’ll have a finished soffit that keeps the attic dry and the roof happy.
For more detailed ventilation insights, take a look at Roof Online’s guide on how soffits improve energy efficiency and prevent roof damage . Their breakdown of airflow dynamics can help you tweak your system for optimal performance.
Step 5: Maintain and Inspect Your Soffit
Let’s talk about the routine that keeps your soffit from turning into a liability.
When to Inspect
Keep an eye on your soffit at least twice a year—ideally in the spring and fall. That’s when leaves fall and snow melts, making it easy to spot water spots or new damage. If you’re in a place with heavy rain or wind, consider a mid‑season check to catch erosion early.
How to Inspect
Step out onto a ladder, feel the panels, and look for:
Cracks or warps that look like a dent in a car door.
Loose or missing fasteners that could let a gust yank the panel.
Water stains on the wall behind the soffit—those are red flags.
Signs of pests—small holes, droppings, or chew marks.
When you spot a crack, don’t just slap a patch on it. A good rule of thumb: if the crack is more than a pencil line, replace that panel.
Cleaning Routine
Debris builds up like a blanket in summer and a snowdrift in winter. A gentle sweep with a soft brush or a low‑pressure hose clears it without forcing water into cracks. Avoid a high‑pressure washer; that can push moisture deeper than you want.
After cleaning, check the gutter and downspout. If they’re clogged, the water will back up and soak into the soffit. A clear drainage path means your soffit stays dry and your attic stays cool.
Sealing & Caulk
Every time you install a new panel or replace a damaged one, run a bead of exterior caulk along the seam. This blocks wind, water, and insects. Use a caulk that’s rated for exterior use and can flex with temperature swings.
Let the caulk cure for at least 24 hours before you expose it to rain. If you’re in a wet season, cover the area with a tarp until it’s fully set.
What About Ventilation?
Remember, a soffit is a vent. If the perforations are covered by insulation or debris, the airflow stalls. Check that every vent opening faces upward and is clear. A clogged vent can raise attic temperatures by up to 15°F, which, according to the U.S. Department of Energy, can push heating and cooling bills up 15%.
When to Call a Pro
If you see:
Widespread rot that you can’t isolate to one panel.
Structural issues where the soffit is pulling away from the fascia.
Pest infestations that keep coming back even after you’ve patched holes.
These are signs that you need professional help. A contractor can assess hidden damage, replace sections safely, and make sure your soffit is properly sealed.
Quick Maintenance Checklist
Grab a clipboard and tick these off once a year:
Inspect for cracks, loose fasteners, and water stains.
Clean debris and check gutter flow.
Replace any damaged panels.
Re‑caulk seams.
Verify vent openings are clear and face up.
Look for pest activity and seal entry points.
Keeping this checklist in your home maintenance log ensures you won’t forget a step, and your soffit stays ready to do its job—venting, protecting, and giving your roof that sleek finish.
Step 6: Repair Common Soffit Issues
Ever notice a warped panel that feels like it’s been on a roller coaster? That’s your soffit waving a red flag.
Pull the ladder, grab a flashlight, and give the whole eave a quick look. You’re hunting for cracks that look like the line of a broken twig, missing fasteners, or a darker spot that’s a hint of water stain.
Sound doable? If yes, keep reading. If not, a call to a local pro will get the job done in a jiffy.
Replace Damaged Panels
When a panel cracks or warps, it’s time for a swap. Measure the panel’s width and length with a tape measure. Cut a new piece to match, smoothing the edges so no splinters snag a nail.
Slide the new panel into the F‑channel, line it up with the neighboring seams, and nail through the backing plate into the sub‑fascia. Use a trim nail every 3‑4 feet to lock the piece in place.
We’ve seen that a single loose fastener can let wind bite in, so double‑nail where you spot any slop.
Seal Cracks and Gaps
Clean the area first with a brush and a little soap and water to remove dust and old caulk.
Run a thin bead of exterior‑grade caulk along every seam, especially where panels meet the fascia. An even bead expands and contracts with temperature changes without cracking.
After the caulk sits for a few hours, wipe off any excess with a damp cloth so the finish looks tidy.
Clear Blocked Vents
Remember: a soffit is a vent too. If perforations are clogged with insulation, leaves, or debris, airflow stalls.
Check each vent opening for obstructions. Remove any insulation that’s wedged against the panel edge, and sweep leaf clogs with a stiff brush.
Got a ladder or a ladder extension handy? If the vents are hard to reach, a sturdy stool can give you a better angle.
Treat Pest Entry Points
Small holes left by squirrels or beetles can let moisture in and start rot. Spot round or oval holes—classic pest marks.
Fill each hole with a two‑component wood filler, sand it smooth once dry, then paint over it to match the panel color.
For extra protection, spray a quick sealant over the entire soffit after the filler has cured.
Re‑Inspect After Weather Changes
After repairs, do a final walk‑through. Feel for any gaps that might have shifted with the day’s temperature swing.
Check the gutters above; if they’re clogged, water can back up into the soffit and undo your fixes.
Want an easy way to track future repairs? Keep a simple spreadsheet with dates, observed issues, and actions taken. That way you’ll know exactly when the next maintenance check is due.
In our experience, homeowners who catch these problems early save a fortune on costly roof repairs later. It’s a small time investment that pays off in peace of mind.
FAQ
What are the most common reasons a soffit starts leaking?
Leaking often sneaks in because panels shift or fasteners loosen. Weather can also push water through tiny gaps, especially if vents get clogged. Imagine a roof that’s been hit by a storm and the soffit was already on its last leg—water finds the weak spot. That’s why you’ll see spots of water inside the attic after heavy rain.
How can I tell if my soffit is properly ventilated?
Check the louvers: they should face straight up and be free of debris. A quick test is to lay a flashlight under the panels and see if you can feel a breeze. If the air feels stagnant, your vents are probably blocked or misaligned. That’s a red flag that could raise attic temperatures.
Can I replace a damaged soffit panel myself, or should I hire a pro?
If the panel is small and you’re comfortable on a ladder, a DIY swap works fine—measure, cut, nail, seal. But larger or warped panels often need precise cuts to fit snugly. When in doubt, calling a contractor guarantees the fasteners line up and the sealant sets correctly, preventing future leaks.
What maintenance routine keeps a soffit in top shape year‑round?
Inspect twice a year for cracks, loose nails, and clogged vents. Clean debris with a soft brush or low‑pressure hose, then seal any new gaps with exterior caulk. Keep the gutters clear, because backed‑up water can seep into the soffit. A quick yearly sweep keeps moisture and pests out.
How do pests affect soffits, and how do I prevent them?
Pests like squirrels or beetles chew tiny holes that let moisture in, leading to rot. Spot round or oval holes early and seal them with wood filler or a quick spray sealant. Installing a fine mesh over vents can also deter critters from nesting right under the panels.
When is it time to replace the entire soffit rather than just repair?
If you’re seeing widespread rot, multiple cracked panels, or the fascia is pulling away, a full replacement is usually the safest route. It’s also worth it when the original material has reached the end of its lifespan or if you’re planning a style upgrade. Replacing all panels gives you a clean slate and reduces future maintenance.
Conclusion
So, we’ve walked through every step of getting your soffit looking sharp and working hard behind the scenes.
First off, remember that a well‑installed soffit keeps the attic dry, cuts your heating bill, and gives the roof line a clean, finished look. It’s more than a pretty face; it’s a barrier against rain, pests, and rot.
We’ve seen that keeping the panels sealed, vents clear, and fasteners tight turns maintenance into a quick yearly check instead of a big repair job.
Now that you’re armed with measurement tricks, material choices, and a maintenance playbook, the next move is simple: schedule your inspection for spring and fall. Grab a ladder, a flashlight, and a clipboard.
Ask yourself, “Did I seal every seam?” or “Is the gutter still clear?” These quick checks keep the soffit doing its job for years.
If you spot a loose panel or a clogged vent, patch it up right away. The sooner you address small problems, the less you’ll spend on costly repairs later.
And if you ever feel stuck, LGFMH Construction is ready to help you keep the roof happy and the home safe.
Take the next step—pick a date, grab your tools, and give your soffit the attention it deserves. Your home will thank you.


Comments