Vinyl Siding Repair Cost Guide: What Homeowners Need to Know
- William McKracherne
- Feb 8
- 18 min read

Ever walked up to your house and noticed a dented piece of vinyl siding, then wondered how much you'd actually have to shell out to fix it? That moment of "what's the price tag?" is something most homeowners feel the instant they see a crack, a water stain, or a loose panel.
Vinyl siding repair cost can swing wildly because it's not just the material price—it's the labor, the extent of damage, and whether you need to remove old pieces before installing new ones. In our experience, a simple nail‑hole patch might run you $150 to $250, while replacing a whole section of 12‑by‑12‑foot panel can climb to $800 or more, especially if you add premium trims or need extra weather‑proofing.
Picture this: a family in Virginia Beach discovered that a storm had lifted a corner of their siding, letting moisture seep into the wall cavity. They called us, and after a quick inspection we broke down the cost: $325 per square for the vinyl material, plus $120 for labor per hour, plus a $200 disposal fee. The total landed at about $1,200 for a 4‑square fix. Knowing the numbers helped them budget without surprise invoices.
Here’s a quick way to get a realistic estimate for your own project:
Measure the damaged area in squares (one square = 100 sq ft).
Check current vinyl pricing in your region—most suppliers list $300‑$350 per square for standard products.
Factor in labor: typical rates range from $90‑$130 per hour for licensed installers.
Add extra costs for removal, disposal, and any needed trim or flashing.
When you line up those numbers, you’ll see a clearer picture of the total. If you’re unsure about any step, a professional assessment can save you from costly mistakes. For a deeper dive into pricing details, check out our Siding Installation | Lgfmh Construction page, which breaks down material and labor rates for common vinyl siding jobs.
So, before you grab a hammer or call a random contractor, take a minute to map out the scope, run the numbers, and decide if a DIY patch or a full‑service repair makes sense. With a solid estimate in hand, you’ll feel confident moving forward and keep your home looking sharp without breaking the bank.
TL;DR
Understanding vinyl siding repair cost helps you budget confidently, avoid surprise invoices, and choose the right DIY or professional solution for your home. Measure the area, check material prices per square, factor labor and disposal fees, then compare options to keep your exterior looking sharp without breaking the bank today.
Understanding Vinyl Siding Repair Costs
So you’ve spotted that cracked panel, and the question buzzing in your head is, “How much am I really going to pay?” That knot in your stomach is totally normal – we’ve felt it countless times when a storm or a stray baseball leaves a dent in a home’s skin.
First, let’s break down the two big pieces of the puzzle: material costs and labor overhead. Vinyl itself isn’t a luxury item, but the price per square can swing depending on the brand, thickness, and any added UV‑protective coating. In most markets you’ll see a range of $300‑$350 per 100 sq ft (one “square”). If you need a premium profile or a specialty color, bump that up another $50‑$80.
Labor – the hidden variable
Labor is where the numbers really start to dance. A licensed installer in the Southeast typically bills $90‑$130 per hour. But it’s not just about clock‑time; it’s about the steps they have to take: removing the damaged piece, prepping the underlying wall, fitting the new panel, and sealing the seams. A simple nail‑hole patch might be a quick 1‑2 hour job, while a full 12‑by‑12‑foot section can easily consume 4‑6 hours.
Don’t forget the ancillary costs: disposal fees for old vinyl (usually $100‑$200), any necessary flashing or trim upgrades, and occasionally a permit if your municipality requires one for exterior work. Those little line‑items add up, but they’re essential for a watertight finish.
How to estimate your own project
Grab a tape measure and count the squares you need to replace. Multiply that by the current material price you see at your local supplier. Then add a labor buffer – a safe rule of thumb is $120 per hour for 2‑3 hours per square, plus a $150 flat fee for disposal and cleanup.
For example, a 3‑square repair with standard vinyl would look like this:
Material: 3 × $325 = $975
Labor: 3 × $120 × 2 hrs = $720
Disposal & misc: $150
Total: roughly $1,845. That’s a ballpark, but it gives you a concrete number to discuss with any contractor.
Sometimes the biggest surprise isn’t the price tag, but the hidden damage behind the panel – water infiltration, rot, or mold. That’s why a quick moisture check before you sign off on a quote can save you hundreds down the line.
Want a visual walk‑through of what the repair process looks like? Check out the short video below. It walks you through the steps from inspection to final seal, so you know exactly what you’re paying for.
After you’ve watched, take a moment to write down any questions that pop up – “Do I need new flashing?” or “Will the new panel match the existing color exactly?” Those are the kinds of details that separate a vague estimate from a crystal‑clear one.
One last tip: always ask for a written breakdown. A reputable crew will itemize material, labor, disposal, and any extra work. That way you can compare apples‑to‑apples if you get multiple quotes.
When you sit down with the numbers in front of you, the “vinyl siding repair cost” stops feeling like a mystery and becomes a manageable part of your home‑maintenance budget. You’ll walk away feeling confident, not anxious, and ready to give your house the protection it deserves.
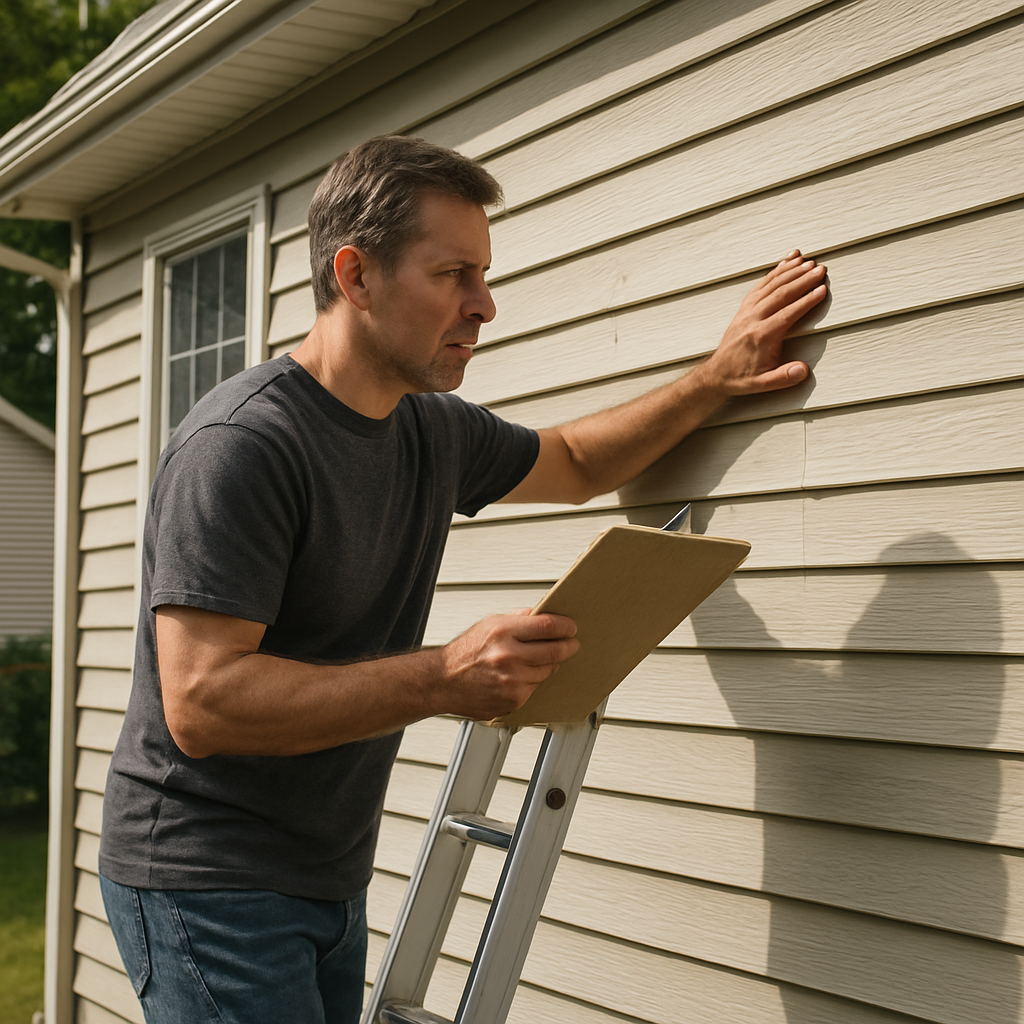
Step 1: Assess Damage and Identify Needed Repairs
First thing’s to admit: staring at a cracked piece of vinyl siding feels like a tiny mystery you didn’t ask for. You’re wondering if it’s a simple nail‑hole or the start of a bigger water‑intrusion issue. That moment of uncertainty is exactly why a solid assessment is the foundation of any realistic vinyl siding repair cost estimate.
Grab a ladder, a notebook, and a good flashlight. Start at the most obvious spot – the dent, crack, or loose panel you first noticed. Walk the perimeter of that area and note every imperfection: cracks, gaps, warped sections, or missing trim. Write down the size of each problem in squares (1 square = 100 sq ft). Even a half‑square matters when you’re adding up material costs.
Check the siding type and condition
Is it standard 4‑by‑8 ft vinyl, an insulated panel, or a premium textured product? The type determines the per‑square price you’ll see on the quote. Look for signs of wear: fading, brittleness, or warping that could signal age‑related degradation. Those hidden issues often add labor hours, which pushes the vinyl siding repair cost higher.
Next, run a quick moisture check. Use a moisture meter or press a dry cloth against the wall behind the siding. If the wood feels damp, you might be dealing with water damage that will require additional repairs beyond the siding itself. That’s a cost driver many homeowners overlook.
Document everything
Take clear photos of each damaged spot from a few angles. Snap a wide shot of the whole wall, then zoom in on the problem areas. Label the images on your phone with the square measurement you wrote down – this makes it painless when you hand the files to a contractor or use them for your own estimate.
While you’re at it, glance at the flashing and sealant around windows, doors, and rooflines. Cracked or missing flashing is a silent expense that can double the repair bill if you wait until it fails.
So, how do you turn all those notes into a cost estimate? Start with material: multiply the total squares by the current market price per square (usually $300‑$350 for standard vinyl in Virginia Beach). Then add labor – typical rates run $90‑$130 per hour, and the number of hours depends on the damage scope you just cataloged.
Don’t forget ancillary fees. Removal and disposal can be $150‑$250 per load, and trim or flashing replacements often carry a line‑item price of $50‑$100 each. When you add a 10‑percent contingency for unexpected issues, you get a realistic vinyl siding repair cost that won’t surprise you later.
Use a trusted reference
If you’re unsure whether you’ve covered everything, the home inspector guidelines for vinyl siding inspection provide a handy checklist of what to look for. It walks you through the exact elements we just mentioned – material type, moisture, flashing, and overall condition.
At this point you should have a tidy spreadsheet or a simple table that lists each damage area, its square footage, material cost, estimated labor hours, and any extra line items. That document is your cheat sheet for negotiating with contractors or deciding whether a DIY patch makes sense.
And remember, the goal isn’t to become a professional inspector; it’s to gather enough concrete data so the vinyl siding repair cost you’re quoted reflects reality, not guesswork.
Once your assessment is complete, you’ll feel confident moving on to the next step – ordering the right material and scheduling the install. That confidence is the biggest savings tool in the whole process.
Step 2: Gather Materials and Get Accurate Quotes
Now that you’ve got a clear picture of what’s broken, the next move is to turn those notes into a concrete budget. Think of it like making a grocery list before a big dinner—you don’t want to wander the store buying stuff you don’t need, and you definitely don’t want to discover you’re out of salt halfway through cooking.
First, jot down the exact type of vinyl you’ve got. Is it the standard 4‑by‑8‑foot panel, an insulated version, or a premium textured product? The distinction matters because a standard square typically runs $300‑$350 in our region, while insulated or textured panels can add $50‑$100 per square. If you’re not sure, a quick glance at the manufacturer’s label (usually on the back of a loose piece) or a photo of the profile will save you a phone call later.
Next, calculate the total square footage you need to replace or patch. Remember, one “square” equals 100 sq ft. If you measured a 12‑by‑12‑foot section, that’s 1.44 squares, which you’d round up to 2 squares for ordering purposes. Write that number next to the material type—this becomes the backbone of your quote request.
Step‑by‑step checklist for gathering materials
Locate the manufacturer’s product code (e.g., “Royal Premium” or “Insul‑Siding”).
Confirm the color and finish – matching the existing hue avoids extra painting later.
Call at least two local suppliers (home‑center chains, specialty lumber yards, or online distributors) and ask for price per square, including any bulk discount for ordering 2 + squares.
Ask about delivery fees – many suppliers waive the charge if you pick up the material yourself.
While you’re on the phone, throw in a quick question about warranty. Some manufacturers back their vinyl with a 20‑year fade guarantee, which can be a nice selling point if you ever decide to sell the house.
Now, onto labor. The biggest surprise in a vinyl siding repair cost often comes from how contractors break down their hours. A straightforward nail‑hole patch might be a single hour of labor, but a panel swap that requires removing trim, re‑flashing, and resealing can easily balloon to 4‑6 hours. Ask each contractor for a line‑item estimate that shows:
Hours of labor (and the hourly rate they charge).
Removal and disposal fees – many crews charge $150‑$250 per load, but some bundle it into the total.
Any additional trim or flashing – a typical piece runs $25‑$75, but hidden damage behind the siding can add extra.
Here’s a real‑world snapshot: A homeowner in Norfolk measured a 3‑square damaged area (300 sq ft). Material cost came to $975 (3 × $325). Labor was quoted at 4 hours × $115 = $460. The contractor added $200 for disposal and $80 for new trim. Total? $1,715. The homeowner saved $200 by sourcing the vinyl themselves at a local supplier, proving that separating material purchase from labor can shave off a noticeable chunk.
If you prefer a single‑point solution, ask the contractor whether they can handle both material procurement and installation. Some crews have a markup of 10‑15% on materials, which can be convenient but less transparent. Compare that to the “DIY‑materials” route and decide what feels right for your budget and timeline.
Pro tip from our team
We often recommend ordering a little extra – about 5‑10% more siding than your exact calculation. It’s a cheap insurance policy against miscuts or hidden breaks that show up once the old panel is removed. The leftover pieces can be used for future touch‑ups or stored for resale value.
Finally, put everything into a simple spreadsheet: column A for material type, column B for square footage, column C for material cost, column D for labor hours, column E for labor rate, column F for extra fees. Total each row, then add a 10‑15% contingency line for “unexpected surprises” – rain delays, hidden rot, or a surprise extra trim piece.
When you hand that spreadsheet to a contractor, you’ll walk into the quote conversation with confidence. They’ll either match your numbers or explain why they need to adjust, and you’ll avoid the dreaded “I didn’t know about that extra charge” moment.
So, grab your notebook, fire up that calculator, and turn your damage assessment into a clear, actionable cost plan. The more precise you are now, the smoother the repair process will be later.
Step 3: DIY vs Hiring a Professional – Cost Comparison
So you’ve measured the damage, you’ve got the numbers on paper, and now the big question looms: should you roll up your sleeves or call in the pros? It’s a classic “DIY vs hiring a professional” dilemma, and the answer hinges on how the vinyl siding repair cost breaks down for each path.
First, let’s peel apart the cost layers. On the DIY side you’re looking at material price, tools or rentals, and your own labor time. On the professional side you add labor rates, insurance, disposal fees, and often a markup on the material itself. When you stack those pieces side‑by‑side, the picture becomes a lot clearer.
Material costs – the same for both, but the buying experience differs
If you buy the vinyl yourself, you’ll pay the market rate – roughly $300‑$350 per square for standard panels in the Virginia Beach area. Buying through a contractor usually includes a 10‑15% markup, which can push a 2‑square job up by $60‑$105. That markup covers their handling, storage, and the convenience of a single invoice.
Here’s a quick illustration: a homeowner in Norfolk needed 3 squares of Royal Premium siding. Purchasing directly at $325 per square cost $975. The same homeowner got a quote from a contractor who included a 12% material markup – total material charge $1,092. That $117 difference is something you can decide is worth the hassle.
Labor – where the real divergence appears
DIY labor is your own time, which is priceless to many but can be a hidden expense if you’re juggling work, kids, or a full‑time job. A typical homeowner can finish a simple nail‑hole patch in an hour, but a full panel swap usually takes 4‑6 hours of focused effort.
Professional labor rates in our region run $90‑$130 per hour. A 5‑hour job at $115 per hour totals $575. Add a crew premium for specialized equipment (like a lift or power saw) and you might see the labor bill rise to $650‑$700. Compare that to the $0 labor cost on the DIY side, but remember you’re also paying for your weekend.
Hidden fees – disposal, permits, and insurance
Most contractors charge a disposal fee of $150‑$250 per load, plus a small administrative fee for permits if the work involves structural changes. DIYers often overlook these costs, assuming they can toss the old siding in the trash. In reality, most municipalities require a proper disposal route, and the price can climb to $200‑$300 if you need a dumpster.
Insurance is another hidden factor. A licensed contractor carries liability coverage, protecting you if something goes wrong. If you DIY, any accidental damage to the underlying wall or neighboring property becomes your responsibility – a risk that can turn a $1,200 repair into a $3,000 nightmare.
Decision matrix – when DIY makes sense
Picture this: you have a single 1‑square nail‑hole patch, you own a basic tool kit, and you can spare an hour on Saturday. The total material cost is $325, plus maybe $20 for a utility knife. Your total vinyl siding repair cost sits under $350, and you’ve saved the $600‑$800 you’d spend on professional labor.
Now imagine a 4‑square panel replacement with trim and flashing work. Material alone is $1,300. Add disposal ($200) and a 5‑hour crew at $115/hour ($575). You’re looking at $2,075 before any markup. Even if you DIY the labor, you still need to rent a power saw ($40/day) and possibly a small lift ($80). The DIY total nudges $1,650 – still a savings, but the margin shrinks and the project complexity rises.
Actionable checklist for a cost comparison
List the exact square footage and type of vinyl you need.
Get a per‑square material quote from two local suppliers.
Ask at least two contractors for a line‑item labor estimate (hours × rate).
Add disposal, permit, and insurance costs to each option.
Calculate your own hourly “cost of time” (e.g., $30‑$40/hr) and add it to the DIY total.
Subtract any tool‑rental fees you already own.
When you plug those numbers into a simple spreadsheet, the side that gives you the best value while keeping risk low will jump out.
In our experience, homeowners who tackle small, isolated repairs themselves end up saving 30‑40% on vinyl siding repair cost, while larger jobs usually benefit from a professional’s expertise and warranty protection.
Need a visual walk‑through of the cost breakdown? Check out this short video that walks through a typical repair scenario and highlights where costs stack up. cost‑breakdown video for siding repair .
Below is a quick side‑by‑side table that sums up the main cost categories for DIY versus hiring a pro.
Cost Category | DIY Approach | Professional Approach |
Material (per square) | $300‑$350 | $330‑$400 (incl. markup) |
Labor | Your time (estimate $30‑$40/hr) | $90‑$130 per hour |
Disposal & Permits | $150‑$250 (DIY dumpster) | $200‑$300 (included in quote) |
Use this table as a cheat sheet when you’re sitting at the kitchen table with your calculator.
Ultimately, the choice comes down to three things: project size, your comfort with tools, and how you value your own time. If the numbers tilt toward a small, low‑risk job, grab the ladder and give it a go. If the scope widens or you spot hidden damage, calling a licensed crew will likely keep your vinyl siding repair cost in check and your peace of mind intact.
Step 4: Budget Planning and Hidden Costs
So you’ve measured the damage, gathered quotes, and maybe even watched a quick video. The next hurdle is turning all those numbers into a budget that doesn’t leave you gasping when the invoice arrives. Sound familiar?
In our experience, the biggest surprise isn’t the headline material price—it’s the little line‑items that creep in once work actually starts. That’s why we walk you through a budget‑planning cheat sheet that catches those hidden costs before they bite.
According to average cost to replace vinyl siding , the average cost to replace vinyl siding on a typical home ranges from $5,000 to $10,000, which gives you a useful benchmark when sizing your own repair budget.
Identify every cost bucket
Start with the three big groups you already know:
Materials:vinyl panels, trim, flashing, sealant – usually quoted per square foot.
Labor:crew hours, equipment rentals, and any overtime rates.
Disposal & permits:dumpster fees, landfill charges, and any local building permits.
Write each bucket on its own line in a spreadsheet. Seeing the numbers side‑by‑side forces you to ask, “Do I really need this piece?”
Spot the hidden costs before they surprise you
Here’s where the sneaky stuff hides:
Trim & flashing replacements – a single piece can add $50‑$100, and you often need more than one.
Weather‑related delays – rain or high winds can pause work, extending labor hours and sometimes incurring extra site‑setup fees.
Underlying rot or water damage – if moisture has already seeped behind the siding, you’ll need plywood repair or mold remediation, which can double the budget.
Tool & equipment rentals – power saws, lifts, or scaffolding aren’t usually included in a contractor’s base rate.
Travel & mileage – contractors serving multiple neighborhoods may tack on a small transport surcharge.
Insurance & warranty add‑ons – some crews offer extended liability coverage or product warranties for an additional fee.
Even a modest 2‑square‑foot patch can swell by a few hundred dollars if you overlook any of these.
Most pros recommend a 10‑15 % contingency on the total estimate. Why? Because you can’t predict whether you’ll uncover rotted studs or need extra flashing until the old siding comes down.
Calculate it like this:
Sum all line items (materials, labor, disposal, hidden fees).
Multiply the subtotal by 0.12 (12 % is a happy middle ground).
Add that amount back to the subtotal – that’s your “real‑world” budget.
When you walk into the contractor’s office with this figure, you’ll either get a tighter quote or a clear explanation of why the extra money is justified.
Grab a blank spreadsheet or a piece of paper and follow these steps:
List each damaged area, its square footage, and the type of vinyl you need.
Enter the per‑square material price you found at a local supplier.
Record the estimated labor hours and the hourly rate the contractor gave you.
Add separate rows for disposal, permits, trim, flashing, and any tool rentals you anticipate.
Sum everything, then apply the 12 % contingency.
Compare the final number to the amount you’ve set aside. If there’s a gap, decide where you can trim – maybe DIY the trim yourself or shop around for a cheaper dumpster.
Tip: Keep receipts for every purchase. That paper trail not only helps you stay on budget, it’s useful if you need to file a warranty claim later.
Imagine a Virginia Beach homeowner with a 3‑square‑foot damaged panel. They paid $975 for material (3 × $325), $460 for labor (4 hours × $115), $200 for disposal, and $80 for new trim. Subtotal = $1,715. Adding a 12 % contingency ($206) brings the total to $1,921. The homeowner set aside $2,000, so they stayed in range and even had $79 left for unexpected extra flashing.
If the same job had hidden rot that required $400 in plywood repair, the contingency would have covered it without a nasty surprise.
Bottom line: a solid budget isn’t just a number on paper – it’s a roadmap that flags hidden costs, cushions surprises, and gives you confidence to move forward. Take a few minutes now to map out each line item, add a realistic buffer, and you’ll walk into any siding repair knowing exactly what you’ll spend.
Conclusion
You've made it to the end of the guide, and now the big question is—what do you actually do with all that vinyl siding repair cost info?
First, take a minute to jot down the numbers you collected: square footage, material price per square, estimated labor hours, and any extra fees like disposal or trim.
Next, add a 10‑15 % contingency. That little buffer is what kept the Virginia Beach homeowner in our example from scrambling when hidden rot showed up.
If the total sits comfortably inside your budget, you can move forward with confidence—whether you order the vinyl yourself and hire a crew, or let a pro handle everything from start to finish.
Still feeling unsure? Grab that spreadsheet, run the numbers one more time, and ask yourself: does the estimate feel realistic, or is there a hidden line‑item you might have missed?
When you’re ready, give LGFMH Construction a call. We can walk through your estimate, spot any blind spots, and make sure the vinyl siding repair cost stays exactly where you expect it.
Bottom line: a clear, itemized budget plus a modest contingency turns a potentially stressful repair into a straightforward project. You’ve got the tools—now go fix that siding.
FAQ
What is the average vinyl siding repair cost for a small patch?
For a typical nail‑hole or 1‑square patch you’re looking at material around $300‑$350 per square plus about an hour of labor at $90‑$130. Throw in a modest disposal fee of $150‑$200 and you’re usually in the $500‑$700 range. The exact number shifts with your local market, but that ballpark helps you avoid surprise invoices.
How can I estimate vinyl siding repair cost before calling a contractor?
Start by measuring the damaged area in squares (1 square = 100 sq ft). Next, check the current price per square for the vinyl type you have – most suppliers list $300‑$350 for standard panels. Add an hourly labor rate you’ve seen in your area (often $90‑$130) and multiply by the estimated hours. Finally, tack on a 10‑15 % contingency for hidden issues; that gives you a solid, realistic figure.
Why does my vinyl siding repair quote sometimes include a markup on materials?
Contractors often source the siding for you, which saves you a trip to the store and guarantees the right color and profile. To cover handling, storage, and the convenience of a single invoice they add a 5‑15 % markup. It’s not a hidden fee, just a way to recoup the extra work. If you buy the vinyl yourself, you can shave that amount off the total.
What hidden costs should I watch out for in vinyl siding repair?
Beyond the obvious material and labor, look for line‑items like trim and flashing replacements ($50‑$100 each), disposal fees ($150‑$250 per load), and any permit charges if the work touches structural elements. Underlying rot or water damage can add $300‑$500 for plywood repair. Tool rentals, travel surcharges, and extended warranty options are also common extras that can inflate the final bill.
Is it cheaper to DIY vinyl siding repair versus hiring a professional?
DIY eliminates labor costs, but you’ll still pay for material, disposal, and possibly tool rentals. A simple patch might run $350‑$400 if you have the tools, while a professional would charge $600‑$800 for the same job. The trade‑off is time, safety, and the peace of mind that a licensed crew brings, especially for larger panels or when hidden rot is involved.
How often should I budget for vinyl siding maintenance to avoid big repair costs?
We recommend an annual visual inspection and a gentle power‑wash every 2‑3 years. Budget $100‑$200 a year for cleaning supplies, caulk touch‑ups, and a quick trim check. Spotting a loose panel or a cracked seal early can save you a few hundred dollars in repair costs down the road, and it keeps your home’s curb appeal humming.
How does LGFMH Construction help keep vinyl siding repair cost predictable?
At LGFMH Construction we start with a detailed, itemized estimate that breaks down material, labor, disposal and any extra trim or flashing. We also suggest a 12 % contingency so you’re not caught off‑guard by hidden rot or weather delays. Our team walks you through every line item, answering questions on the spot, so you know exactly where each dollar is going before any work begins.


Comments