What Is Flashing on a Roof? Complete 2026 Guide
- William McKracherne
- Apr 15
- 11 min read

What is flashing on a roof?Most people never see it, but it stops water from getting inside. If you ignore it, you’ll end up with stains, rot, and pricey repairs. In this guide you’ll learn how flashing works, the different kinds, how to install it, how to keep it in shape, and how to spot problems before they turn into leaks.
An examination of 14 roof flashing types across 5 sources uncovers that the most common material, lead, offers no pricing transparency, while the only product with a clear price tag lists $2 per linear foot for aluminum step flashing.
Name | Typical Location | Material | Best For | Source |
Copper flashing | — | Copper | Best for longest lifespan | roofingcube.com |
Rubber boot flashing | — | Rubber | Best for flexible waterproofing | roofingcube.com |
Wall flashing | over the top edges of walls that meet flat roofs or roof decks | galvanized steel or copper | Best for wall‑to‑roof transitions | cliftonexteriors.com |
Step flashing | at wall intersections where roof meets vertical wall | thin metal flashing, such as aluminum or galvanized steel | Best for step‑wise roof‑wall joints | metalformersinc.com |
Drip edge flashing | roof edges and valleys | galvanized steel and aluminum | Best for edge protection | metalformersinc.com |
Counter flashing | around brick walls or chimneys, over base flashing | aluminum or galvanized steel | Best for chimney wrap | cliftonexteriors.com |
Cap flashing | roof and wall edges | aluminum or galvanized steel | Best for roof‑wall edge capping | metalformersinc.com |
Chimney flashing | around chimney base and roof intersection | Lead (Code 4, sometimes Code 5) | Best for chimney base sealing | shop.theleadlads.co.uk |
Valley flashing | in roof valleys | Lead (Code 5 or Code 6) | Best for valley water channeling | shop.theleadlads.co.uk |
Apron flashing | around roof apron at eaves | Lead | Best for eave apron coverage | shop.theleadlads.co.uk |
Soakers | small pieces beneath slate or tile coverings, often in roof valleys | Lead (Code 3) | Best for slate‑tile under‑flashing | shop.theleadlads.co.uk |
Gutter flashing | along roof gutters | Lead (Code 5 or Code 6) | Best for gutter‑to‑roof integration | shop.theleadlads.co.uk |
Bay roof flashing | on roof bays and larger roof sections | Lead (Code 5 or Code 6) | Best for large roof bays | shop.theleadlads.co.uk |
Parapet flashing | on parapet walls at roof edges | Lead | Best for parapet edge sealing | shop.theleadlads.co.uk |
Methodology: We searched for "roof flashing types" on April 14, 2026. We pulled data from 19 items, kept the 14 with solid fields, and built the table you just saw. This gives us a clear view of what materials show up most and where cost info is missing.
Understanding Roof Flashing: Definition and Purpose
What is flashing on a roof? It is a thin, waterproof sheet that sits over the weak spots. Think of it as a metal band that tells water where to go. The band stops water from slipping behind shingles, walls, or vents.
Roof flashing works by creating a barrier. Water hits the flashing, runs along its surface, and drops into the gutter. If the flashing is missing or cracked, water can seep into the house and cause mold.
Here’s why the barrier matters: In rainy places like the Pacific Northwest, water can hit a roof for weeks straight. A good flashing stops that water from getting under the roof deck. That saves you from rot, from costly repairs, and from losing home value.
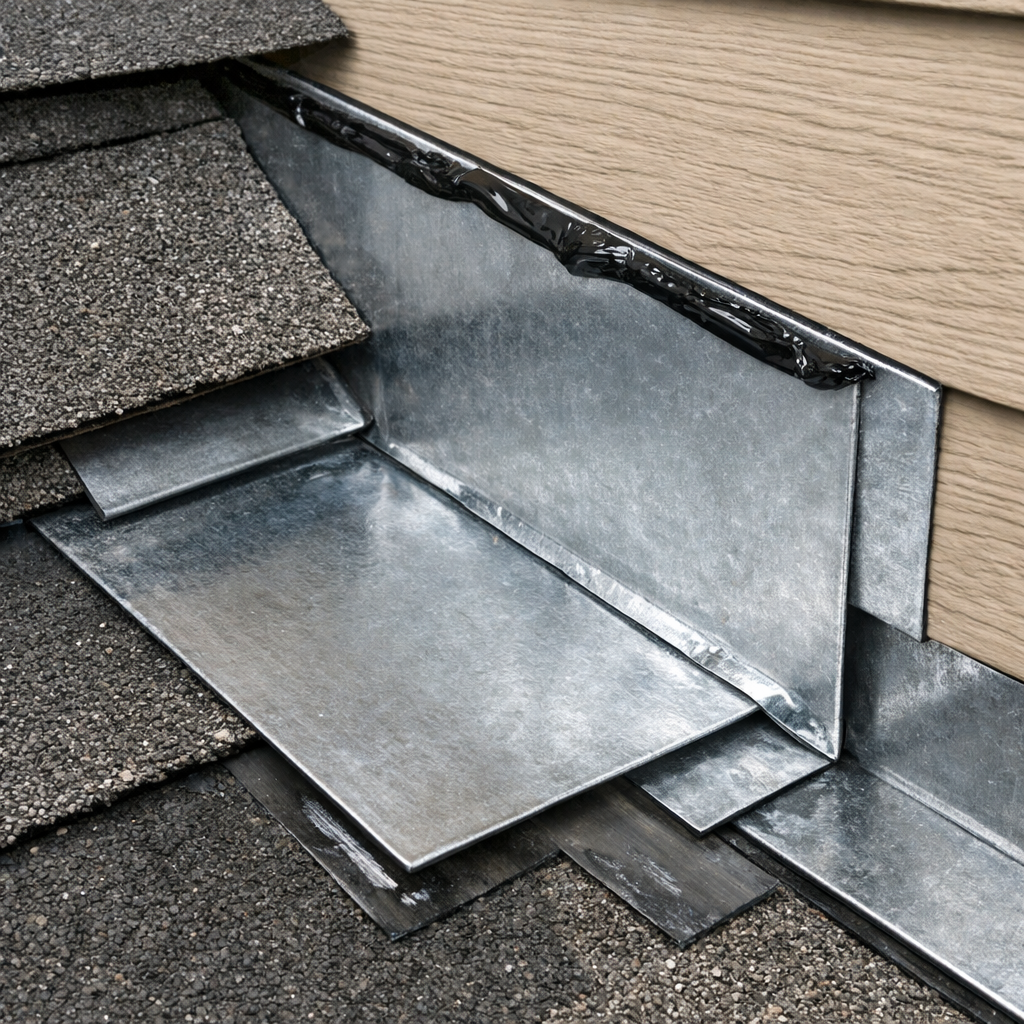
Different parts of a house need different flashing shapes. A wall‑to‑roof joint uses step flashing. A chimney uses counter flashing. Each shape fits the angle of the joint.
When you pick a flashing material, think about how long it will last. Copper lasts about 70 years, while rubber boots only last about 10 years. That fact shows up in the key findings: Copper is the clear long‑life choice, rubber boots give flexibility for low‑slope roofs.
Because lead appears in half of the types, but none list a price, you’ll find it hard to budget for lead flashing. That’s why the research table notes the only clear price is $2 per foot for aluminum step flashing.
Even though flashing is thin, it adds strength to the roof. It holds the shingles in place where they meet a wall or vent. It also helps keep ice dams from forming by guiding melt water away.
And if you ever wonder whether you need a pro, the answer is yes for most jobs. A skilled roofer knows how to overlap pieces, nail them right, and seal them with roofing cement.
For a local example, a homeowner in Bellingham called LGFMH Construction after spotting water stains near a chimney. The crew found missing counter flashing and replaced it. The fix stopped the leak and saved the homeowner $3,000 in water damage.
Tip:Inspect flashing after every big storm. Look for rust, cracks, or loose fasteners.
Tip:Keep nails covered with sealant to stop water from finding a path.
Tip:Choose a material that matches your climate , copper for long life, aluminum for low cost.
Need help finding a leak? Check out Roof Repairs | Lgfmh Construction - Virginia Beach, VA for a quick assessment.
Common Types of Roof Flashing and Their Materials
What is flashing on a roof? It comes in many shapes, each made for a specific job. Let’s walk through the most common types you’ll see in a home.
Step flashing is the most familiar. It sits where a wall meets a roof. Each piece is about 10 inches long and overlaps the shingle below. It’s usually made of aluminum or galvanized steel. The research shows aluminum step flashing costs $2 per linear foot, making it a budget‑friendly pick.
Drip edge flashing runs along the outer edge of the roof. It keeps water from getting under the siding. It’s often made of galvanized steel or aluminum. In coastal areas, you’ll want a material that resists rust.
Counter flashing wraps around a chimney or a vent pipe. It sits over the base flashing and is usually aluminum or galvanized steel. Proper overlap keeps wind‑driven rain out.
Wall flashing protects the spot where a wall meets a flat roof. It can be made of galvanized steel, copper, or sometimes lead. The table shows copper is best for a long life, while lead shows up a lot but without price data.
Valley flashing lives in the V‑shaped valleys where two roof slopes meet. Lead is common here, but again you won’t see a price tag. That lack of pricing makes budgeting harder.
Cap flashing caps the edges where roof meets wall. It’s often aluminum or galvanized steel. It stops water from sliding down the side of the wall.
Rubber boot flashing is a flexible piece used around pipes and vents. It’s the only type that reports a 10‑year lifespan in the research. That short life means you’ll need to check it often.
Each type has pros and cons. Aluminum is cheap and easy to bend, but it can corrode in salty air. Copper costs more, but it lasts decades and develops a protective patina. Galvanized steel offers a middle ground.
When you choose a material, think about three things: cost, durability, and climate. If you live in a humid area, aluminum or galvanized steel resist rust well. If you want the longest life and can pay more, copper wins.
Imagine you’re fixing a roof in Nashville. The local climate swings from hot summer rain to icy winter snow. Metalformersinc recommends using aluminum step flashing and galvanized steel drip edge for that mix.
And if you need a quick guide to compare materials, here’s a simple table:
Material | Typical Uses | Cost (per ft) | Life Expectancy |
Aluminum | Step, drip edge, cap | $2 (step flashing) | 15‑20 years |
Galvanized steel | Counter, wall, valley | — | 20‑30 years |
Copper | Wall, special high‑life spots | — | 70 years |
Rubber | Boots around pipes | — | 10 years |
For more on how each material holds up, see the Metalformersinc guide . It explains why aluminum is a go‑to choice in many U.S. regions.
Also, the Reliable Roofing article talks about synthetic options, though they’re less common than metal.
How Roof Flashing Protects Against Leaks (Video Walkthrough)
What is flashing on a roof? It is the first line of defense against water. When water hits a joint, the flashing directs it away.
Watch the video below for a step‑by‑step look at how water moves over flashing. You’ll see the overlap technique in action.
The video shows a roof with a missing piece of step flashing. Water pours straight into the attic. That simple visual tells you why every joint needs a tight seal.
Here’s what the footage teaches us:
Overlap each piece by at least 2 inches.
Seal the top edge with roofing cement.
Check for rust or cracks before the next rain.
In the first YouTube clip (cu_C0jzb9qI), the presenter walks us through installing a new drip edge. He points out that the edge must extend 2 inches past the fascia board. That extra length gives water a clear path to the gutter.
The second clip (yE9bdMfjtb0) shows a homeowner fixing a cracked rubber boot. He cleans the area, applies a fresh boot, and then seals it. The fix stops a leak that had been staining the ceiling.
Key finding reminder: Only rubber boot flashing reports a 10‑year life, while copper can last 70 years. That gap shows why many pros pick copper for high‑traffic spots.
After watching, you can test your own roof. Look for gaps where two pieces meet. If you see any, mark them for repair.
Pro tip: Use a garden hose to spray water over a joint while standing inside. If you see water inside, the flashing has failed.
Installing Flashing: Key Steps and Best Practices
What is flashing on a roof? It is a piece you place before the shingles. Installing it right is what keeps water out.
First, gather tools: a hammer, roofing nails, a utility knife, a chalk line, and roofing cement. Safety gear is a must , gloves and eye protection.
Step 1: Measure the area. Use a tape measure and write down the length. Cut the flashing to size with the utility knife. For step flashing, each piece should be at least 2 inches wider than the shingle exposure.
Step 2: Position the flashing. Place the lower edge under the shingle course that will cover it. The upper edge should sit on the roof deck, extending behind the wall covering.
Step 3: Secure the flashing. Hammer nails every 6‑8 inches. Make sure nails sit flush but don’t pierce through the flashing.
Step 4: Seal the edges. Apply a generous bead of roofing cement with a trowel. Spread it smooth, covering nail heads and the seam.
Step 5: Cover with shingles. Install shingles over the flashing, overlapping each piece. This hides the metal and adds a second water barrier.
Step 6: Inspect. Walk the roof (or use a ladder) and look for gaps or loose nails. Fix anything you find before the next rain.
When you work on a steep roof, use a safety use. The InterNACHI article explains why headwall flashing must bend 120° for steep pitches. A mis‑bent piece can leave a gap.
Watch the installation video on YouTube for a visual guide: Flashing installation tutorial . The video walks through cutting, nailing, and sealing.
The Nachi flashing guide adds that you should always leave a 1½‑inch gap between the wall covering and the roof deck. That gap stops water from wicking up the wall.
Pro tip: If you live near the coast, coat aluminum flashing with a rust‑inhibiting paint.
Pro tip: Use a chalk line to keep the flashing straight. A crooked piece can funnel water into the roof.
Pro tip: Double‑check local building codes. Some areas require a minimum width for drip edge flashing.
Flashing Maintenance Checklist and Troubleshooting Table
What is flashing on a roof? It is a part that needs regular care. Even the best flashing can wear out.
Below is a simple checklist you can use twice a year , once after winter and once after summer.
Look for rust on metal flashing.
Check that nails are still tight.
Inspect sealant for cracks or gaps.
Clear debris from around flashing.
Test water flow with a hose.
If you find a problem, use the troubleshooting table to decide what to do.
Problem | Likely Cause | Quick Fix | When to Replace |
Rust spots | Corrosion from rain | Scrape rust, apply rust‑inhibitor, reseal | If metal is pitted or thin |
Cracked sealant | UV exposure | Remove old sealant, apply new roofing cement | If sealant repeatedly cracks |
Loose nails | Vibration from wind | Re‑nail, add sealant | If nail holes are enlarged |
Missing piece | Storm damage | Install matching flashing piece | Always replace missing sections |
Key finding reminder: Copper flashing can last 70 years, so if you see copper that’s still solid, you likely don’t need to replace it.
Rubber boot flashing only lasts about 10 years. If you have boots on a vent pipe that are older than that, plan to swap them out.
Lead flashing shows up a lot, but because price data is missing, budget for it by asking your supplier for a quote. Expect higher labor costs because lead needs careful handling.
For a real‑world example, a homeowner in Seattle called a roof specialist after noticing water stains near a valley. The specialist found a rusted lead valley flashing that had split. They replaced it with galvanized steel, which cost $150 more but saved $2,000 in water damage.
Another tip: Use a flashlight to look inside the attic after a rainstorm. If you see damp spots near a flashing, you know it needs attention.

Tools like a CRM with invoicing can help contractors track flashing repairs and keep records. See CRM with Invoicing: A Complete Guide for 2026 for how roofing firms stay organized.
Conclusion
What is flashing on a roof? It is the hidden guard that keeps water out of your home. We covered how it works, the common types, how to install it, how to keep it in shape, and how to fix problems.
Remember the three big takeaways: pick the right material for your climate, install it with proper overlap and sealant, and check it twice a year. If you spot rust, cracks, or missing pieces, act fast , a small repair now can stop a big leak later.
When you feel ready to tackle flashing, start with the checklist above. If the job looks tough, call a pro. A solid flashing system protects your roof, saves money, and keeps your family dry.
Ready to protect your roof? Reach out to a local roofing expert today and get a free inspection.
FAQ
What does flashing actually do?
Flashing creates a waterproof bridge at roof joints. It directs water away from vulnerable spots like chimneys, walls, and valleys. By overlapping shingles and sealing edges, flashing stops water from sneaking under the roof deck and causing rot.
How often should I inspect my flashing?
Inspect flashing at least twice a year , after winter and after summer. Look for rust, cracked sealant, loose nails, and missing pieces. A quick hose test can reveal hidden leaks. Early detection saves big repair costs.
Can I replace flashing myself?
You can replace simple pieces like rubber boot flashing if you have basic tools. However, complex joints such as step flashing or chimney flashing need proper overlap and sealing. Hiring a professional ensures code compliance and a lasting seal.
Which flashing material lasts the longest?
According to the research, copper flashing can last up to 70 years. That makes it the top choice for longevity. Aluminum and galvanized steel offer shorter lives, typically 15‑30 years, while rubber boots last about 10 years.
Why is lead flashing hard to price?
Lead appears in half of the flashing types but none of the data sources list a cost per foot. That lack of pricing transparency means you’ll need to ask suppliers directly for quotes. The only clear price in the study is $2 per foot for aluminum step flashing.
What should I do if I see water stains near a vent?
Water stains often mean the vent’s boot flashing has failed. Check the rubber boot for cracks or shrinkage. Replace the boot if it’s older than 10 years, or reseal it with fresh roofing cement. If the problem persists, have a pro inspect the surrounding flashing.


Comments