Windows: A Practical Guide to Choosing, Installing, and Maintaining Your Home
- William McKracherne
- Jan 29
- 20 min read

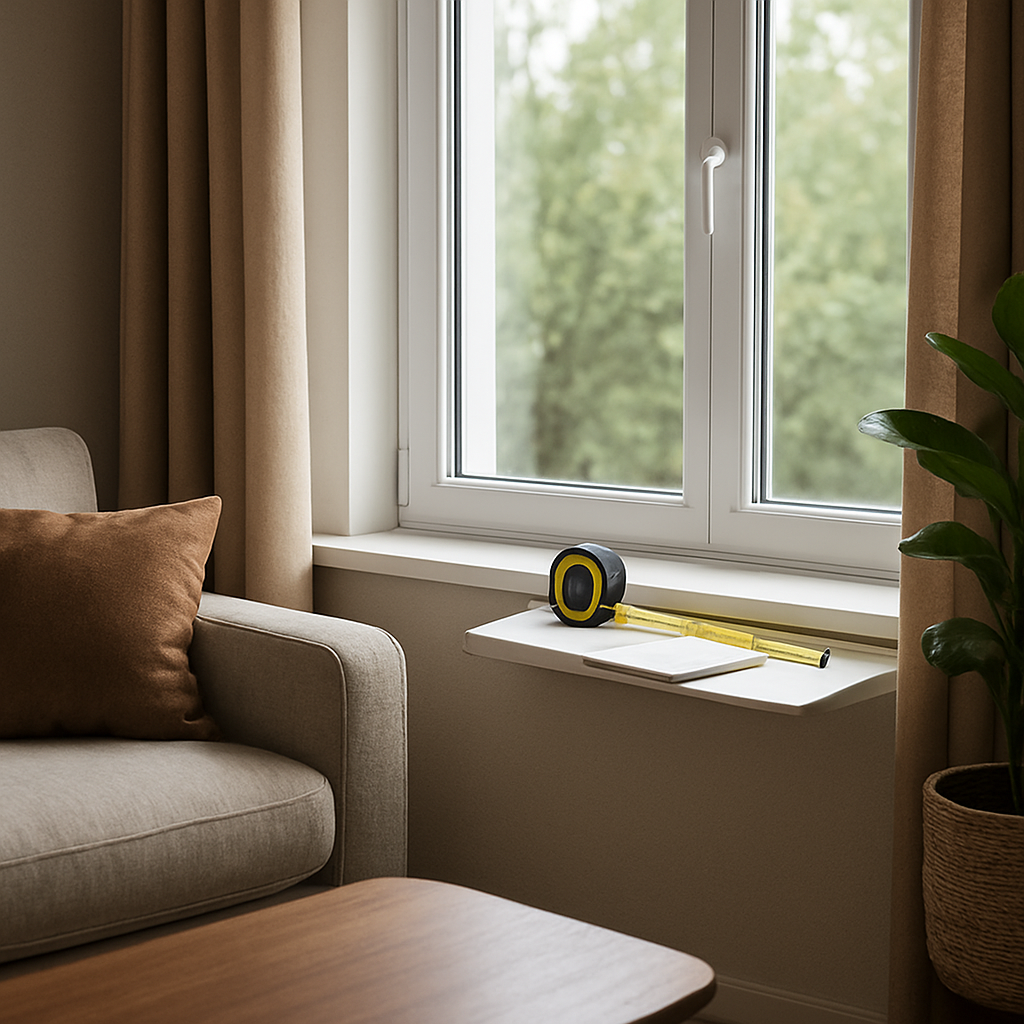
Let me ask you something: Have you ever stood in your living room, squinting at the same dusty window, and wondered if that pane could be more than just a glass door? Windows are the eyes of a house, and their health is a big deal for comfort, safety, and value. If the glass is cracked, the frame warped, or the seal is leaking, you’re not only letting cold in, you’re losing energy and maybe even your peace of mind.
In our experience at LGFMH Construction, we’ve seen that a single broken sash can signal a bigger problem—water damage behind the trim, mold spores that start to breed, or even a weakened frame that’s prone to collapse in a storm. That’s why the first thing we do when you call is a quick visual walk‑through. We’ll flag obvious issues, but we also look for the hidden ones that even you might miss, like tiny gaps that let drafts in during the winter or cracks that widen over time.
What’s the takeaway? Treat your windows like a living system—you need to inspect, clean, seal, and repair regularly. Here’s a quick three‑step routine you can start tonight: 1️⃣ Inspect each pane for cracks or peeling. 2️⃣ Clean the sills with a mild soap solution, wiping away dust that can trap moisture. 3️⃣ Apply a fresh bead of weatherstripping around the frame. Doing this can cut heat loss by up to 15% and keep your thermostat from fighting you.
If you’re still unsure about the state of your windows, the next logical step is a professional inspection. At LGFMH, we offer a no‑obligation windows assessment that dives deeper than a quick walk‑through, checking for hidden moisture, checking the integrity of the frame, and giving you a clear repair plan. And if you’re curious about other home systems, you can read about how a proper roof repair can prevent water from creeping into your walls: Repairs Soffit Fascia - Lgfmh Construction .
And here’s a thought that ties it all together: A window that’s well‑maintained is like a well‑tuned piano—every note matters. Take a quick snapshot of your windows before the next season and ask yourself, “Are they truly letting me in the light or are they a silent leak?” The answer will tell you whether you need a simple seal, a new sash, or a full replacement. So, grab a flashlight, a notepad, and start the inspection today. For a deeper dive into how window health impacts your overall energy bill, check out this expert guide on Hemocytometer vs Automated Cell Counter: A Practical Comparison Guide .
Bottom line: Keep an eye on your windows, and you’ll keep your home’s comfort, safety, and value intact. When you’re ready for a deeper look, remember that LGFMH is here to help you navigate repairs, replacements, or just a quick check-up. Your windows deserve the same love you give your family—so give them a little love today and watch the difference it makes in your everyday life.
TL;DR
Your windows are the home's eyes; keeping them tight and clean in every season can slash energy bills and boost comfort and reduce maintenance costs. By inspecting, sealing, and cleaning each month, you safeguard your home, cut heating costs, and enjoy clearer, crisper views while keeping utility bills low consistently.
Step 1: Identify Your Window Needs and Style Preferences
So you’re thinking about new windows or a simple fix, and you’re standing in front of the old frames, scratching your head. That’s the moment we call the “needs and style check‑in.” It’s not just about what looks good; it’s about what works for your home and your life.
First, pull out a notebook and a tape measure. Measure each sash’s width and height from the inside of the frame—yes, that’s the part you can see when the window is closed. Write down the smallest numbers; that’s what the contractor will need to know. If you’re not comfortable measuring, jot down the model numbers on the old windows and you’ll find them online.
Next, think about what the window does for you. Is it a bedroom that needs extra privacy? A kitchen that wants a bright, airy feel? Or maybe a living room that’s your “show window” to the outside. Ask yourself: “Do I want to open this for ventilation? Do I need a storm‑ready pane?” Your answer will steer you toward single‑hung, double‑hung, casement, or picture windows.
Picture a single‑hung in a sun‑lit den. It lets you pull the bottom sash out for easy cleaning and still keeps a solid frame on top. That’s great for older houses with narrow openings. If you’re in a new build, a double‑hung gives you double the airflow and a bit more style. For a breezy porch, a casement that swings out is a win.
Now, style. Windows are a huge part of a house’s personality. Do you lean toward modern, clean lines or classic mullions? Think of your roofline and siding; they’re the window’s neighbors. A sleek aluminum frame matches a contemporary clapboard, while a warm wood trim pairs nicely with a Victorian sash. Pick a material that will age with your home.
Consider the energy angle too. Triple‑pane glass can cut heating costs by up to 15% in colder climates, but it’s pricier. If your budget is tight, double‑pane plus a high‑quality seal can still give you a solid energy boost.
Do you have pets or children who love to climb? Look for reinforced frames and laminated glass. If you live in a stormy area, look for impact‑resistant options that can shrug off hail. Those specs often come with a higher upfront cost, but they pay off when the weather turns rough.
One trick: sketch a quick floor plan and label where each window will sit. Then draw a quick “needs” box—label each window with its primary function: light, privacy, ventilation, or decorative focus. That visual will keep the conversation focused when you chat with a contractor.
Now that you’ve got the measurements, the function, and the aesthetic vibe, it’s time to line up the options. Keep a spreadsheet of potential windows, their dimensions, glass type, frame material, and price. You’ll be able to compare at a glance and spot any hidden costs, like mismatched trim or extra weather stripping.
When you’re ready, schedule a quick on‑site visit. A contractor can confirm that the rough opening will accommodate the chosen size and can flag any structural quirks that might need addressing before installation. That pre‑check saves you from surprises and ensures the final product fits exactly.
Bottom line: The “needs and style check‑in” is your secret weapon. It turns a vague desire for better windows into a concrete, data‑driven plan that keeps costs down and satisfaction high.
Step 2: Choose the Right Window Types for Your Home
Alright, we’ve got the measurements and the mood board. Now it’s time to decide which window style actually fits the job. Think of this like picking a pair of shoes for a road trip: you need something that looks good, feels comfortable, and can handle the terrain. The same logic applies to windows.
First thing: ask yourself what you’ll actually use the window for. Is it a bedroom that needs privacy? A kitchen that wants to flood with light? Or a living room that’s the showpiece of your front façade? Your answer will narrow the field to one or two styles. And no, you don’t have to commit right away; you can keep a shortlist.
Single‑hung: the classic workhorse
Single‑hung windows have a fixed top sash and an operable bottom. They’re the go‑to for older houses with narrow openings. The good news? They’re simple to clean from the inside and often come with a lower price tag.
The downside? They’re not the most energy‑efficient option because the bottom sash can let air slip even when locked. If you’re in a chilly climate, you might need to pair them with a good sealant or consider a secondary layer of insulation.
Casement: the seal‑tight champion
Casement windows swing out on hinges. They have a single sash that locks tightly against the frame, creating a weather‑tight seal that’s hard to beat. That means less draft, less heating cost, and a cleaner look.
They do need space to open, so if you’re near a door or a wall, keep that in mind. Also, a bit of maintenance is required to keep the hinges smooth, but most people find the extra effort worth the energy savings.
Picture windows: the passive performance stars
Picture windows are fixed, non‑operable panels that let light in without the hassle of moving parts. Because they never open, they’re the most efficient of all the types. Think of them as a window’s “stay‑in‑place” mode.
They’re great for bedrooms or living areas where you don’t need to ventilate, but if you want fresh air, you’ll need at least one operable window nearby.
Putting it together: a quick decision guide
Here’s a quick cheat sheet to help you sort through the options:
Feature | Common Types | What to Consider |
Energy efficiency | Casement > Picture > Single‑hung | Look for tight seals and double or triple pane glass if heat loss is a concern. |
Ventilation | Single‑hung, Casement, Awning | Choose an operable style if you need to pull fresh air in without opening a door. |
Maintenance | Single‑hung easiest to clean, Casement needs hinge upkeep, Picture minimal | Factor in your willingness to touch hardware versus having a low‑maintenance window. |
Now, let’s bring it back to you. Picture this: you’re standing in your kitchen, the light pours in through a casement that swings open to the garden. The air is fresh, the heat stays inside during a cold night, and you can spot your favorite cookbook on the shelf without a ladder. That’s the kind of experience you’re building when you pick the right type.
So, what should you do next? Pull up your shortlist, match each style to the room’s primary function, and then factor in the climate and your budget. Remember, you can always mix and match—perhaps a picture window above the fireplace for maximum light and a casement on the side for ventilation.
If you’re feeling stuck, draft a simple pros‑and‑cons list on a sticky note. That visual trick forces you to see the trade‑offs in one glance, which is perfect for when you’re talking options with a contractor. It also keeps the conversation focused, so you don’t wander into “should we repaint the trim?” territory.
And finally, keep in mind the long‑term payoff. A window that’s well‑chosen today means lower heating bills, higher resale value, and a home that feels more comfortable. So, grab that notebook and get mapping—your future self will thank you.
Step 3: Evaluate Energy Efficiency and Materials
When you’re hunting for a new window, the first thing that pops into your head is probably the price tag or the style. But if you’re serious about cutting costs and keeping the house cozy, you have to dig a little deeper. Think of the window as a little energy gate—if it’s built right, it keeps the good stuff in and the bad stuff out.
So, what’s the real metric that tells you a window will do that job? The answer lies in the NFRC rating system, which is the gold standard in the U.S. for window performance. Each certified window comes with a label that lists its U‑Factor, SHGC, and other key numbers. Lower U‑Factor numbers mean less heat loss; lower SHGC numbers mean less unwanted solar heat. For a house in the Midwest, you’ll want a U‑Factor around 0.28–0.30 and an SHGC near 0.35. If you’re in a sunny, hot corner, flip the SHGC lower to keep the room cool.
It can feel like jargon, but you can break it down to plain English: U‑Factor is how much heat can escape; SHGC is how much sun can heat the inside. If you’re in a cold climate, a lower U‑Factor is king. If you’re in a hot climate, a lower SHGC saves you on AC. The trick is to match the numbers to your local weather and the wall orientation.
How do you find the right numbers for your home? The easiest way is to use the efficient windows ratings guide . It gives you a searchable database of windows with their exact ratings, plus it shows you the ENERGY STAR® qualification for each. Switching to a certified window can slash your energy bill by about 13% on average. That’s not just a marketing line—research backs it up.
Beyond the numbers, material matters a lot. Wood frames offer great natural insulation but need regular maintenance; vinyl is low‑maintenance and can be made to look like wood; aluminum can be tough and is often paired with thermal breaks to stop heat transfer. In the Midwest, where you have both hot summers and cold winters, vinyl is a popular choice because it holds up against moisture and doesn’t warp when it freezes.
Don’t forget about the glass itself. Most windows today use double or triple pane glass, and each pane can be coated with a low‑e (low emissivity) film. That thin coating reflects infrared heat while letting visible light through. If you’re in a sunny spot, you’ll want a low‑e that reflects the sun’s heat but lets natural light in. In a colder area, a low‑e that reflects interior heat back in is ideal.
Air leakage is another sneaky culprit that can drain your energy. Even a window that looks tight can have tiny gaps that let drafts sneak in. NFRC labels include an optional “Air Leakage” rating; the lower the number, the tighter the fit. Look for a window with an air leakage rating of 50 cfm or lower if you’re serious about staying warm in winter.
Condensation resistance is a bonus that many homeowners overlook. It’s the window’s ability to keep moisture from forming inside the glass, which protects your frame from rust and helps keep mold at bay. A high condensation resistance rating is especially useful in humid climates or in rooms like basements and bathrooms.
Once you have a shortlist of windows that meet your U‑Factor and SHGC needs, compare their build quality. Ask the contractor about the frame material, the type of sealant used, and whether the manufacturer offers a warranty that covers thermal performance for at least ten years. A solid warranty is a good indicator that the manufacturer stands behind its ratings.
Before you commit, run a quick “energy audit” of your home. Turn off your heating or cooling system, close all windows and doors, and measure the indoor temperature after a couple of hours. If the temperature drops faster than you expect, that’s a sign your existing windows are leaking. Bring the numbers to your contractor; they’ll know if the new windows will make a real difference.
Now that you’ve got the data, you’re ready to make a choice that balances style, durability, and efficiency. The right window isn’t just a pretty face—it’s a smart investment that keeps your home comfortable and your energy bills low for years to come.
Step 4: Budgeting and Installation Planning
We’ve got the right windows on the table—now let’s talk numbers and the practical side of getting them in place.
First up: the budget. Replacement windows can cost anywhere from a few hundred to a few thousand dollars, depending on style, glass, and finish. A recent guide shows the average price, including labor, is about $800 to $1,200. Check out the full cost breakdown for a deeper look.
So, what does that mean for you? Think of each window as an investment in comfort. The more you put in now, the less you’ll pay in energy bills later. A simple trick: grab a rough estimate of how many windows you’ll replace and multiply by the mid‑range price. Add 10% for shipping, and you’re looking at the ballpark figure for the whole job.
Next: warranties. Most reputable manufacturers throw in a 10‑year guarantee on thermal performance, and many offer a 25‑year life‑time warranty on frames. That’s a big safety net. If you’re on a tighter budget, you can opt for a lower‑end model with a 5‑year warranty.
Now let’s talk installation. The timing of the job can affect the price. Installing new windows during the off‑season—late winter or early spring—can save you money because contractors have more availability and lower rates. Ask your contractor for a quote that separates materials, labor, and any demolition or trim work. You’ll get a clearer picture of where the money goes.
Checklist to keep your budget on track:
Get three independent quotes and compare line items, not just the final price.
Ask for a detailed scope: will the contractor replace trim, remove old windows, or just fit new frames?
Verify the warranty coverage—does it include the frame, glass, and installation seal?
Check if the contractor uses licensed installers or if they’re subcontracting out the work.
Don’t forget to factor in the hidden costs that can sneak up on you:
Sealant and caulk to keep drafts out.
Weatherproofing for the sill and surrounding trim.
Possible upgrades to the jamb if the existing frame is damaged.
When you’re ready to lock in the deal, ask for a written contract that lists every item, the exact window model, and the warranty terms. That way, if something goes wrong—say a leak appears after a storm—you can refer back to the contract instead of fighting with the contractor.
Lastly, plan your installation timeline with a buffer. A typical window replacement takes about a day per unit, but you’ll need time for any unforeseen complications like removing old glass or repairing damaged framing. Schedule a day in your calendar when the weather is forecast to stay clear; a rainy day can delay the whole project.
In short: set a budget, get transparent quotes, understand warranties, and keep a handy checklist. With these steps, you’ll walk out of the project with windows that look great, feel tight, and keep your home comfortable while saving on the bank.
Step 5: Maintenance and Longevity Tips
All right, you’ve got fresh windows, a solid budget, and a contractor who knows how to get the job done. What’s next? The real magic happens when you keep those windows happy long after the paint dries. Let’s dig into the day‑to‑day habits that turn a one‑time purchase into a lasting investment.
Clean Your Windows Regularly
We all know a clean glass looks better, but did you know dirt and grime can actually scratch the surface over time? A study by the National Association of Window Cleaners shows that windows cleaned twice a year lose 15% less light than those left untouched.
Spring and fall are the classic times to give your panes a wash. But if you’re in a city with a lot of smog, traffic, or near a construction site, you might want to step up to a quarterly schedule. And if you have pets or young kids who love to splash, consider a quick wipe‑down every few weeks.
You can do a DIY clean with a mild soap and vinegar solution. Sprinkle a little dish soap on warm water, dip a microfiber cloth, and wipe in circular motions. Finish with a dry buff to avoid streaks. If the job feels daunting, Bethany Associates offers professional window cleaning that guarantees spotless results and keeps your glass looking new.
Inspect and Seal Drafts
Drafts are the silent thieves that eat your heating bill. After installation, let the contractor run a smoke test or use a candle to spot gaps. If you see swirling smoke, you’ve got a leak. A quick caulk or weatherstripping upgrade can stop those drafts in their tracks.
When you feel a breeze in a winter month that should be chilly, check the frame. A simple plastic or rubber seal around the sash can seal the gap. Replace it every few years or when you notice cracks. Remember, a single draft can raise your heating cost by $50 a year.
Protect the Frame
Wood frames love water; vinyl loves dust. Both need care. For wood, apply a water‑resistant finish every 2–3 years to keep rot at bay. Vinyl frames can benefit from a silicone spray that repels dirt and reduces wear on hinges.
Also, keep the sills clear of debris. Leaves and dirt can trap moisture, leading to mold growth inside the jamb. A simple sweep or a leaf blower after autumn rains can keep moisture away.
Seasonal Prep
Before winter rolls in, do a quick pre‑check. Tighten all screws, ensure the sash moves smoothly, and replace any worn weatherstripping. In summer, run a fan in the attic to reduce heat buildup behind the frame and keep the glass cool.
And here’s a quick tip: put a small towel or sponge in the sill during rain. It’ll soak up drips before they can seep into the wood or frame.
When to Call a Pro
Some maintenance is simple, but when you see a persistent crack in the glass, a warped frame, or water pooling inside the trim, it’s time to bring in the pros. A professional can assess hidden damage that isn’t obvious to the eye.
They’ll also handle more involved tasks like re‑caulking a large frame, replacing a broken sash, or treating the wood to prevent future rot. Think of it as a health checkup for your windows—better to spot problems early than wait for a full replacement.
To keep your investment strong, schedule a full inspection once a year, and don’t wait until a leak shows up. A proactive approach can save you thousands in energy and repair costs.
Quick Action Checklist
Clean glass and frames twice a year (or more often if needed).
Test for drafts each winter and summer; re‑caulk as needed.
Replace weatherstripping every 3–5 years.
Clear sills of debris after each season.
Apply wood finish every 2–3 years; spray silicone on vinyl frames.
Schedule a yearly professional inspection.
Follow this routine, and you’ll keep your windows looking bright, feeling tight, and working hard for you. You’ll spend less on energy, more on the things you love—like that cozy evening by the fire without that annoying draft.
Step 6: Common Mistakes to Avoid During Window Projects
1. Skipping a Professional Assessment
Ever think a quick look around will catch every problem? Most homeowners do. The truth is, a seasoned inspector can spot hidden moisture, warped frames, and early glass failures that even a keen eye misses.
Think about the last time you opened a window and felt that cold draft on your hand. It’s probably not just a bad seal—there might be a tiny crack in the jamb or a warped sill that’s letting in a lot more air than you realize.
Action tip: schedule a free on‑site review before you pick any new panels. The contractor can measure the opening, check for moisture, and recommend the exact window type that will fit and stay tight.
2. Choosing the Wrong Style for Your Climate
Casement windows seal tight, but they need space to swing out. If you’re living in a city with narrow streets, a casement could jam against a curb or a neighbor’s wall.
Single‑hung windows are easier to install in tight spaces, but their fixed top sash can let cold air seep in when the bottom sash is closed.
What you can do: match the window style to the room’s use and the local weather. A double‑hung in a sunny kitchen gives great ventilation, while a low‑profile picture window above a fireplace keeps drafts out.
3. Cutting Corners on Materials
Buying the cheapest frame or glass sounds smart until it starts leaking or rotting. Low‑cost vinyl may look fine, but without a thermal break it can still lose heat.
Similarly, a single‑pane window in a region that swings between 30°F and 90°F is a recipe for expensive heating and cooling bills.
Pro advice: look for ENERGY STAR labels or a low‑e coating that reflects heat. The initial price jump often pays back in utility savings over a decade.
4. Ignoring the Importance of Proper Sealing
Even the best glass can become a drafty hole if the seal around the sash is weak. You might notice a puff of air when you close the window in winter.
Caulking that’s been drying or a weatherstripping layer that’s cracked can let in as much as a 10‑inch air pocket.
Fix it by applying a fresh bead of silicone sealant around the frame each time you install a new sash, and replace weatherstripping every 3–5 years. That’s a quick touch that can shave off a few dollars on your heating bill.
5. Overlooking Installation Precision
When a contractor cuts the frame too deep or doesn’t level the sill, the window won’t sit flush. The result? Air gaps, water infiltration, and a window that feels loose.
Even a 0.5‑inch misalignment can create a noticeable draft.
Ask your installer to use a level, a moisture meter, and a proper shimming technique. If you’re DIYing, double‑check the jamb width against the new frame’s spec sheet before you start.
6. Neglecting Post‑Installation Maintenance
After the big day, many homeowners assume everything’s done. The truth? Windows need regular care to keep their seals and hinges functioning.
Cleaning tracks, lubricating hinges, and inspecting for new cracks should be part of your quarterly routine. Ignoring these steps can lead to a swollen sash that won’t open and a frame that’s prone to rot.
Set a calendar reminder: every spring, give the windows a quick wipe‑down and check for moisture. Every winter, run a quick draft test with a candle or a smoke stick.
7. Forgetting About Energy‑Efficiency Ratings
Many buyers focus on looks and price, missing the U‑Factor and SHGC numbers that actually dictate energy performance.
A window with a U‑Factor of 0.30 will lose more heat than one at 0.28, even if they look identical. Similarly, a high SHGC can let in unwanted solar heat during summer.
Take a minute to pull the window’s NFRC label and compare the ratings with your local climate needs. That small check can save you up to 13% on average energy bills.
8. Assuming One‑Size‑Fits‑All
Every room tells a different story. A bedroom needs privacy and quiet; a living room wants natural light and ventilation.
If you install a large picture window where a small, operable one would be better, you’re likely to feel drafts and get higher heating costs.
Plan the window type with the room’s function in mind, and don’t be afraid to mix styles. A casement for airflow beside a picture window for light can deliver both comfort and aesthetic appeal.
9. Skipping a Final Leak Test
After the new windows are up, it’s tempting to close the door to the work area. But a quick smoke test can reveal hidden gaps that weren’t obvious during installation.
If you notice swirling smoke, that means air is slipping in. Seal the gap immediately with a bead of silicone or replace the weatherstripping.
Doing this right away avoids future water damage and keeps the energy savings you invested in.
10. Overlooking Warranty Details
Everyone wants a warranty, but many homeowners don’t read the fine print. A 10‑year thermal performance guarantee is great, but if the frame warranty is only five years, you’ll be paying for repairs sooner.
Ask the installer to explain what’s covered, for how long, and under what conditions. Knowing that will give you peace of mind and protect your investment.
In short, keep the project on track by checking every step—assessment, material choice, sealing, installation, maintenance, ratings, and warranty. These 10 quick checks help you avoid the costly mistakes that can turn a simple window upgrade into a headache.
FAQ
What should I look for when choosing a window frame material?
The frame is the heart of any window. Wood gives a classic look and natural insulation but needs caulking and paint every few years. Vinyl is low‑maintenance and keeps the same finish for decades. Aluminum can be thin and light, but without a thermal break it will transfer heat. Think about your climate: if you’re in a humid area, vinyl resists warping, while in a colder zone wood can keep heat inside if sealed well.
How do I know if my new windows are sealing properly?
After the installer finishes, run a simple smoke test. Light a cigarette or a candle and hold it near the frame. If the smoke moves through, you’ve got a gap. A quick bead of silicone sealant or a new weatherstripping strip can stop drafts. It’s a tiny fix that can shave a few dollars off your heating bill each winter.
Do energy‑star ratings really make a difference in my monthly bill?
Yes. A lower U‑Factor means less heat leaks out, and a lower SHGC keeps hot sun out during summer. In a typical home, switching to an ENERGY STAR window can cut heating and cooling costs by about 13 %. Even if the upfront price is higher, the savings add up over the life of the window, so it’s a smart long‑term investment.
What’s the best way to maintain my window sills and trim?
Keep the sill clear of debris. A quick sweep after rain or a leaf blower in autumn stops moisture buildup that can lead to mold or rot. If you have wood trim, apply a protective sealer every two to three years. For vinyl trim, a silicone spray keeps dirt from sticking and keeps the hinges running smoothly.
When should I schedule a professional inspection after installation?
Schedule a check a few weeks after the new windows are up. Look for any shifting or new cracks in the frame and test the sash operation. If you notice a gap or a warped sash, call the contractor. Addressing small problems early prevents larger leaks and costly repairs later.
Can I mix different window types in one home?
Absolutely. Pair a casement in the kitchen for airflow with a picture window above the fireplace for light. Mixing styles lets you match each room’s function—ventilation, privacy, or view—while still achieving a cohesive look. Just make sure each window meets the local climate’s energy requirements.
Conclusion
We’ve taken you from the first measurement to the final seal, covering style, efficiency, budget, and upkeep. The goal? A set of windows that feel like they belong, not just replace.
What really sticks is that the right window is less about fancy glass and more about how it keeps your home comfortable day in and day out. Lower U‑Factors mean fewer drafts, and a tighter seal keeps your heating bill from ballooning. That’s the kind of return you’ll notice in a few months, not just on paper.
Now, let’s make it real. Schedule a quick inspection a few weeks after installation. Use a candle or a smoke stick to spot gaps—any draft is a cash‑saver waiting to happen. Keep the sill clear, and refresh sealant every two to three years. Treat wood trim with a water‑resistant finish, and give vinyl a silicone spray to keep it clean.
Feeling stuck or seeing a leak? Reach out to us. A quick chat can spot a problem before it becomes a costly repair. Your windows are an investment; let’s keep them paying off for years to come. Remember, a well‑maintained window keeps your home cozy and your wallet lighter for decades and beyond.


Comments