Garage Floor Epoxy Coating Guide: A DIY How-To
- William McKracherne
- Jun 18
- 6 min read

Epoxy coating is one of the best upgrades you can make to your garage floor. But research shows that only 29% of kits actually list how many square feet they cover, and the average is about 628 sq ft, just enough for a two-car garage. The key is getting the prep and application right. Here's exactly how to do it yourself.
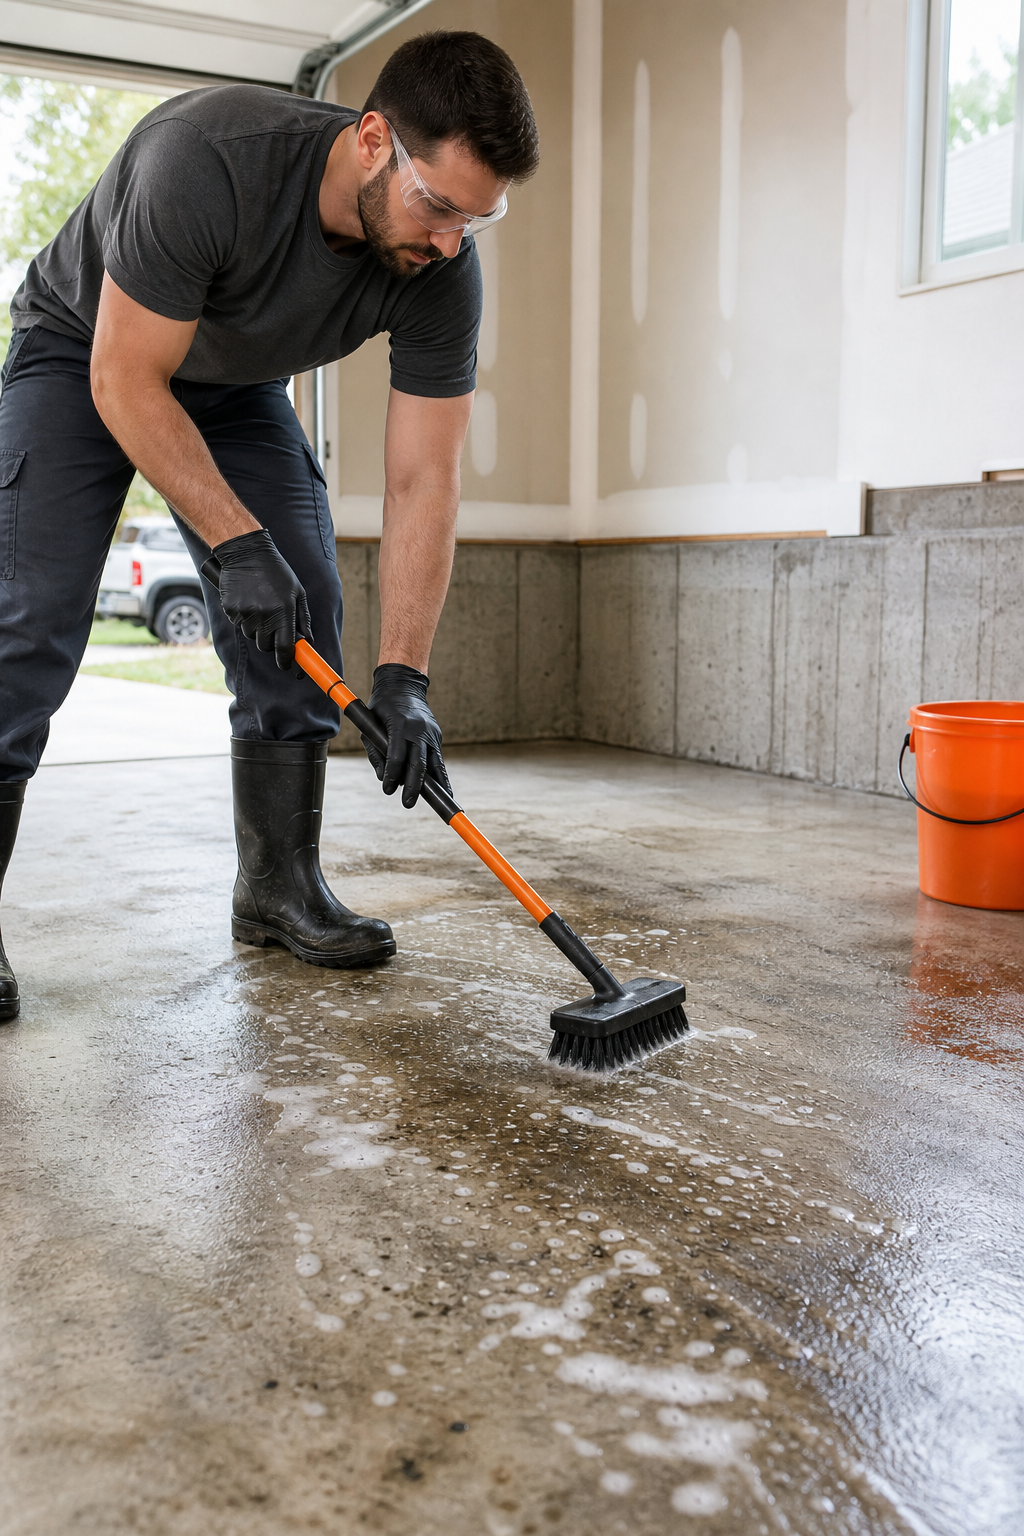
Step 1: Prepare the Garage Floor
Good prep is what separates a coating that lasts a decade from one that peels in months. Start by clearing everything out of the garage. Sweep, then degrease any oil stains with a concrete degreaser or a mix of trisodium phosphate and water. Rinse thoroughly.
Next, etch the concrete to open up its pores. You can use a muriatic acid solution or a professional concrete etcher. Follow the label instructions exactly, you want a light fizz, not a violent reaction. Rinse again until the water runs clear.
Fill any cracks with a concrete patching compound that's rated for garage floors. Let it cure per the package directions. Then vacuum the entire floor with a shop vac and wipe down with a tack cloth. Do a moisture test: tape a plastic sheet to the floor for 24 hours; if there's condensation underneath, you have a moisture problem that needs a vapor barrier before you coat.
If your concrete is newer (less than 28 days old), wait before coating. And check for any paint or sealant residue, you'll need to grind or sand that off. A rough, clean surface is the only thing epoxy bonds to well. LGFMH Construction often sees DIY jobs fail because of skipped prep; if you're unsure, they offer professional surface prep services.
Additionally, you can read up on drywall installation and finishing tips for related garage finishing projects.
Step 2: Choose the Best Epoxy Coating Kit
Not all epoxy kits are the same. The three main types are water-based, solvent-based, and 100% solids. Water-based epoxies are low-VOC and easy to apply, but they wear faster. Solvent-based ones have strong fumes and are being phased out due to environmental rules. According to Sherwin-Williams, 100% solids epoxies contain no water or solvents and cure to a thicker, more durable film, ideal for garage floors that see heavy traffic.
When shopping, look for a kit that clearly states its coverage. Our research across 24 products found that only 7 (29%) reported square footage, with an average of 628 sq ft. Many kits advertise “1200 sq ft coverage” but that's often for a primer or a very thin coat, be realistic about your garage size. Also check cure time: the average among reporting kits was 16.4 hours, but some set in as little as 3 hours while others take 48. For a DIY first-timer, a longer cure gives you more working time.
Here's a quick comparison table to help you decide:
Type | Durability | Application Difficulty | Best For |
Water-based | 3-5 years | Easy | Low-traffic garages |
Solvent-based | 5-8 years | Medium | Moderate traffic (less common now) |
100% solids | 10+ years | Hard (fast cure) | High-traffic, professional finish |
If you're set on the best results, go with a 100% solids epoxy. Brands like Rockhard (via a regional supplier) and ArmorPoxy are popular. The durability claims of 10 years sound great, but only 4 out of 24 kits we studied actually listed a durability rating, and all said 10 years. Take marketing with a grain of salt.
Step 3: Mix and Apply the Epoxy Base Coat
Now the actual coating work begins. Read the kit instructions first, different epoxies have different mix ratios. Most two-part epoxies are a 1:1 or 2:1 resin-to-hardener ratio by volume. Pour the hardener into the resin and stir for a full 2, 3 minutes, scraping the sides and bottom.
Once mixed, you have limited time (the pot life). For 100% solids epoxies, that's usually 30, 45 minutes. Don't mix more than you can apply in that window. Pour the mixed epoxy onto the floor in a ribbon along the longest wall. Use a 9-inch roller with a 1/2-inch nap to spread it evenly. Work in sections about 3, 4 feet wide, and back-roll to remove bubbles.

After rolling, use a spike shoe or spreader to break any remaining air bubbles. The coat should be around 10, 15 mils thick. Watch for puddles, those lead to uneven curing. If you see a puddle, sps, like this one from a flooring pro, show the technique in detail.
Let the base coat cure until it's tacky but not wet, usually 12, 24 hours depending on temperature and humidity. Ideal conditions are 70°F and 50% humidity.
Step 4: Add Decorative Flakes or Color
This step is optional but adds grip and hides imperfections. If your kit came with decorative flakes, wait until the base coat is still tacky (but not so wet that flakes sink). Then broadcast the flakes by hand or with a handheld spreader. Start at the farthest corner and work backward to avoid walking on fresh flakes.
Use about 0.25 pounds per square foot for a heavy flake finish (more coverage) or less for a speckled look. Let the flakes sit for 24 hours, then sweep up the excess that didn't stick. You can also use a squeegee or brush to push them flat.
For a solid color without flakes, you can add a second base coat in a tinted epoxy. That's simpler but less textured. As seen in this video demonstration, flake systems are popular because they're forgiving of minor surface imperfections.
If you skipped flakes, you can apply a chip-free urethane or polyaspartic top coat for color. But most kits include a top coat as the final step.
Step 5: Apply Top Coat and Allow Curing
The top coat protects the epoxy from UV, chemicals, and scuffs. Polyaspartic top coats are UV-stable and cure faster than urethanes, some are ready to walk on in 3, 4 hours. Urethanes are more scratch-resistant but take longer to cure.
Mix the top coat the same way as the base coat, applying it with a clean roller. Work in smooth, even strokes. Apply a second coat if your kit calls for it, but most DIY kits require only one.
Now the hard part: waiting. Epoxy takes about 7 days to fully cure, though you can walk on it after 12, 24 hours. Don't park a car on it for at least 3, 4 days, and avoid heavy items for a full week. Temperature and humidity affect this, hot conditions speed it up, cold slows it down. If your garage is uninsulated, consider a portable heater or dehumidifier to keep it around 70°F and 50% humidity.
During curing, keep the garage doors open for ventilation if using a solvent-based top coat. For water-based or 100% solids, minimal ventilation is needed.
Once cured, your garage floor will have a hard, glossy finish that can last 10+ years with proper care. But remember those durability claims: only 17% of kits we studied even mentioned durability, and all said 10 years, so treat that as ideal conditions. Regular maintenance like sweeping and avoiding harsh chemicals will extend its life.
Frequently Asked Questions
Can I apply epoxy over an existing painted floor?
Not directly. Paint creates a bond breaker. You'll need to completely remove the paint via grinding or sandblasting. Any remaining paint will cause the epoxy to peel.
How long does epoxy coating last on a garage floor?
With proper prep and application, a quality 100% solids epoxy can last 10, 15 years. However, many kits claim 10 years, but only about 1 in 6 actually publish that figure. Operational durability depends on traffic and maintenance.
Is a garage floor epoxy coating worth the effort?
Yes, if you use the right product and follow prep steps. Epoxy resists oil stains, tire marks, and moisture. It's also easier to clean than bare concrete. For a typical two-car garage, a DIY kit costs $100, $300, but professional installation by LGFMH Construction can save headaches and give a flawless finish.
Can I apply epoxy during cold weather?
Most epoxies require temperatures above 50°F during application and curing. Cold slows the cure and can cause adhesion problems. If you must work in cold temps, look for a low-temperature epoxy formulated for 40, 50°F.
How do I maintain an epoxy garage floor?
Sweep regularly and mop with a neutral pH cleaner. Avoid ammonia or bleach. For heavy stains, use a degreaser. Reapply a top coat every 3, 5 years if the gloss fades.
Conclusion
A garage floor epoxy coating is a DIY project that delivers professional results when you improve your time with prep and follow the steps. The average kit covers about 628 sq ft, measure your garage and buy accordingly. If you'd rather trust a pro, LGFMH Construction offers interior and exterior floor coating services that save you the backache. Whichever route you choose, your garage will look better and last longer.


Comments