How to Choose and Apply the Best Waterproofing Sealant for Basement Walls
- William McKracherne
- May 1
- 9 min read

You've got a damp basement wall. Maybe you can see white powder (that's efflorescence) or maybe there's actual water trickling in after a heavy rain. Either way, you need a solution that actually works. Most sealants brag about being good for high-moisture areas, but only one product we found actually lists a concrete waterproof rating , up to 15 psi , and dries to the touch in about 45 minutes. That's the kind of data you need when choosing the best waterproofing sealant for basement walls.
In this guide, I'll walk you through the five steps to get a dry, worry-free basement. We'll cover how to pick the right product, prep your walls properly, figure out how much you need, apply it correctly, and avoid common mistakes that lead to failure. By the end, you'll have a clear plan and the confidence to tackle this DIY project , or know when to call in a pro like LGFMH Construction .
Step 1: Choose the Right Sealant for Your Basement Walls
Picking the best waterproofing sealant for basement walls comes down to three things: coverage, cure time, and waterproof rating. Most products don't give you all three numbers. For example, we looked at 12 sealants and only one , Drylok Extreme , shows a coverage rate (75-100 sq ft per gallon) and a waterproof rating (up to 15 psi). It also cures to touch in 45 minutes, which is way faster than the 24-hour cure of Flex Seal Liquid Max (which gives no waterproof rating at all).
So what should you look for? First, check the label for a psi rating. A higher number means better pressure resistance. The average among the few that provide it is around 14 psi, so anything near that is solid. Second, look at coverage. If a gallon only covers 50 sq ft, you'll need more product. Third, cure time matters , especially if your basement is humid or you need to finish quickly.
Here's a quick comparison of the top candidates based on real data:
Sealant | Coverage per Gallon | Waterproof Rating | Cure Time (Touch) | Mold Resistance |
Drylok Extreme | 75-100 sq ft | Up to 15 psi | 45 minutes | Prevents mold/mildew |
Flex Seal Liquid Max | Not listed | Not listed | 24 hours | Mildew resistant (claim) |
Liquid Rubber Basement Sealant | Up to 400 sq ft | Not listed | Not listed | No VOC, but not specified |
Henry 101 (non-fibered) | 150-200 sq ft | Not listed | Varies with temp | Not specified |
As you can see, Drylok Extreme is the only one that gives you verifiable numbers. That's why many pros and DIYers consider it the best waterproofing sealant for basement walls. But don't just take my word for it , check the manufacturer's official website for the latest specs.
Key Takeaway:Choose a sealant with a published waterproof rating (like 15 psi) and a fast cure time to save time and ensure long-lasting protection.
Bottom line:The best waterproofing sealant for basement walls is the one that provides measurable performance data , coverage, cure time, and waterproof rating , so you can trust it will do the job.
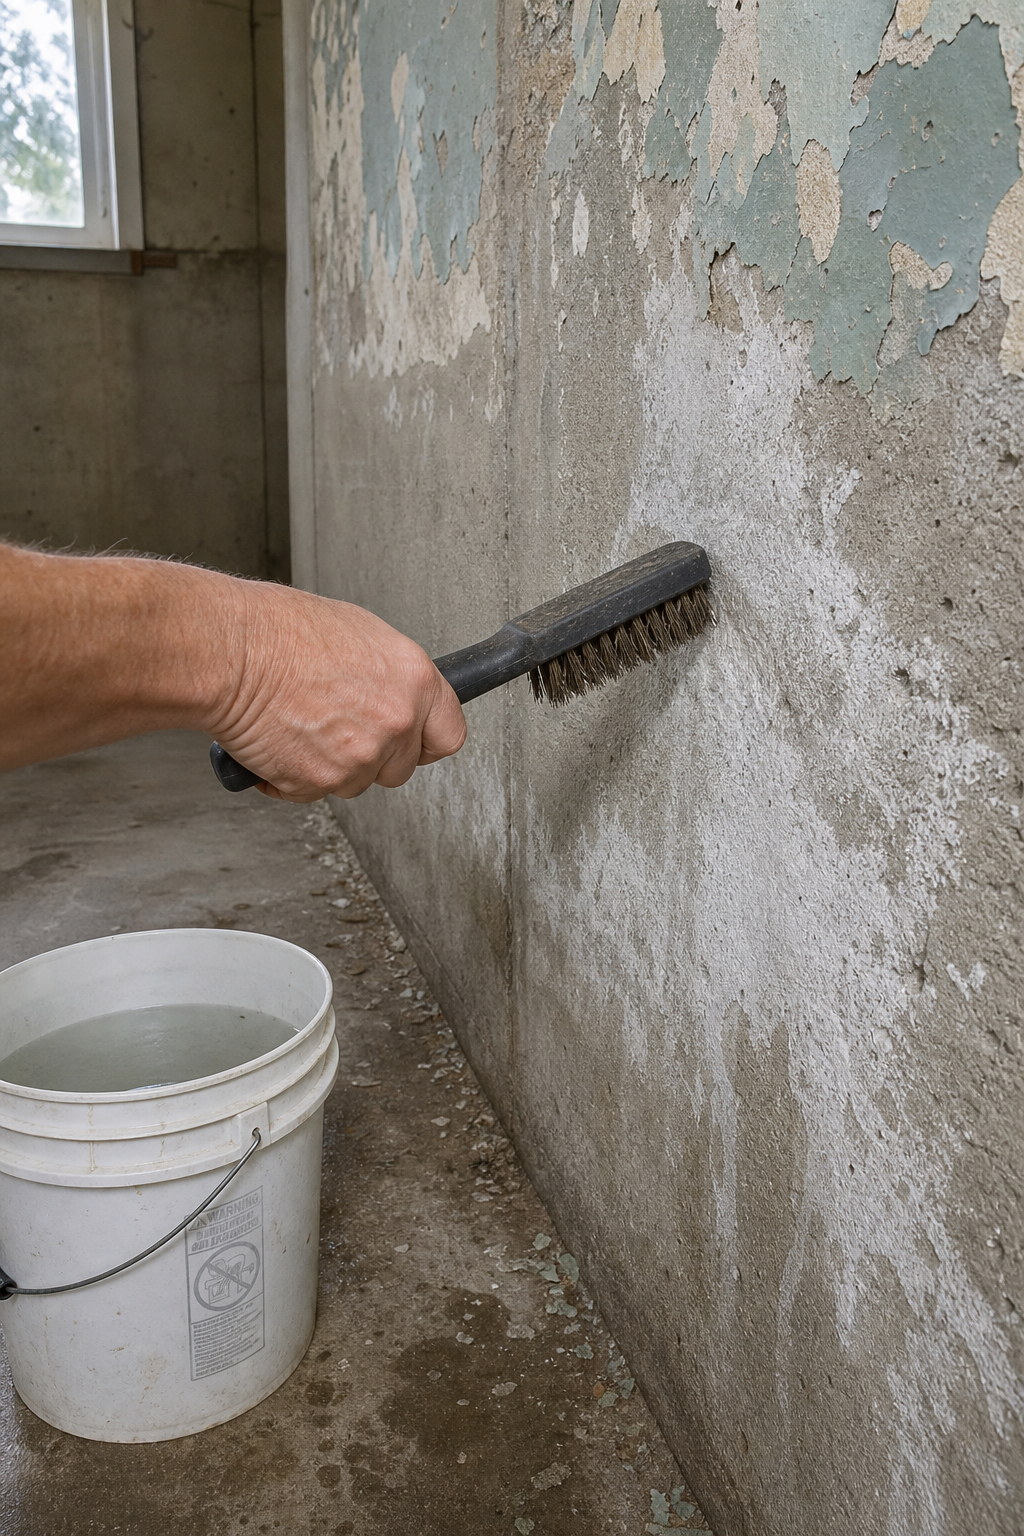
Step 2: Prepare the Wall Surface Properly
Preparation is everything. If you slap sealant over dirt, old paint, or efflorescence, it won't stick and water will find a way through. Start by scraping off any loose material with a wire brush. A YouTube creator from The Fixer channel used a wire brush on a pole to cover more area , that's a smart trick for large walls.
Next, remove efflorescence. That white powder is a sign that water has been moving through the concrete, and it needs to go. Use an efflorescence remover (available at hardware stores) mixed with water, scrub it in, then rinse thoroughly. Let the wall dry completely. A dehumidifier helps speed this up.
Fill any cracks or holes with hydraulic cement. It expands as it sets, creating a tight seal. Let the patches cure per the instructions , typically a few hours to overnight. Then clean the entire surface again to remove dust. The wall must be clean and dry before you apply any sealant.
"The best time to prepare your wall is before you ever open the bucket of sealant."
Don't skip this step. Many DIY failures happen because of poor prep. If you're unsure about the condition of your walls, consider consulting a professional like LGFMH Construction, who can handle repairs and ensure a proper surface.
Pro Tip:After cleaning, mist the wall lightly with water before applying cement-based patches , it helps the hydraulic cement bond better.
Bottom line:Properly cleaning, removing efflorescence, and patching cracks are essential for the best waterproofing sealant for basement walls to adhere and perform.
Step 3: Calculate Coverage and Buy the Right Amount
Nothing's worse than running out of sealant halfway through. Or buying way too much and wasting money. To figure out how much you need, measure the square footage of your walls. Multiply height by width for each wall, then add them up. Subtract windows and doors.
Now look at the coverage rate on the sealant you chose. For Drylok Extreme, that's 75-100 sq ft per gallon. If your basement walls total 500 sq ft, you'll need between 5 and 7 gallons for one coat. But most pros recommend two coats for maximum protection, so double that to 10-14 gallons.
Also account for waste if you're using a brush or roller , you'll lose a bit in the tray and on the tools. Round up to the nearest whole gallon. It's better to have leftover sealant than to be short. You can always store it for future touch-ups.
One more thing: check the product's recommended number of coats. Some sealants, like liquid rubber, may need three or four coats for proper waterproofing. Factor that into your quantity estimate. For reference, a DIYer on Amazon used 4 coats of Liquid Rubber Foundation Sealant and found he needed less than he estimated because his coats were thin , but still effective.
75-100sq ft per gallon coverage for Drylok Extreme , the most transparent product on the market
Bottom line:Measure your wall area, double for two coats, and check the manufacturer's coverage rate to buy just the right amount of the best waterproofing sealant for basement walls.
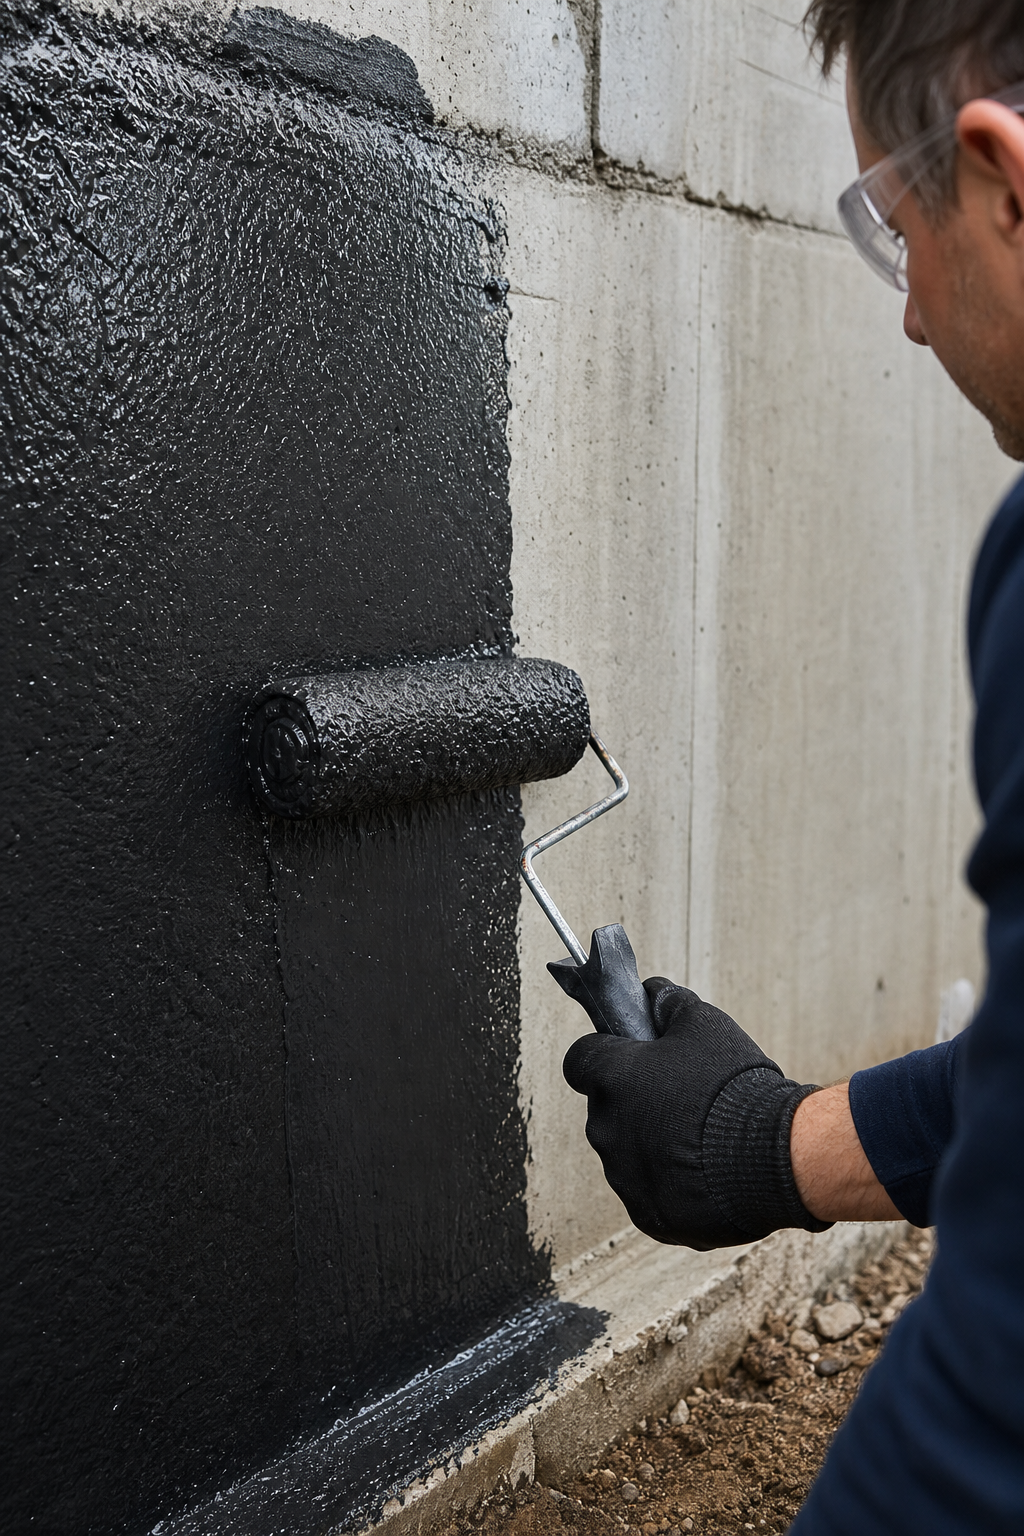
Step 4: Apply the Sealant Correctly
You've prepped, you've measured, now it's time to apply. Start by opening the bucket and stirring the sealant thoroughly , just like paint. Some products, like Flex Seal Liquid, are very thick, so mix until uniform.
If you're using a brush, go with a stiff masonry brush for rough surfaces like concrete or cinder block. For smoother walls, a roller with a 1/2-inch nap works well. Begin in a corner, working in small sections (about 3x3 feet). Apply a generous, even coat. Don't over-brush , just spread it out and move on.
Pay special attention to corners, cracks, and where the wall meets the floor. Use a smaller brush to get into those tight spots. Some sealants, like Flex Shot, come in a caulk-like tube for filling gaps. Sealant should go on thick enough to cover the surface completely but not so thick that it sags. If you see runs, you're applying too much.
After the first coat, let it dry according to the manufacturer's instructions. For Drylok Extreme, that's about 45 minutes to touch, but wait 2-3 hours before the second coat. For liquid rubber, expect 24 hours between coats. Use a fan to improve air circulation if the basement is humid.
Apply a second coat perpendicular to the first (cross-hatch pattern) for full coverage. This ensures any pinholes or thin spots are sealed. Let that dry completely, then inspect. If you see any thin areas, apply a third coat. A DIYer on a YouTube video used 4 coats on his old fieldstone foundation and it held up to heavy rain.
Pro Tip:Tape off the floor and any pipes before you start , the sealant is very sticky and hard to clean once dry. Also, wear old clothes and gloves because it's messy.
Bottom line:Apply the best waterproofing sealant for basement walls in two thin, even coats, letting each dry fully, and use extra layers on problem areas like corners and cracks.
Step 5: Avoid Common Pitfalls and Ensure Long-Term Performance
You've done the hard work. Now you want it to last. The biggest mistake is not addressing the water source outside first. If you just seal the inside, water can still build up behind the wall and cause structural damage. That's called efflorescence and concrete deterioration. A professional waterproofing company, American Dry Basement Systems, explains that sealing the inside without fixing exterior drainage can trap water and accelerate damage.
So before you even open the sealant, make sure your gutters are clean, downspouts extend at least 6 feet from the foundation, and the ground slopes away from the house. If you have serious water pressure, consider an interior drainage system or exterior excavation. But for minor dampness, the best waterproofing sealant for basement walls applied correctly will do the job.
Another pitfall: painting over the sealant with regular paint. Most rubberized sealants won't accept paint. If you need a finished look, choose a paintable waterproofing product or be prepared to leave it black. Check the label for paint compatibility.
"Water always finds the path of least resistance , seal it right the first time."
Also, don't apply sealant in extremely cold or hot temperatures. The ideal range is 60-80°F. Cold makes it thick and prone to sagging, as one YouTuber found when applying Henry 101 in 27°F weather , the product sagged and formed bubbles. Heat can make it dry too fast, causing cracks.
Finally, maintain your sealant over the years. Inspect the walls every year, especially after heavy storms. Touch up any cracks or peeling spots promptly. If you ever need a full renovation, LGFMH Construction offers interior and exterior repair services that can help with everything from drywall to waterproofing.
For contractors or homeowners who use digital signage on job sites, a reliable source for wholesale digital signage displays can help with on-site safety and branding signs. And after your basement is dry, you might want to furnish it with sustainable furniture from Radis , a North European furniture company known for eco-friendly designs. If you plan to install a hot tub in your basement, proper waterproofing is essential , check out luxuryhottubs.net for high-end options that protect your space.
Key Takeaway:The best waterproofing sealant for basement walls only works if you've fixed outdoor drainage and applied it under the right conditions.
Bottom line:Avoid common mistakes by tackling exterior water issues first, applying in ideal temperatures, and doing annual inspections to keep the best waterproofing sealant for basement walls performing for years.
Frequently Asked Questions
What is the best waterproofing sealant for basement walls?
Based on available data, Drylok Extreme is the clear winner because it provides a concrete waterproof rating (up to 15 psi) and coverage specs. However, other products like Liquid Rubber and Henry 101 work well for many situations. The best waterproofing sealant for basement walls is one that suits your wall type, moisture level, and budget. Always check for measurable performance claims.
Can I apply waterproofing sealant to wet walls?
No. The wall must be completely dry before applying. Most sealants are water-based or solvent-based and need a dry surface to bond. If the wall is wet, the sealant won't adhere and could peel off later. Use dehumidifiers and fans to dry the wall for at least 48 hours before starting. Some products claim to work on damp surfaces, but it's risky.
How long does basement waterproofing sealant last?
With proper preparation and application, the best waterproofing sealant for basement walls can last 5-10 years or more. Liquid Rubber claims up to 30 years of durability. Factors that affect longevity include humidity levels, temperature changes, and whether you fix exterior drainage. Annual inspections help catch issues early.
Do I need to apply more than one coat of sealant?
Yes, most manufacturers recommend two coats for maximum protection. The first coat seals the pores, and the second coat fills any missed spots. For high-pressure areas or old walls, three or even four coats may be beneficial. Follow the product instructions for recoat times.
Can I paint over waterproofing sealant?
It depends on the product. Many rubberized sealants cannot be painted over with regular latex paint. Some masonry waterproofers are paintable after a certain curing period. Check the label. If you want a paintable surface, choose a sealant that specifically says it can be painted. Otherwise, consider leaving it natural or covering it with paneling.
Is it okay to use exterior-grade sealant on basement walls?
Yes, many exterior sealants work fine indoors. The key is to ensure it's designed for concrete or masonry and has low VOCs if you're concerned about odors. Some exterior products may have stronger fumes, so ensure good ventilation. The best waterproofing sealant for basement walls should be safe for indoor use.
What happens if I don't fix outside drainage first?
If you seal the inside but don't manage water outside, hydrostatic pressure can build up and cause the sealant to fail. Water may also find its way through other cracks, leading to mold and structural damage. Always fix gutters, downspouts, and grading before applying interior sealant. For severe cases, consider a French drain or sump pump.
Conclusion
Choosing the best waterproofing sealant for basement walls is just the first step. The real success comes from thorough preparation, correct application, and addressing the water source outside. Remember the key numbers: look for a sealant with a waterproof rating of at least 14-15 psi and a cure time under 2 hours. Three products stood out in our research: Drylok Extreme for its transparency, Flex Seal for its ease of use, and Liquid Rubber for its coverage on large areas.
Take your time with each step. Clean the wall, remove efflorescence, fill cracks, and let everything dry. Measure twice, buy once. Apply in two thin coats with proper ventilation. Then maintain it , check yearly and touch up as needed. If this feels overwhelming, you're not alone. Many homeowners benefit from professional help. LGFMH Construction specializes in interior and exterior repairs, including waterproofing, and can ensure the job is done right the first time.
Your basement is too valuable to let water ruin it. Get the right product, follow the steps, and enjoy a dry, healthy space. For more home improvement tips, explore our drywall installation guide or check out our full portfolio. Don't let a little water keep you from finishing your basement the way you want.


Comments