How to Seal Foundation Cracks
- William McKracherne
- May 21
- 10 min read

Foundation cracks scare homeowners. But not all cracks mean your house is falling apart. Some are just cosmetic. Others are signs of movement that need quick action. Knowing how to seal foundation cracks yourself can save you thousands of dollars and prevent water damage, mold, and bigger structural issues.
This guide walks you through every step. You'll learn how to inspect a crack, pick the right sealant, prepare the area, apply the material, and finish for a watertight seal. We'll cover common mistakes and when to call a pro. By the end, you'll have the know-how to tackle most non-structural cracks with confidence.
Let's start with the most important part: figuring out what kind of crack you're dealing with.
Step 1: Inspect and Identify the Crack Type
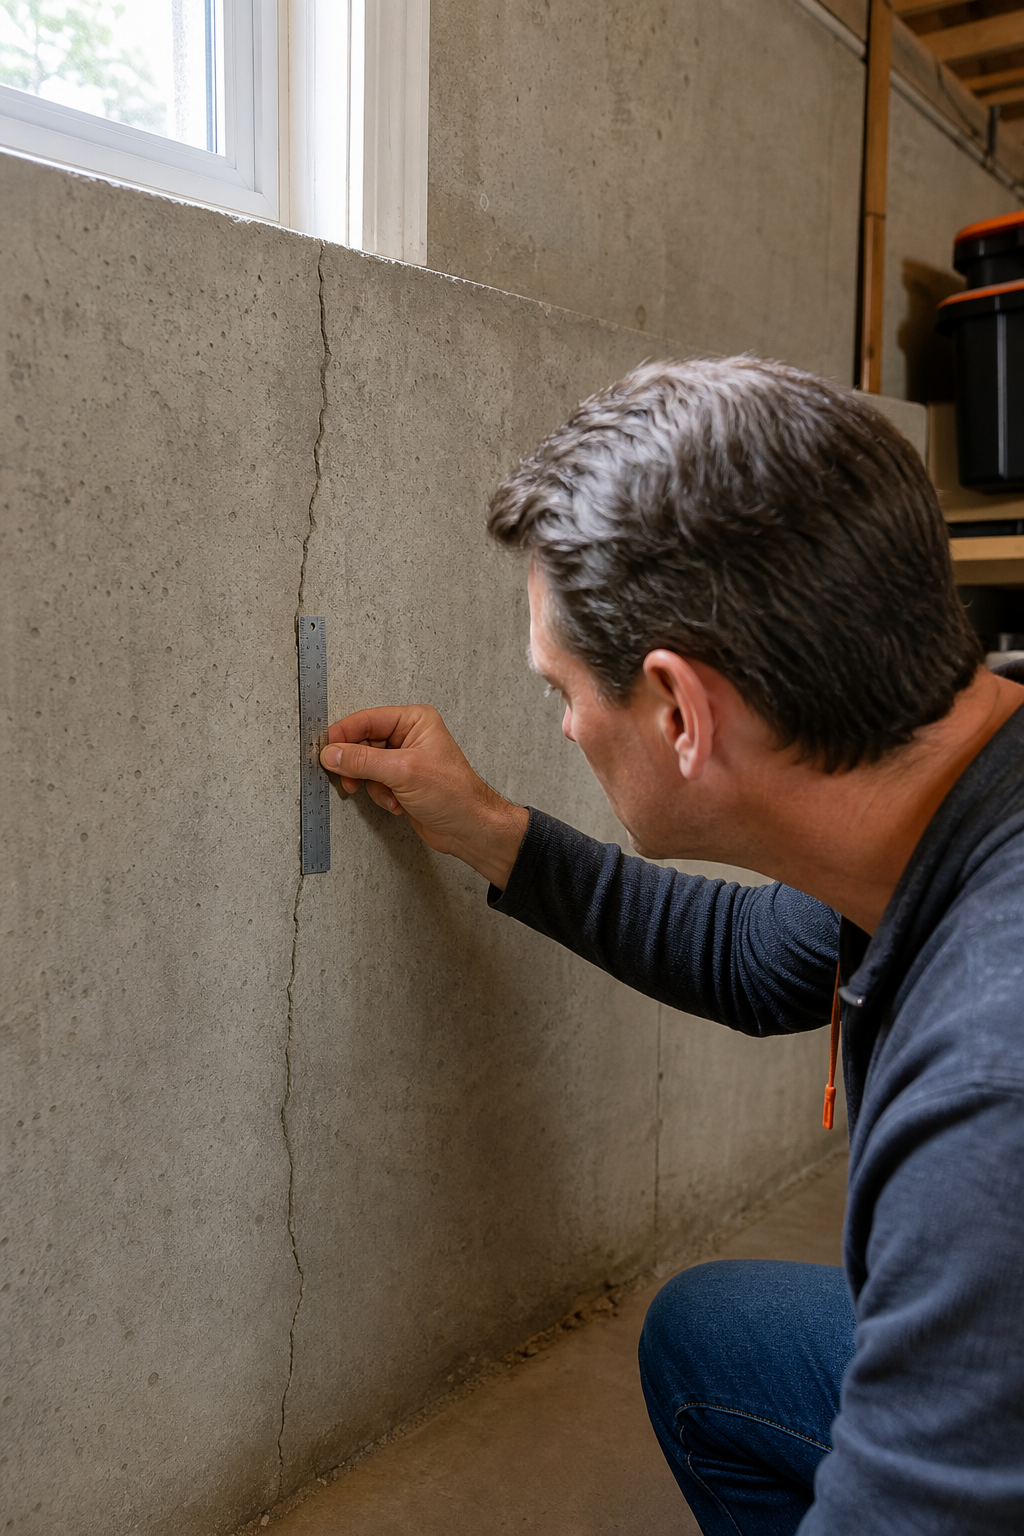
Before you buy any sealant, you need to understand the crack. Not every foundation crack needs the same treatment. Some are harmless. Others require a structural engineer. Here's how to tell them apart.
First, look at the shape. Vertical cracks are the most common. They run straight up and down and are usually caused by the specific settling as it cures. According to foundation engineering , these cracks rarely threaten the structure. If they're less than 1/4 inch wide and not leaking, you can seal them with epoxy or polyurethane.
Diagonal cracks are similar. They run at an angle up to 30 degrees from vertical. They also come from settling or the specific's natural curing process. Like vertical cracks, they're usually not serious unless they get wider over time.
Horizontal cracks are a different story. They often mean the soil outside is pushing against your wall. This is serious. If you see a horizontal crack, especially in a block foundation, call a professional right away. Do not try to seal it yourself without an expert opinion.
Stair-step cracks follow the mortar joints in block walls. They look like a staircase. These are also concerning because they indicate uneven settling or pressure. A structural engineer should evaluate them.
Hairline cracks are thin, often less than 1/16 inch. They're common in new construction as the specific dries and shrinks. These are usually cosmetic but can still let water in. Polyurethane injection works great for these.
Check for moisture. Is the crack damp or actively leaking? That changes the sealant you need. Wet cracks call for polyurethane, which expands on contact with water. Dry cracks can use epoxy for extra strength.
Measure the width. Use a quarter. If the crack is wider than a quarter (about 1/16 inch), it's more than cosmetic. If it's more than 1/4 inch, get a professional inspection. The same applies if you can fit a dime sideways into the crack.
Document the crack. Take a photo and mark the date. Check it again in six months. If it's growing, you have active movement. That's a red flag. For stable cracks, you can proceed with sealing.
If you're unsure about a crack, especially horizontal or stair-step, don't guess. Many homeowners avoid costly mistakes by getting a quick opinion. For example, buyers of bank lelong property often need to assess foundation issues before purchase. Looking at the property's cracks early can prevent surprises.
Also, consider your family's safety. Pets and kids often explore basements. A sharp crack or loose specific can be a hazard. If you have a pet , ensure they stay away from the repair area during work. Dust and chemicals can be harmful.
Once you've identified the crack type, you can move to picking the right sealant. That's Step 2.
Key Takeaway:Vertical and diagonal cracks under 1/4 inch are usually safe to DIY. Horizontal, stair-step, or widening cracks need a pro.
Step 2: Choose the Right Sealant for Your Crack
Now that you know your crack type, it's time to pick the material. The three most common options for sealing foundation cracks are epoxy, polyurethane, and hydraulic cement. Each has a different job. Picking wrong can lead to leaks or wasted money.
Epoxyis strong. It bonds to specific and creates a rigid seal. Epoxy is best for dry cracks that need structural reinforcement. It's thicker and takes longer to cure (up to 24 hours). Use epoxy for cracks wider than 1/8 inch where you want to restore some strength. Epoxy injection kits are common for this.
Polyurethaneis flexible. It expands when it touches water. That makes it perfect for wet or damp cracks. Polyurethane is also good for hairline cracks because it can seep into tiny gaps. It cures faster (usually under an hour) and stays slightly flexible, so it can handle minor movement. Most waterproofing contractors use polyurethane for leaking cracks.
Hydraulic cementis the old-school option. It expands slightly as it hardens. It's good for quick patches on large gaps but not for deep cracks. It can also crack itself if the foundation moves. According to crack repair experts, hydraulic cement is best for non-structural, shallow repairs. It sets in minutes.
Here's a quick decision table for how to seal foundation cracks based on crack type:
Crack Type | Best Sealant | Why |
Dry hairline (under 1/16") | Polyurethane | Low viscosity, penetrates small cracks |
Dry vertical (1/8" to 1/4") | Epoxy | Structural strength, bonds well |
Damp or leaking | Polyurethane | Expands on contact with water |
Wide gap (over 1/4") | Epoxy + filler or professional | Needs high strength, may need carbon fiber |
Cosmetic surface crack | Hydraulic cement or caulk | Quick patch, not for active leaks |
Most DIY kits come as injection systems. You inject the sealant directly into the crack using a caulk gun or specialized tool. Kits often include a surface sealer to cap the crack after injection.
One thing to watch: cure times vary widely. Our research shows that the average reported cure time is about 10 hours, but some products claim to set in minutes (like Drylok's hydraulic cement, which sets in 3-5 minutes). Others take a full day. Always read the label. If you need a fast fix, polyurethane is usually faster than epoxy.
Durability ratings are rare. Only about 12% of products list a compressive strength. Those that do quote around 9,000 psi at 28 days. That's very strong, but without comparison data, it's hard to judge. For most homeowners, the real test is whether the seal holds water.
If you're overwhelmed by choices, consider professional repair. Services like those from LGFMH Construction provide expertise and guarantees, eliminating guesswork around cure times and application methods.
Pro Tip:For active leaks, use polyurethane. It expands and fills the void even if water is present. Epoxy needs a dry crack to bond properly.
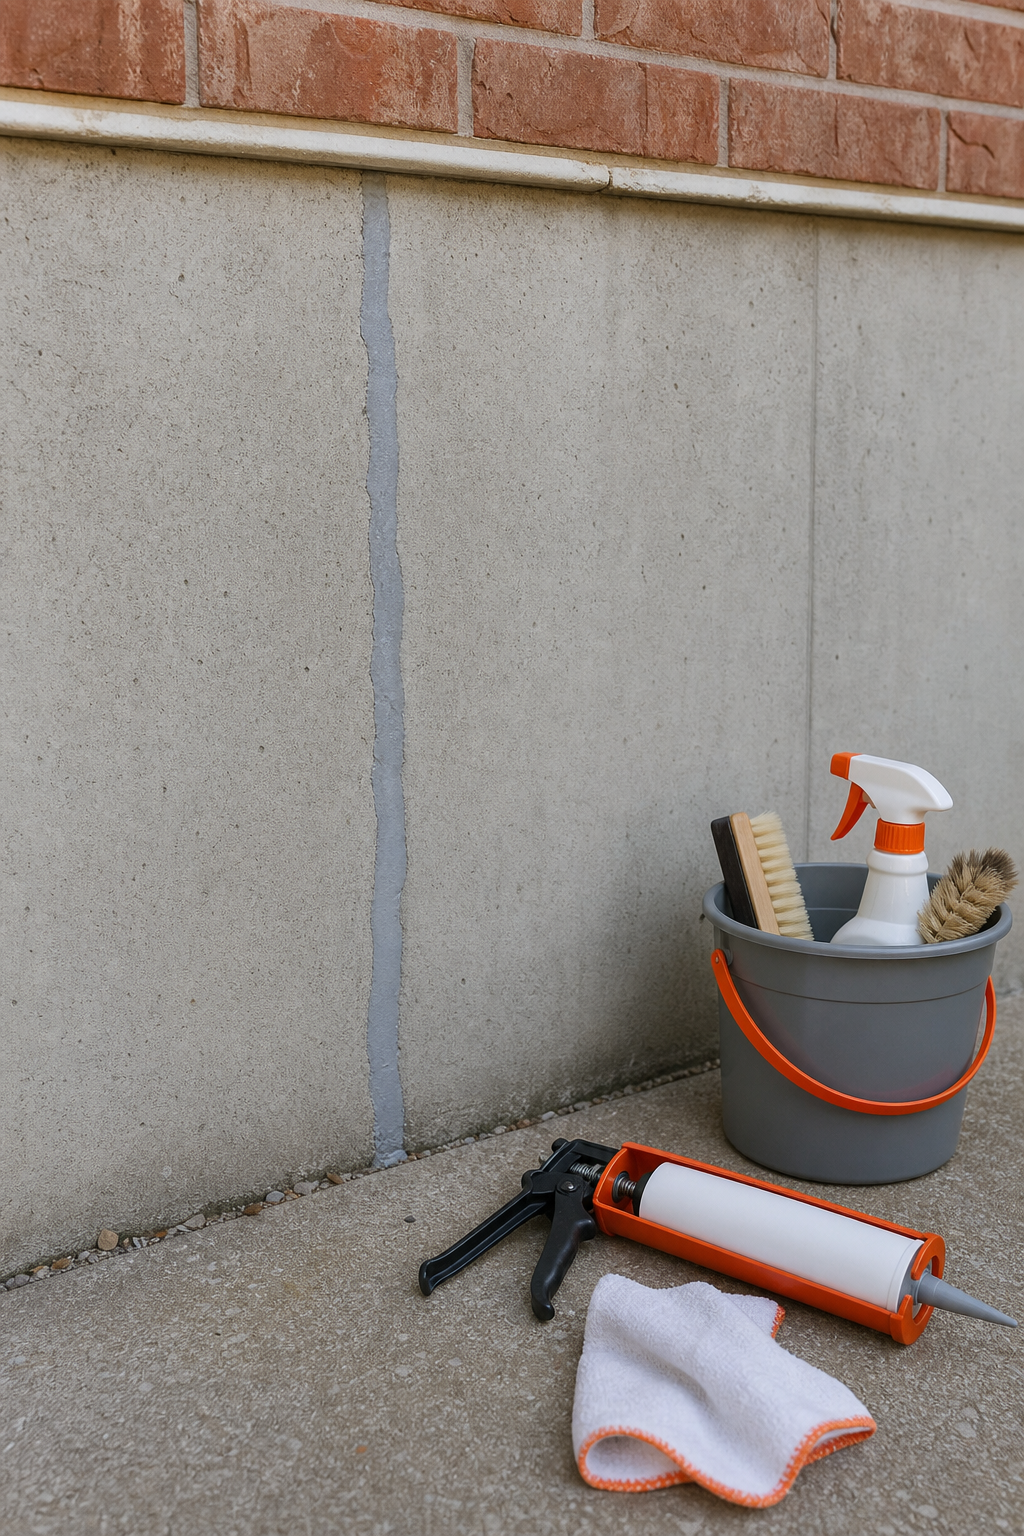
Step 3: Prepare the Crack for Sealing
Good prep makes the seal last. Skipping this step is the number one reason DIY crack repairs fail. Your sealant needs a clean, dry surface to stick to. Here's how to prepare right.
First, clean out the crack. Use a stiff wire brush to remove loose specific, dust, and debris. Go deep if you can. A vacuum with a narrow nozzle helps pull out the fine dust. For deeper cracks, you can use a shop vac or blow out the crack with compressed air (wear a mask).
Next, widen the crack slightly if it's too narrow. Use a chisel and hammer to create a slight V-shape, about 1/8 inch wider at the surface. This gives the sealant more surface area to grip. Be careful not to enlarge the crack too much. Only work on the edges.
If the crack is damp, you need to dry it out. Use a heat gun or a hairdryer on low. For stubborn moisture, wait for a few dry days. Some polyurethane products work on damp surfaces, but most sealants need a dry crack. Check the product instructions.
If the crack is leaking actively, stop the flow first. Use a hydraulic cement patch to create a dam. Then inject polyurethane behind the dam once the leak is controlled. Or call a pro for high-pressure injection.
Remove any old caulk or previous repairs. Old material can prevent adhesion. Use a scraper or chisel to get it out. Then clean again.
Protect the area around the crack. Tape off the wall above and below to catch drips. Put down drop cloths. Sealants are messy and hard to remove once cured.
If the crack is near electrical outlets or wiring, be extra careful. Water and sealant can damage wiring. You might need to disconnect power to that area. If you're unsure, consult an electrician. Companies like Fusion Projects specialize in electrical work alongside home repairs, ensuring safety.
Finally, mask off the crack with painter's tape about 1/2 inch on each side. This gives you a clean line when you apply the surface sealer.
Now you're ready to seal. Move to Step 4.
Step 4: Apply the Sealant Correctly
With everything prepped, it's time to apply. Whether you're using epoxy or polyurethane, the process is similar. Work carefully. Rushing leads to gaps and leaks.
If you're using an injection kit, start by mixing the components. Most two-part epoxies come in a dual-cartridge that mixes in the nozzle. Squeeze a small amount onto cardboard until the color is uniform. For polyurethane, some kits require mixing before loading into a caulk gun. Follow the instructions exactly.
If you're using a caulk gun, cut the nozzle at a 45-degree angle to match the crack width. Insert the tip into the crack and squeeze slowly. You want the sealant to fill from the bottom up to avoid air pockets. Move along the crack, keeping constant pressure. For deep cracks, you may need to inject from multiple points.
For hydraulic cement, mix small batches with water to a putty-like consistency. Wear gloves. Push the cement into the crack with a trowel or your fingers. Work quickly; it sets in minutes. Smooth the surface with a trowel and clean up excess before it hardens.
If the crack is long or wide, you might need surface ports. These are plastic tubes that you attach to the crack at intervals. You inject into each port, and the sealant flows into the crack. This works well for horizontal or diagonal cracks. You also apply a surface sealer along the crack before injecting to keep the sealant from oozing out.
Low pressure is key. The research material notes that good injection uses about 20 psi , that's a slow squeeze. Don't rush. Let the sealant flow naturally. You'll feel resistance when the crack is full. Stop at that point.
For hairline cracks, heat the polyurethane cartridge in hot water for 15 minutes to thin it. This helps it penetrate tiny gaps.
If you're working on a corner crack, use corner surface ports designed for 90-degree angles. Regular ports won't seal properly.
Once applied, remove surface ports and cap the crack with a thin layer of surface sealer (included in many kits). Smooth it with a putty knife.
Now, it's time to let it cure.
Step 5: Finish and Cure for a Watertight Seal
Curing is just as important as application. Most sealants need undisturbed time to reach full strength. Disturbing the repair too early can cause leaks.
First, check the manufacturer's cure time. Our research found an average of about 10 hours, but it ranges from 2 to 24 hours. Polyurethane cures faster, often in minutes to an hour. Epoxy takes longer , up to a day. Hydraulic cement sets quickly (5-10 minutes) but needs to keep moist for 24 hours to develop full strength.
During curing, protect the area. Keep pets and kids away. Don't touch the sealant. If your basement is humid, use a dehumidifier to speed drying. For epoxy, cooler temperatures slow cure time. Aim for 50-80°F (10-27°C) for best results.
After the initial cure (usually overnight), inspect the repair. Look for any gaps, bubbles, or low spots. If you find any, apply another layer of surface sealer. For injection repairs, you might need a second injection if the first didn't fill completely. But typically, one round is enough if you followed the steps.
Once fully cured (check the product's full cure time, often 7 days for maximum bond), you can apply paint or waterproof coating if desired. Some sealants are paintable, others are not. Test a small spot first.
Final test: spray the crack with a hose or wait for heavy rain. Check inside for any moisture. If it stays dry, you did it right. If water seeps through, you may have missed a spot or the crack is deeper than expected. In that case, call a professional. You can read more about assessing repair quality .
Remember, sealing is not always permanent. Foundations move over time. Check the repair annually. If you see new or widening cracks, get an expert opinion.
38%of crack repair products provide cure time info, making the rest a guessing game for DIYers.
FAQ
How do I know if a foundation crack is serious?
Measure the width and note the direction. Horizontal cracks, stair-step cracks, and any crack wider than 1/4 inch are serious. Also, if the crack is growing or leaking heavily, call a structural engineer. Vertical and diagonal cracks under 1/4 inch are usually safe to seal yourself.
Can I use caulk to seal foundation cracks?
Regular caulk is not a good long-term fix. It's too flexible and won't bond well with specific. Silicone caulk may work for tiny hairline cracks as a temporary patch, but for permanent waterproofing, use epoxy or polyurethane injection. Caulk shrinks and cracks over time.
How long does foundation crack sealant take to dry?
It varies by product. Polyurethane can set in 2-4 minutes for foam expansion, but fully cures in hours. Epoxy takes 8-24 hours to cure hard. Hydraulic cement sets in 5-10 minutes but needs 24 hours moist curing. Always check the label for the specific product you buy.
What is the best sealant for cracked foundation walls?
For dry, structural cracks, epoxy is best. For wet or leaking cracks, polyurethane is superior because it expands and seals against water. Hydraulic cement works for large gaps but not deep penetration. The right choice depends on your crack's condition.
Do I need to inject sealant from both sides?
No. You inject from the interior side. The sealant flows into the crack and bonds with the specific. For basement walls, interior injection is standard. Exterior excavation is costly and unnecessary for most cracks. Professional injection reaches deep into the crack.
How much does it cost to seal a foundation crack myself?
A DIY injection kit costs $30 to $100 for polyurethane and $50 to $150 for epoxy. For a typical 4-6 foot vertical crack, one kit is enough. Hydraulic cement bags are under $20. Professional repair costs $300 to $800 per crack. DIY saves money but requires time and care.
Can I seal a crack that is actively leaking water?
Yes, but wait for the leak to slow or use a fast-setting hydraulic cement patch to stop the flow first. Then inject polyurethane behind the patch. Some polyurethane kits can be used on damp cracks. Epoxy needs a dry surface, so it's not suitable for active leaks.
What happens if I don't seal foundation cracks?
Water can seep in, causing mold, mildew, and musty odors. Over time, water can erode the soil under the foundation, leading to settlement and more cracks. In cold climates, freeze-thaw cycles can widen cracks. Sealing early prevents costly damage and protects your home's value.
Conclusion
Learning how to seal foundation cracks is a valuable home maintenance skill. It's not impossible to do yourself, but it requires patience and the right approach. You now know the steps: inspect the crack, choose between epoxy and polyurethane, prepare the surface thoroughly, apply the sealant with care, and allow proper cure time.
Remember, not all cracks are DIY-friendly. Horizontal, stair-step, or very wide cracks need a professional evaluation. But for the common vertical or diagonal crack, you can save money and get a watertight seal if you follow the instructions. The research shows that most DIY kits lack durability data and cure time information, so read labels carefully and choose reputable brands.
If you ever feel unsure or have a complex crack, don't hesitate to call a professional. Companies like LGFMH Construction specialize in interior and exterior repairs. They can handle the tough jobs and offer guarantees that DIY kits cannot.
Start by checking your foundation today. A few minutes now can prevent a flooded basement and expensive repairs later. Your home will thank you.


Comments