Roof Flashing Repair DIY: Step-by-Step Guide
- William McKracherne
- 5 days ago
- 9 min read

A roof flashing leak can look like a ceiling stain, but the entry point may sit several feet uphill. The repair also takes fewer tools than most people expect.
Table of Contents
Step 1: Inspect the Flashing and Confirm the Repair
Start your roof flashing repair DIY job from inside if you can reach the attic safely. Find damp wood, dark marks, wet insulation, or a trail below the roof deck. Follow the stain uphill. Water often travels along timber before it drips into the room below.
Next, inspect the roof from the ground. Use visual aids if needed. Look for lifted metal, open seams, rust holes, cracked sealant, missing shingles, or gaps near a chimney, skylight, vent, valley, or wall joint. A wet patch below a skylight may also come from condensation, so compare it with cold-weather moisture in the room.
Only climb when the roof is dry and the access point is safe. A stable ladder with a standoff keeps pressure away from the gutter. Avoid fragile slate, wet surfaces, steep pitches, and any roof near power lines. Wear appropriate safety gear, including gloves, eye protection, and non-slip footwear. Consider using a safety harness or securing yourself to the roof for added protection.
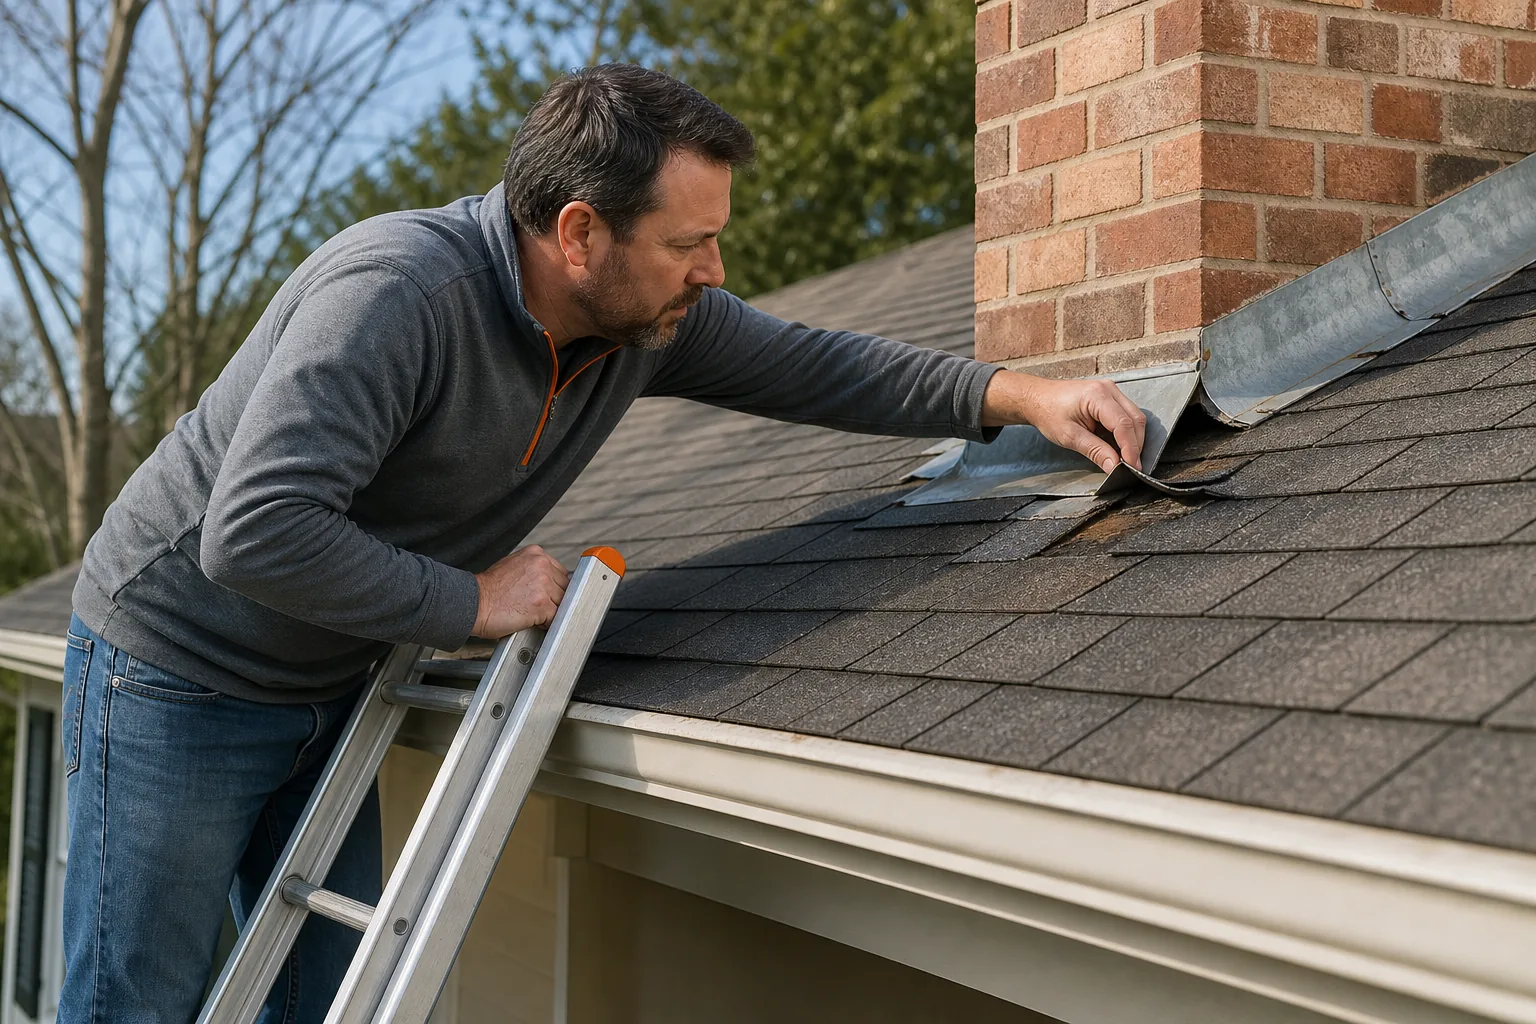
Decide whether the fault is small enough for a repair. Sound metal with a loose edge or failed seal may need cleaning and resealing. Torn, badly corroded, punctured, undersized, or poorly fitted flashing usually needs a new flashing component. Stop and hire a roofer if you can't identify the entry point, reach the area safely, or see rotten framing beyond a small patch.
LGFMH Construction can inspect the roof and related exterior damage when the repair goes beyond a safe DIY task. Take photos from inside and outside before you remove anything. By now you should have a marked leak path and a clear decision: seal, replace, or ask for help.
Step 2: Gather Tools, Materials, and Safety Gear
Roof flashing repair DIY needs a short tool list, but the right safety gear matters more than a large toolbox. The repair steps reviewed for this guide averaged two tools each. A pry bar, utility knife, hammer, and straight blade cover much of the work.
Set out the materials before you climb:
New flashing.
Roofing cement.
Roofing nails.
New shingle if removal damages it.
Underlay.
Roofing tape for a short-term emergency patch.
Timber if the roof deck or support has rotted.
You may also need a caulking gun, pliers, and other basic hand tools. A retractable blade helps with a vent boot. A hook blade can help slice flashing, but it also creates a cut risk. Keep blades sharp and handle them with the edge pointed away from your body.
Wear gloves, eye protection, and non-slip footwear. Use a properly secured ladder, and consider a use or other fall protection when the roof and access system support it. Work on a dry, calm day. Sealant needs a clean, dry surface and enough time to cure.
Cost estimates for this type of repair are unreliable because many guides list materials without prices. Build your budget from the actual parts you need. A small joint may need only flashing, cement, and nails. A vent repair may add a new boot. A rotten deck can change the job completely.
Pro Tip:Measure the flashing run before shopping. Buy enough material for the full repair and its laps, not only the visible hole.
Read the product instructions for the sealant before you buy it. Check that it suits the roof and flashing material. LGFMH Construction's Roof Flashing Sealant Installation Tips also stresses surface prep, dry weather, and the full cure time. By now, every tool should be within reach, and your access plan should be set.
Step 3: Remove Damaged Shingles, Flashing, and Rotten Timber
Remove only enough roofing to expose the full failed detail. Roof flashing repair DIY often fails when someone covers a small visible crack while leaving the damaged membrane or loose metal underneath.
Begin at the shingle edge. Slide a flat pry bar under the shingle above the flashing. Lift slowly. Break the seal between the shingle and the course below with a utility knife or flat blade. Pull nails with pliers or the pry bar. Work gently because a sound shingle can tear when bent too far.
Set each reusable shingle aside in order. Mark its position if the layout is hard to recall. Replace any shingle that is split, brittle, or badly creased. Don't force a new piece into a damaged course. A new shingle must sit at the same height and preserve the existing water path.
Expose the underlay and timber. Remove old sealant, loose mortar, dirt, and rust flakes carefully. Pull bent nails. Cut out rotten timber until you reach firm wood. Fit replacement timber of the same general size and support it well. A new metal patch won't fix a soft deck beneath it.
Inspect the membrane closely. Small tears matter. Driven rain can pass through a tiny opening behind the flashing. Patch the underlay with roofing tape before you fit the metal. Keep the patch flat so it won't push the flashing out of shape.
Don't remove a large section of lead or metal in one piece if the detail needs movement. Oversized pieces can fail as the roof expands and contracts. Several shorter lengths with sound laps often work better. If the old flashing uses a proprietary kit, new parts must match the roof product and pitch.
Keep removed nails and sharp offcuts in a bucket, not loose on the roof. Check the exposed area again before moving on. If the timber extends beyond the small repair zone, or the flashing detail is hard to understand, stop there. LGFMH Construction handles interior and exterior repairs when hidden damage makes a simple patch unsafe.
By now you should see firm timber, a dry and patched membrane, and clean edges around the opening. If you don't, the installation stage will hide the problem rather than solve it.
Step 4: Cut, Fit, and Install the New Flashing
Cut the new flashing to follow the original water path, not just the shape of the damaged piece. The metal must direct water onto the weather surface and never force it uphill.
First, make a card or scrap-metal template. Mark the rise, the roof slope, the wall or chimney face, and each corner. Test the template under the surrounding shingles. This is safer than repeatedly cutting the final piece.
Transfer the marks to the flashing. Use a straight blade or suitable snips for the material. If you use a hook blade, cut away from your hand and keep the other hand clear. Fold corners with care. A neat bend is better than a deep crease that weakens the metal.
Dry-fit the flashing before applying cement. Lift the upper shingle edge just enough to slide the metal beneath it. The lower edge should shed water onto the shingle below. At a roof slope of 30 degrees or more, maintain at least a 100-millimeter lap. Use a larger lap on lower pitches.
Don't rely on one broad sheet where the detail needs to move. Use shorter sections with proper overlap. Keep the overlap facing down the slope. Fix clips where the system calls for them instead of pinning flexible metal tight with too many nails.
Apply roofing cement beneath the repair only where the product instructions allow it. Set the flashing into place. Nail the parts that need mechanical fixing, keeping fasteners out of areas where they would sit in the water path. Replace the lifted shingles in their original order.
At a wall or chimney, the upper edge may need a sound chase or compatible mortar joint. Pointing alone won't hold loose flashing in place. The metal must be fixed first. Then finish the joint so water can't enter behind the edge.
For a vent or skylight, use the matching flashing detail rather than a flat piece laid over the top. A wrong kit can leak even when every visible seam has sealant. Use the roof profile as your guide, and check the lower corners twice. Water finds corners first.
By now the flashing should sit flat, overlap in the direction water travels, and tie into the nearby shingles or tiles. Don't seal it yet if the metal rocks, the laps face uphill, or the shingles won't lie flat.
Step 5: Seal the Repair and Check Related Roof Components
Seal the joint only after the flashing is fixed and the surface is clean and dry. A thick bead over loose metal is a short delay, not a sound roof flashing repair DIY result.
Brush away dust and rust. Remove brittle sealant until you reach a firm edge. Wipe the repair zone with the cleaner named in the product instructions, then let it dry fully. Don't seal wet metal, trapped grit, or active corrosion.
Cut the nozzle at about a 45-degree angle. Make the opening slightly narrower than the joint when possible. Apply one steady bead that touches both sides of the seam. Press it into place with a compatible smoothing tool. Shape the surface so it doesn't leave a ridge that can hold water.
Seal the ends of each lap with care. Check exposed nail heads in the repair zone. Don't spread sealant across clean roof areas without a reason. It can hide later inspection points and may not bond to every surface.
Follow the label for cure time and water exposure. Keep rain off the repair during that period. A temporary strip of flashing tape can help during an emergency, but it should not replace a proper metal repair with sound laps.
Now inspect nearby components. Check the vent boot for splits. Look at the vent cap, chimney mortar, skylight curb, valleys, and adjacent shingles. Water may enter above or beside the flashing you first noticed. Clear leaves and debris from gutters and valleys so water can leave the roof without backing up.
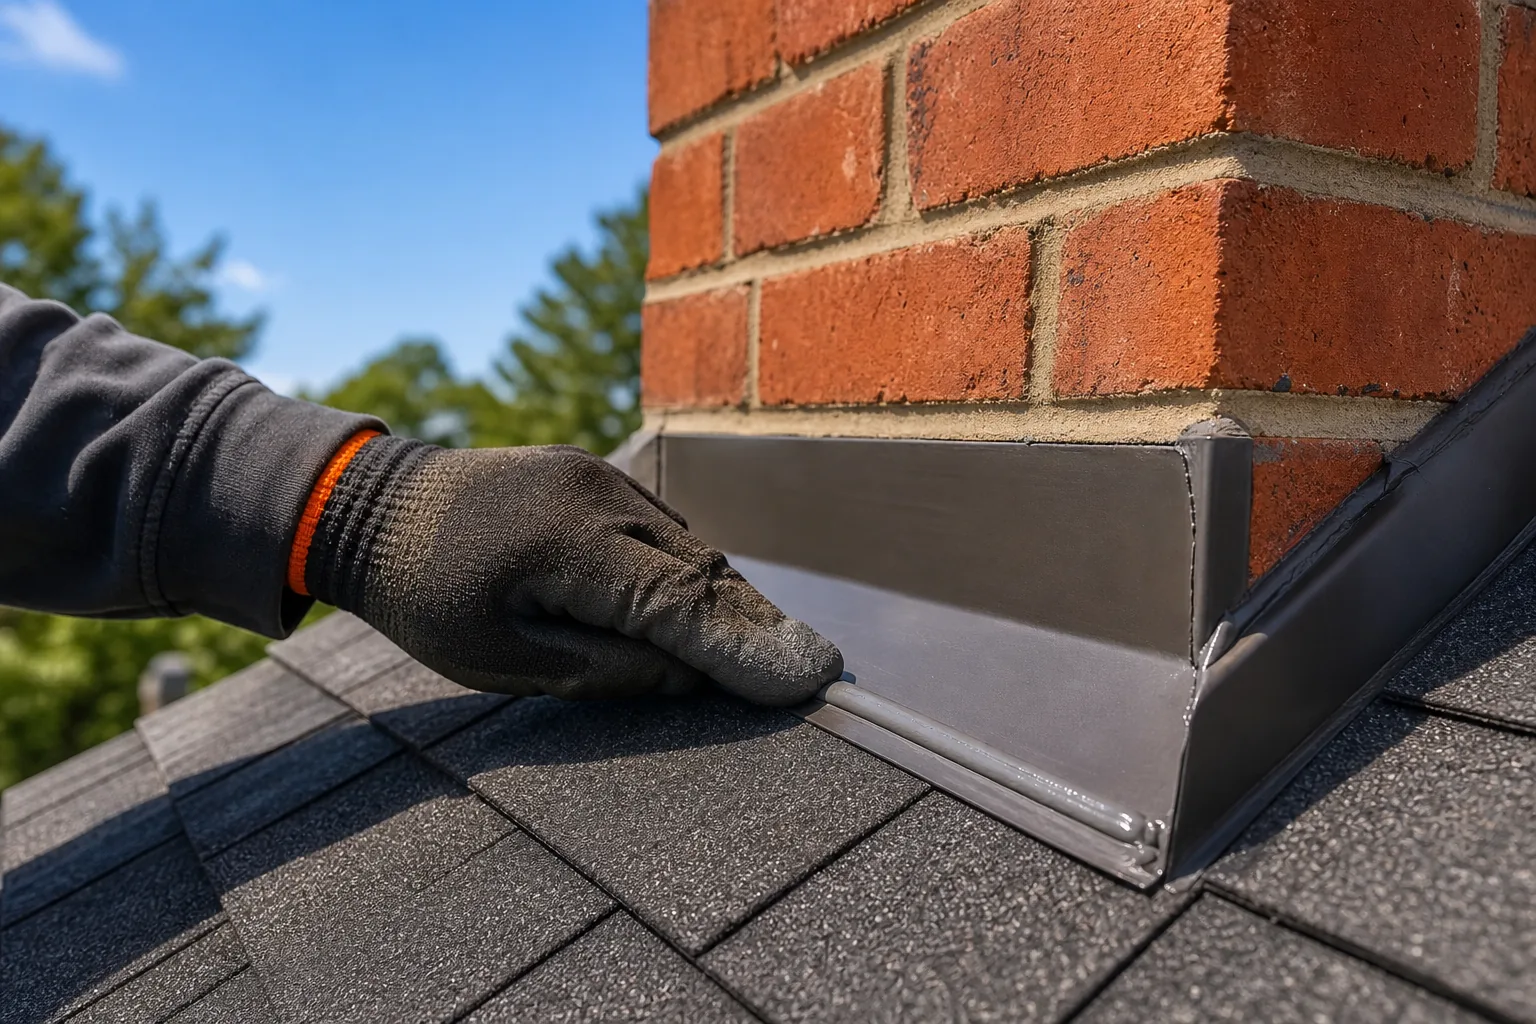
Let the repair cure before testing it. Then use a controlled hose test from the lower roof area upward. Never spray uphill into a lap or blast water under the flashing. Have someone watch the attic if possible. Test one small area at a time so you know which section passes or fails.
Inspect the bead after curing. Look for pinholes, bubbles, thin spots, lifted edges, or places where the seal pulled away. If water still appears inside, stop adding sealant. Recheck the roof above the stain and inspect the underlay, vent boot, and nearby joints.
Record the date, location, materials, and photos of the finished work. This gives you a useful check during future roof inspections. If the leak remains, LGFMH Construction can assess the flashing along with any interior damage caused by the leak.
FAQ: Roof Flashing Repair DIY
Can I repair roof flashing myself?
Yes, you can repair small flashing faults yourself when the roof is safe and the metal is mostly sound. A loose edge or failed seal may need cleaning, fixing, and resealing. Replace damaged metal or rotten timber instead of covering it. Hire a professional for steep access, hidden structural damage, complex chimney work, or an unclear leak path.
What tools do I need for roof flashing repair?
Most small jobs need a pry bar, utility knife, hammer, and a suitable blade. You may also need pliers, a caulking gun, and other hand tools. The roof flashing repair DIY steps reviewed here averaged two tools per step, so you don't need a full professional toolbox.
Should I use roofing cement or sealant on flashing?
Use the material approved for your flashing and roof surface. Roofing cement may help hold a patch or flashing edge, while a compatible sealing material forms a joint seal. Clean and dry the surface first. Read the product label for compatible materials, weather limits, and cure time before you apply it.
How much overlap should roof flashing have?
Use at least a 100-millimeter lap on slopes of 30 degrees or more, then increase the lap on lower pitches. Keep each overlap pointed with the water flow. The exact detail can change with the roof material and flashing system, so match any manufacturer instructions that apply to your roof.
When should I stop a DIY flashing repair?
Stop when the roof is unsafe, the timber feels soft beyond a small patch, or the flashing system is complex. Also stop if the leak source remains uncertain after inspection. Repeated sealant patches can hide a larger fault. A professional assessment from LGFMH Construction may prevent more damage to the roof and interior.
Conclusion
A small flashing repair can be manageable with a short tool kit, careful shingle removal, sound laps, and a dry cure period. Inspect the attic and roof first. If the metal, membrane, or access condition raises doubt, don't climb farther. Take photos of the leak and ask LGFMH Construction to review the repair before water causes more interior damage.


Comments